Turnit Dashboard User Manual
| Description | This is a complete user manual for Turnit Dashboard V2. |
| Author(s) | Turnit Op. Co. Team |
| Copyright | Copyright © 2023 Turnit Op. Co. |
Home ↵
Introduction
The Turnit Dashboard User Manual is a comprehensive guide designed to help users effectively navigate and utilize the full range of features within the Turnit Dashboard. This documentation is structured to cover every aspect of the platform, ensuring that users—from administrators to operational staff—have the detailed instructions needed to manage their real estate operations seamlessly.
Key Areas Covered
-
Dashboard: The manual introduces users to the primary dashboard,
-
Community Management: Detailed instructions are provided for creating, editing, and deleting communities, along with managing community-specific details such as instruction and additional services.
-
Property & Unit Management: Users are guided through processes for adding and editing properties and units, including bulk upload capabilities to streamline large-scale data management.
-
Turnover Processes: The guide explains the end-to-end turnover workflow. This includes handling both in-house services (like punch and inspection assignments) and vendor services (such as posting jobs, managing proposals, tracking price change history, and processing payments). Turnover actions like editing, deleting, and timelines are also covered.
-
User Management: Clear instructions are provided on how to manage user accounts.
-
Vendor Managerment: vendor information, including functionalities to add, edit, delete, and recommend vendors, as well as search, filter, and sort vendor details
-
Analytics: The manual details how to use the Analytics section to monitor key performance metrics, compare community data, and export reports. Users can assess metrics such as turn completion, down days, turn days, and off-market days, facilitating data-driven decision-making.
-
Additional Tools: Other functionalities, such as Chats, Login, Account, Notifications, and even printing the documentation are also covered, ensuring a well-rounded user experience.
Overall, the Turnit Dashboard User Manual serves as an essential resource for mastering the platform’s capabilities, ensuring that all users can operate with confidence and efficiency.
Ended: Home
Dashboard ↵
Introduction
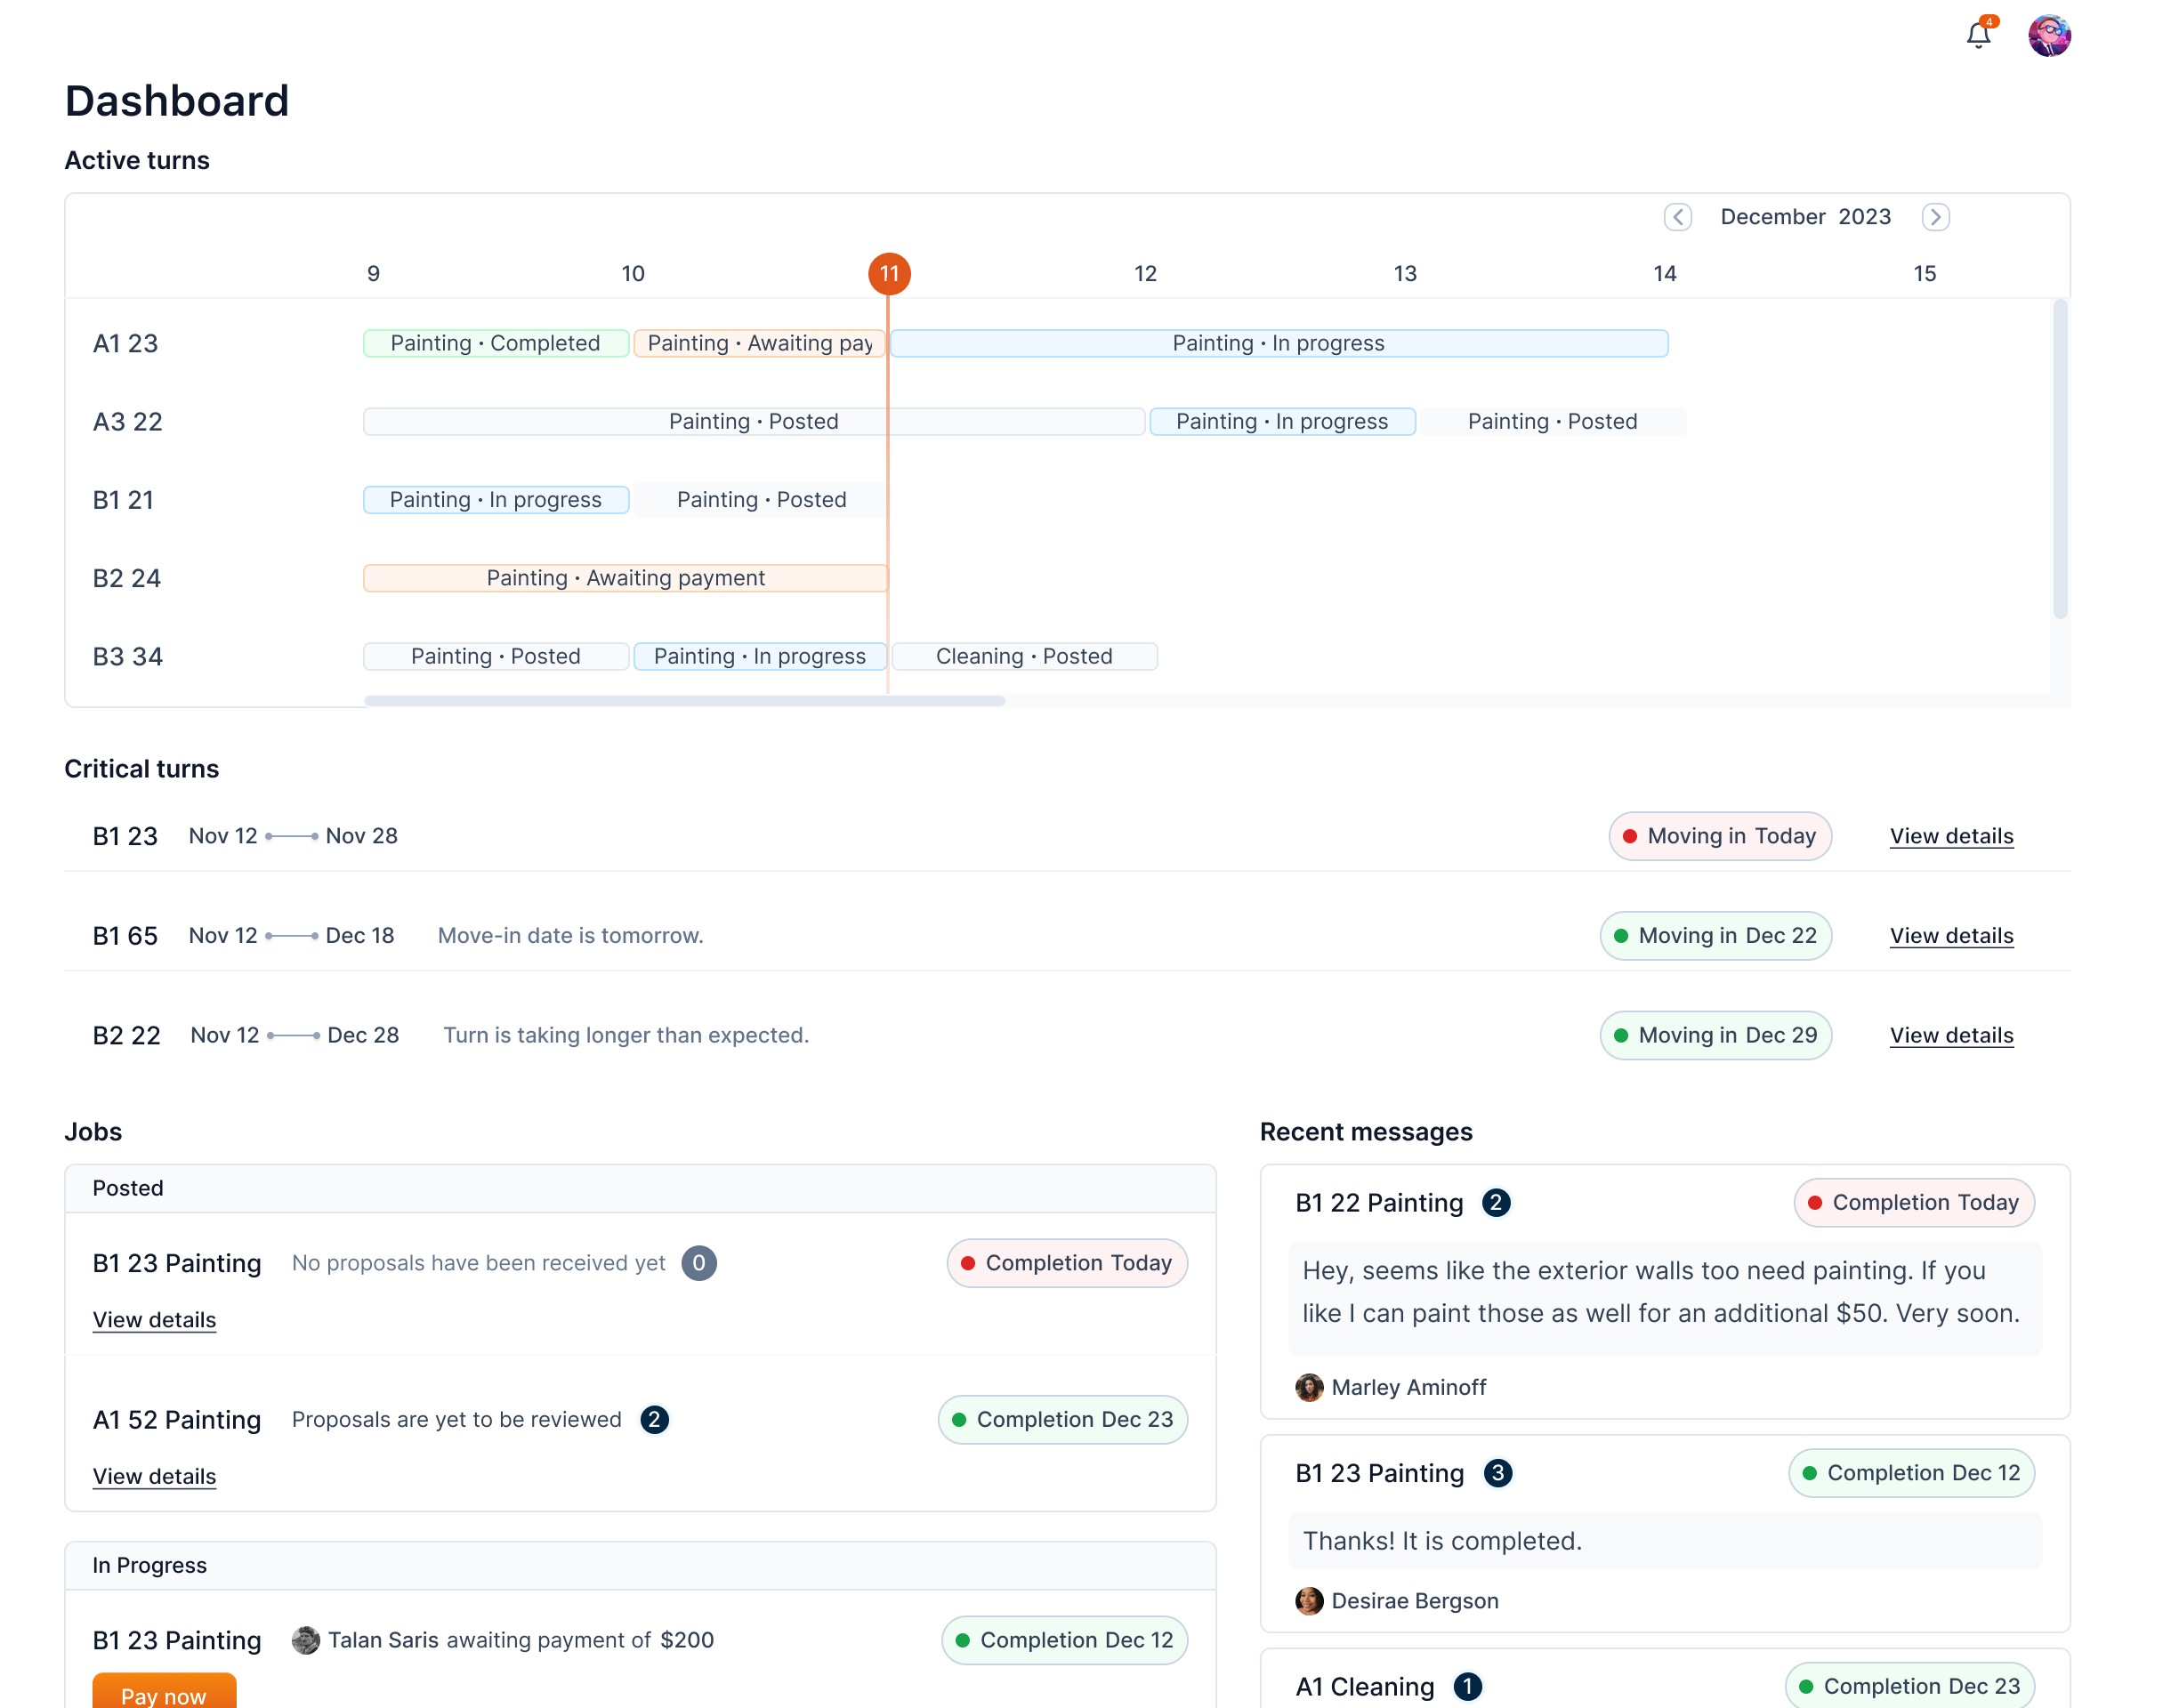
The dashboard provides a centralized view for users to take necessary actions. It highlights critical alerts such as turnovers with overdue end dates and jobs with unseen proposals.
The dashboard is divided into three main sections: Critical Turns, Critical Jobs, and Recent Messages. Each section is detailed in the following headings.
Critical turns
The Critical Turns section highlights turnovers that require your immediate attention. Here’s what you might see and what it means:
-
Move-in Date Has Passed: If a turnover’s scheduled move-in date has already passed, it will appear here, indicating that the move-in has happened but the turnover hasn’t been completed yet. This needs the highest attention.
-
Approaching Move-in Date:
• Today: Turnovers with a move-in date scheduled for today.
• Tomorrow: Turnovers with a move-in date scheduled for tomorrow.
• In Two Days: Turnovers with a move-in date scheduled in the next two days.
Since move-in date is approaching, this means the user needs to take action on the turnover.
-
Turnover Taking Longer Than Expected: If a turnover’s end date has already passed, it means the turnover process is delayed.

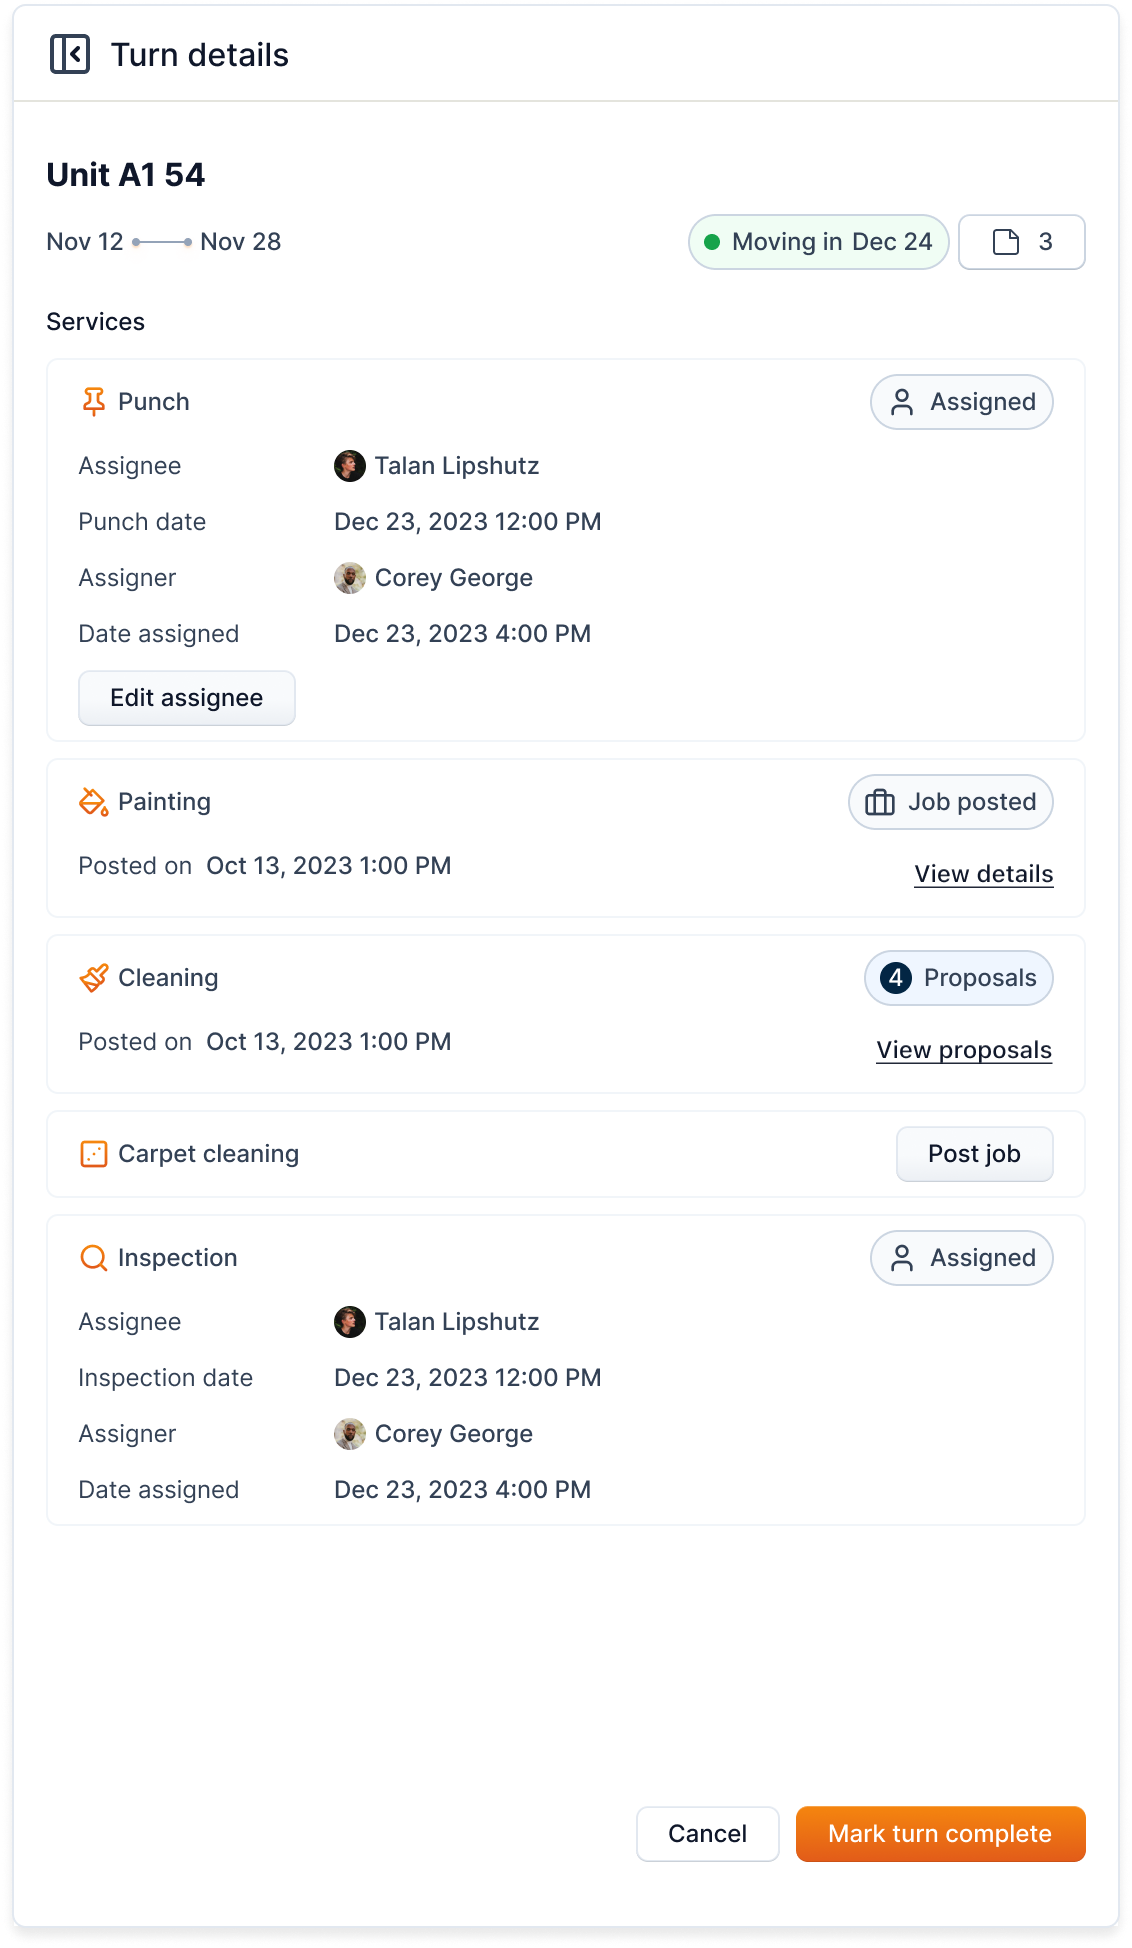
Each row shows the unit information, turn's expected duration, the reason for the alert, and the status and the move-in date.

By clicking the View details button, the turn detail side drawer is opened and you can take appropriate action.
Info
Once you mark a turnover as complete, it will be removed from the Critical turns section and the active turnboard.
Jobs
The Jobs section highlights jobs that need your immediate action or review. Here’s what you might see and what it means:
-
No Proposals Yet: Jobs that have been posted but haven’t received any proposals for over a week will appear here. This means these jobs need more attention to attract proposals.
-
Awaiting Payment: Jobs where the payment is pending will be listed here. This indicates that payment needs to be processed to move forward.
-
Proposals Not Reviewed: Jobs that have received proposals but the proposals haven’t been viewed yet will show up here. This prompts you to review the proposals to keep the job process moving.
-
Proposed New Price: If a job has received a new price proposal, it will appear here, indicating that there is a price change proposal awaiting your review.
For the ease of viewing, this section is subdivided into Posted and Hired (or In Progress) sections.
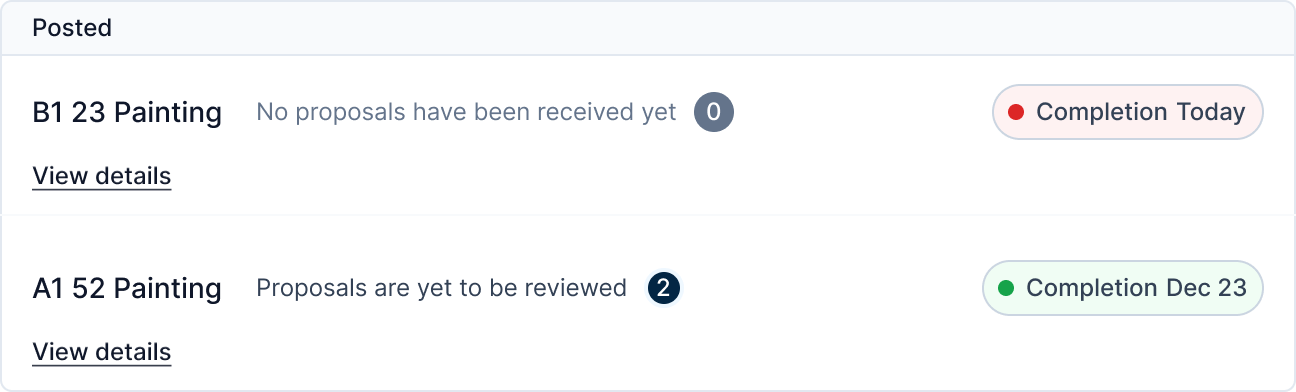

Clicking on the View details button on each job will open a popup relevant to the alert.
Recent messages
The Recent messages section contains the unread messages.
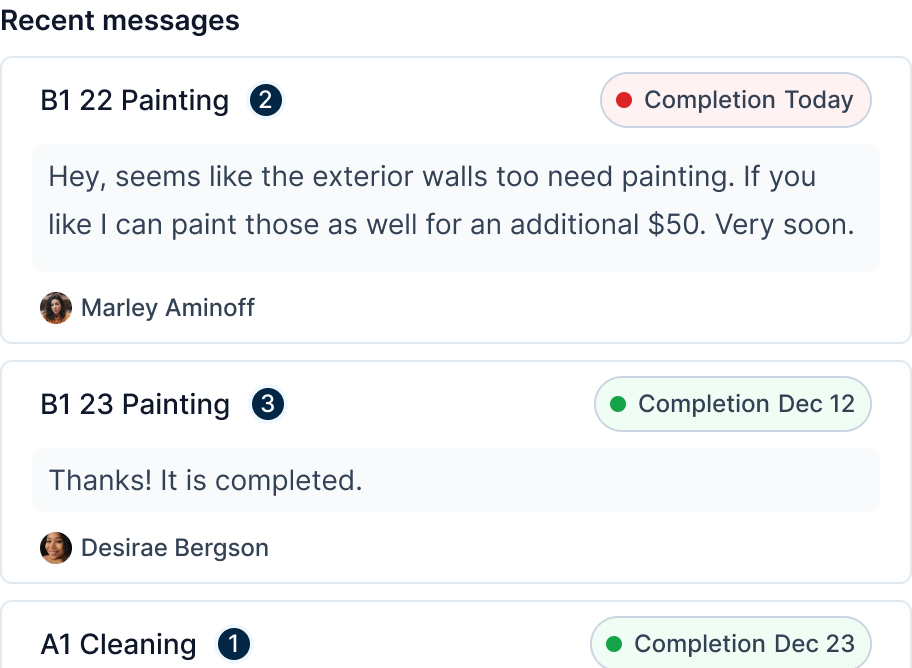
Clicking on a message opens the entire chat.
Ended: Dashboard
Communities ↵
Introduction
A community is a group of properties managed together which are overseen by a designated number of managers.
Community managers can search for communities, view all the available communities, create a new community, edit an existing community, and delete a community.
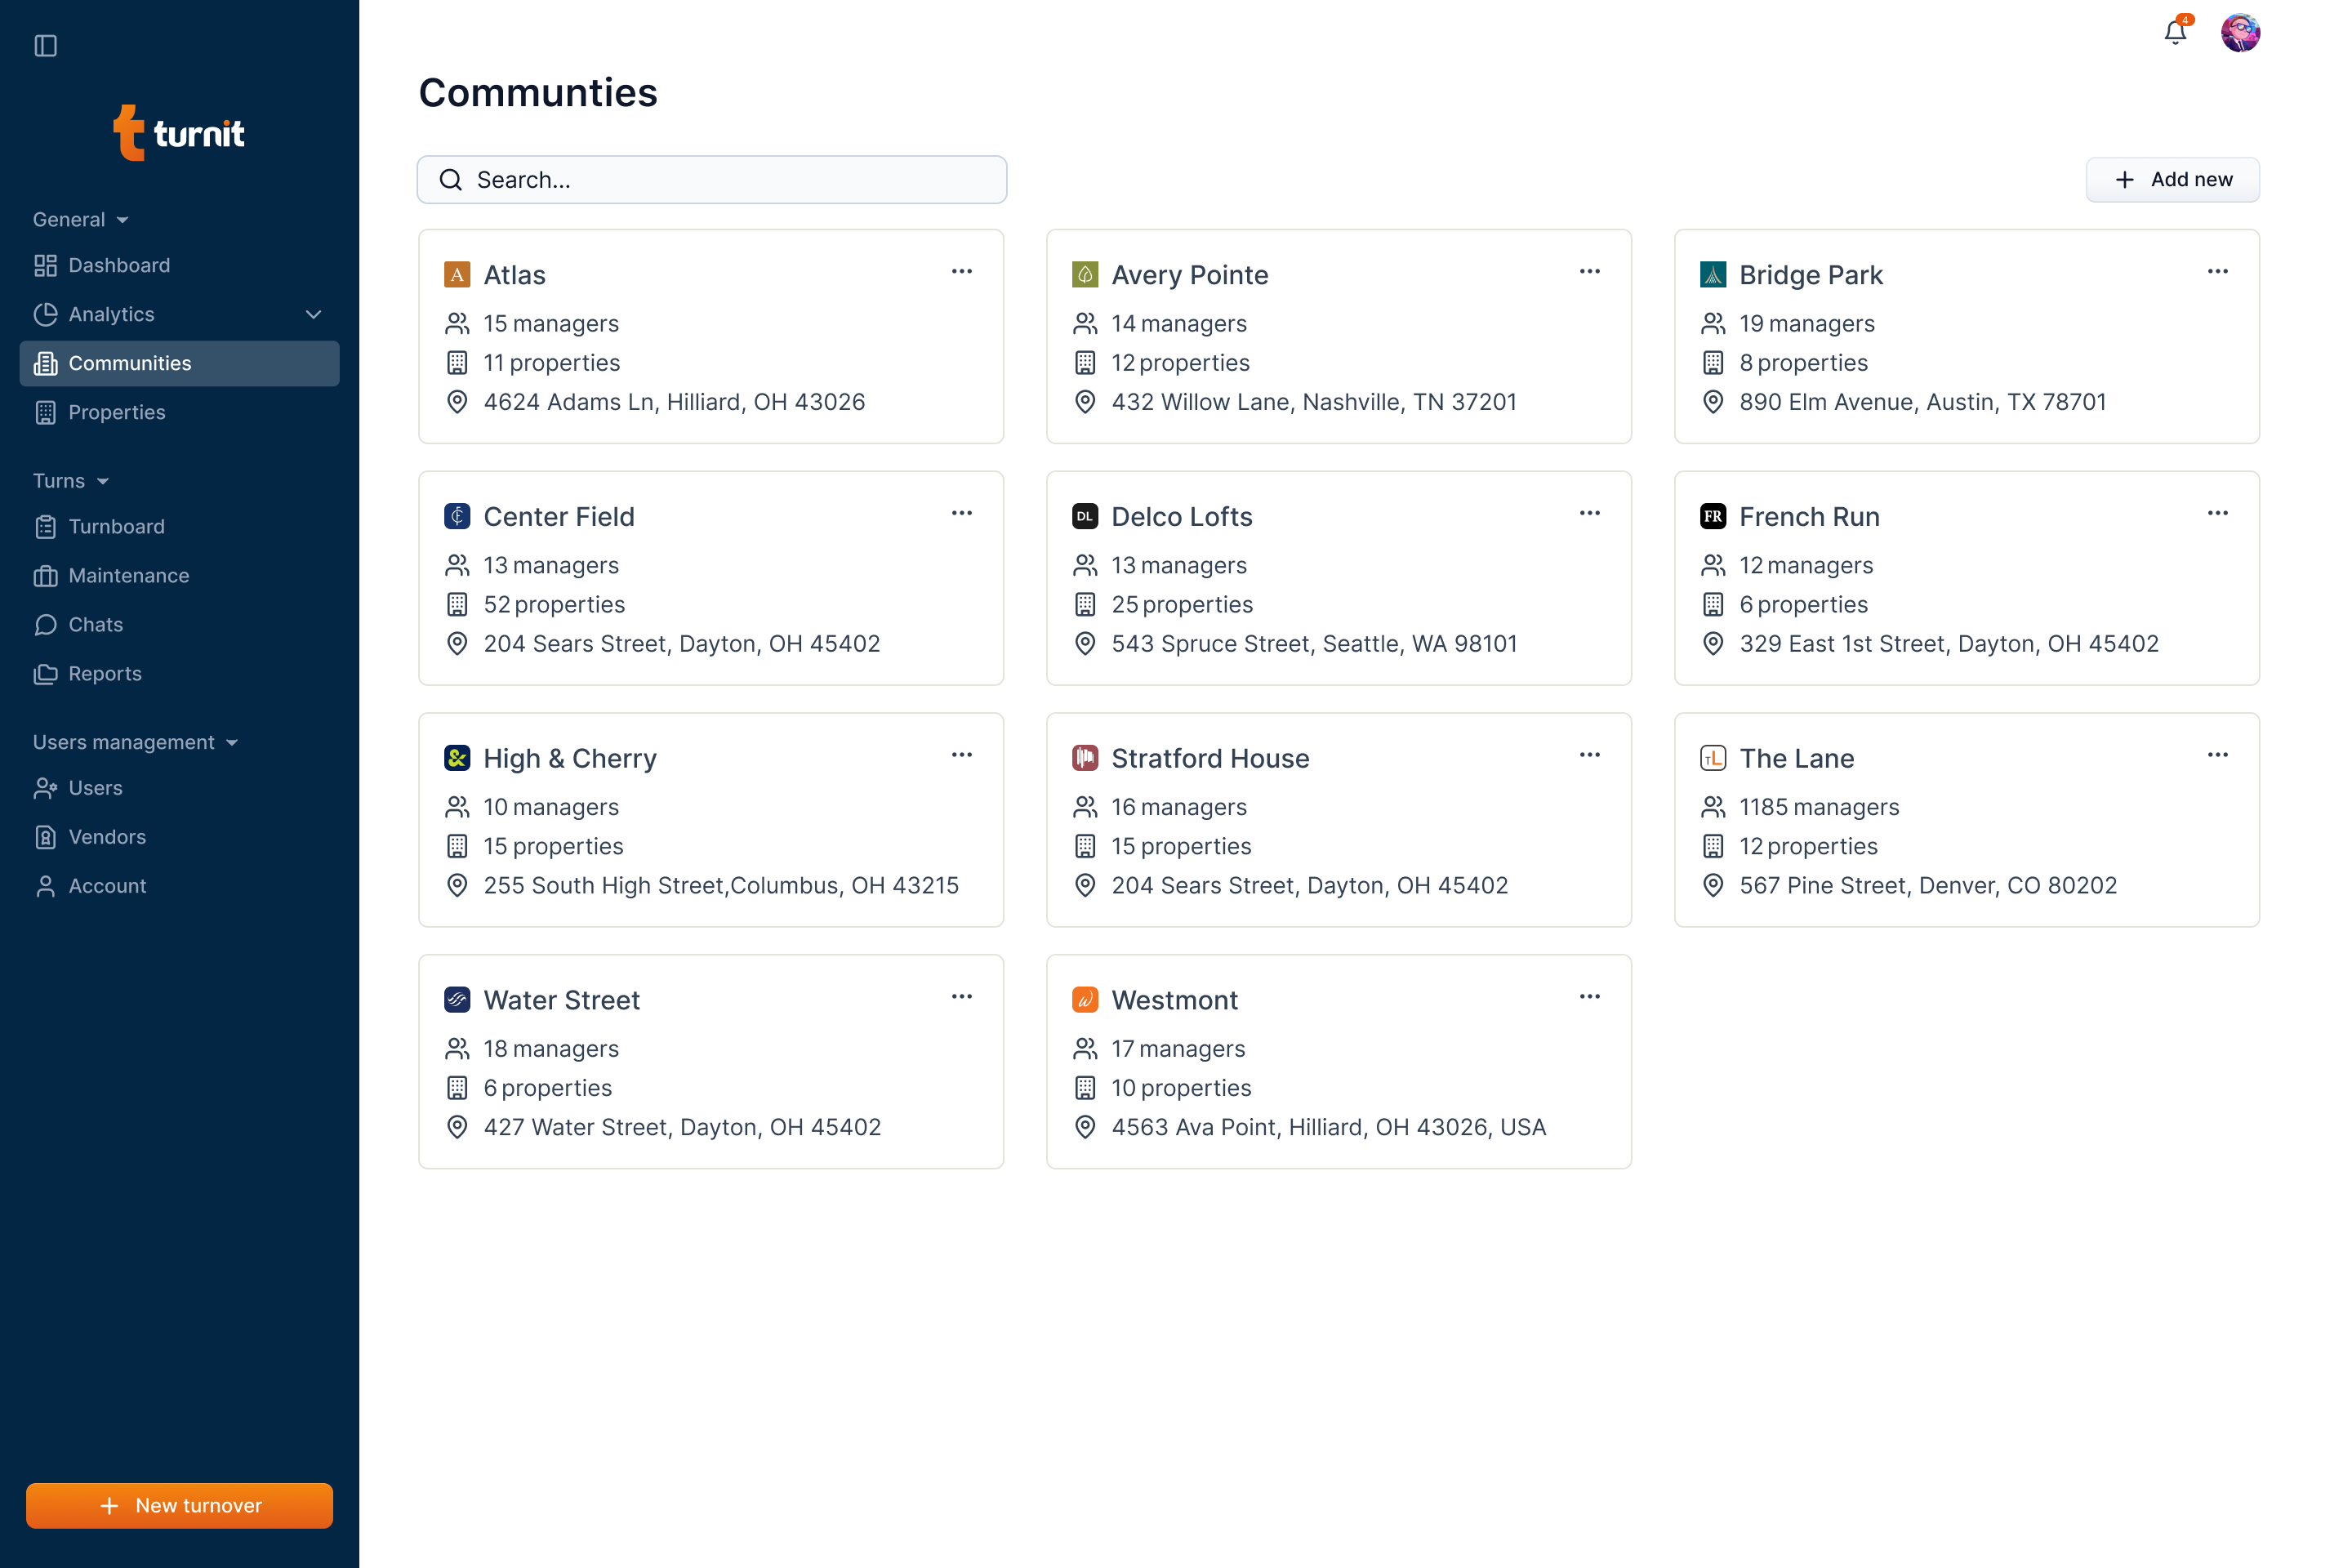
A community is represented by a card. The card contains the community name with the logo, the number of managers, the number of units, and the address of the community along with the three dots icon that allows you to edit or delete the community.
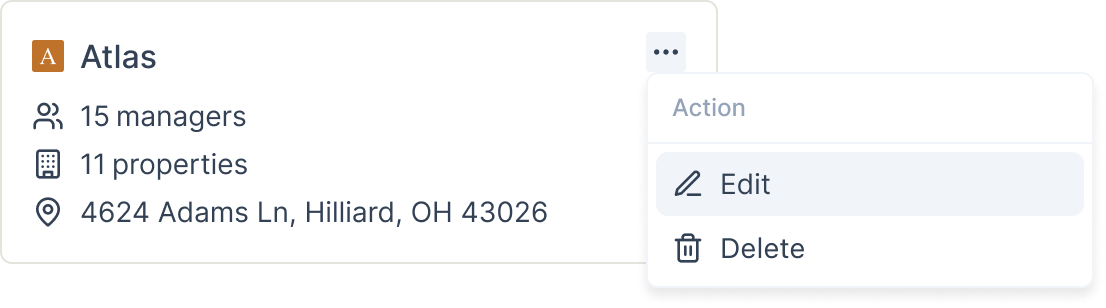
You can edit or delete a community by clicking the three dots icon on the community card.
Add Community
Info
Not available to all users
To add a community, click the "Add new" button.

After clicking the button, a form will open in a pop-up. Here, you can enter the community's information.
Fields in the "Add Community" Form
The form consists of the following fields:
- Name: Enter the name of the community.
- Address: Provide the complete address of the community.
- Map View: A map will be displayed to help visualize the location.
- Community Logo: Option to upload a community logo by clicking "Click to upload."
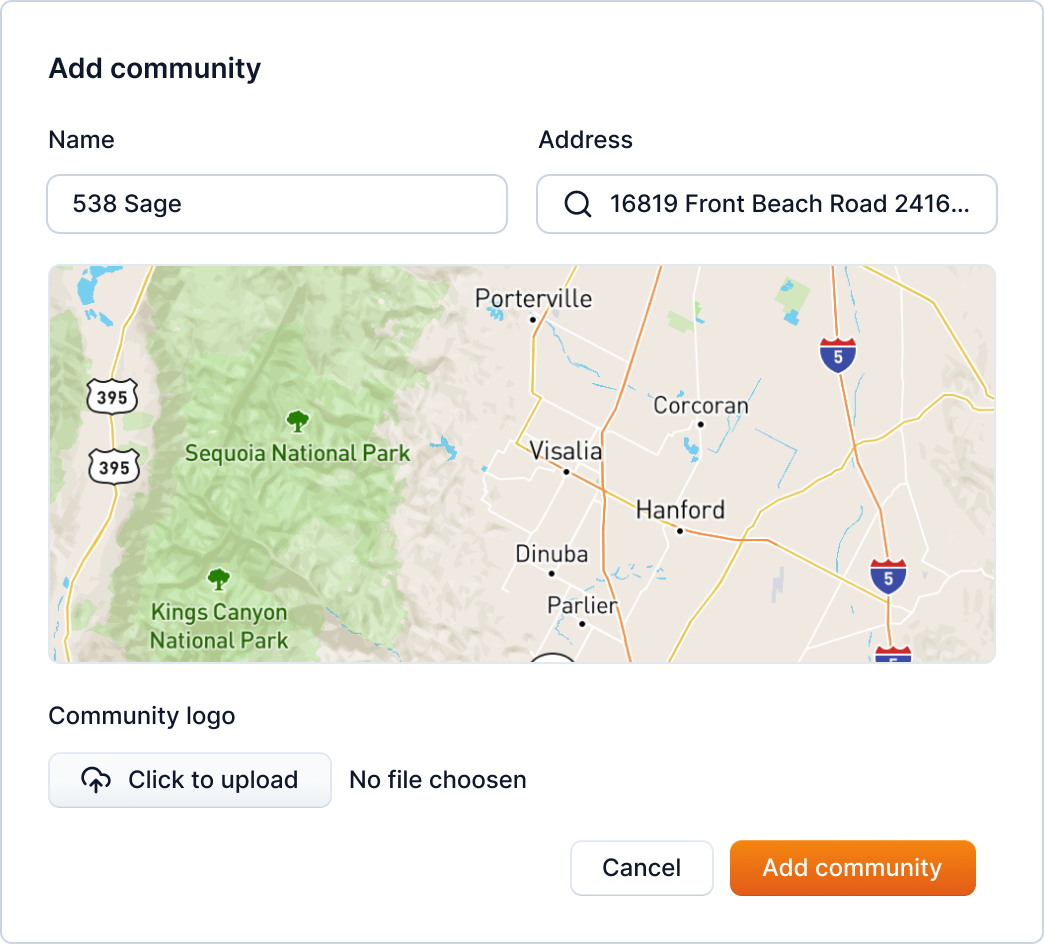
After filling in the necessary information, click the "Add community" button.

To search for a newly added community, you can use the search bar to enter the community name from the community page.

Edit Community
Info
Not available to all users
You can edit a community from the communities page by clicking the three dots icon and clicking on the "Edit" button to edit the community information.
After clicking the button, the same form which was used in community creation will open in a popup with prefilled information. Here, you can edit the community's information.
Fields in the "Edit Community" Form
The form consists of the following fields:
- Name: Modify the name of the community.
- Address: Update the community's address.
- Map View: A visual representation of the location for reference.
- Community Logo: Change the existing logo by uploading a new file.
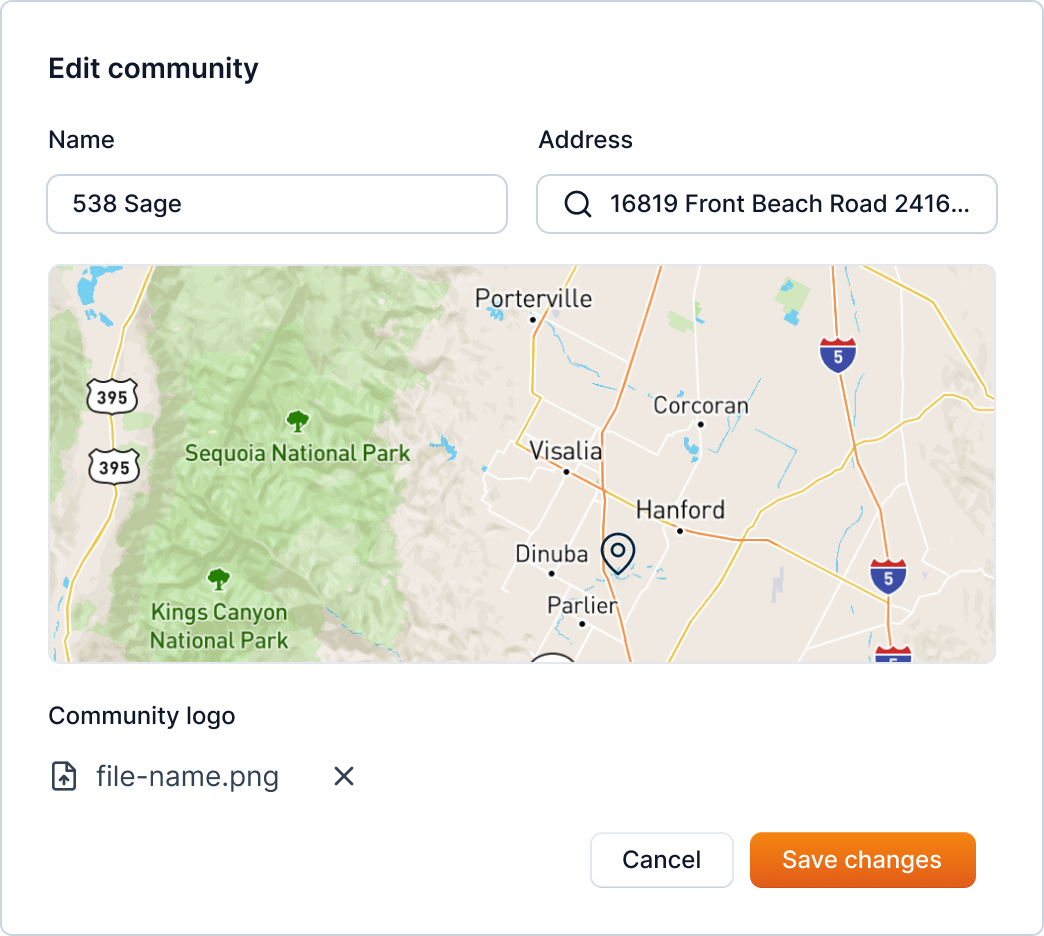
After updating the information, you can click on the "Save Changes" button to save the changes.
Additional Actions
- Cancel: If you want to discard changes, click the "Cancel" button.
- Delete Logo: If a logo is uploaded, you can remove it by clicking the delete icon next to the file name
Delete Community
Info
Not available to all users
To delete a community, click on the three-dot icon on the community's card, then press the "Delete" button and proceed with the provided instructions.
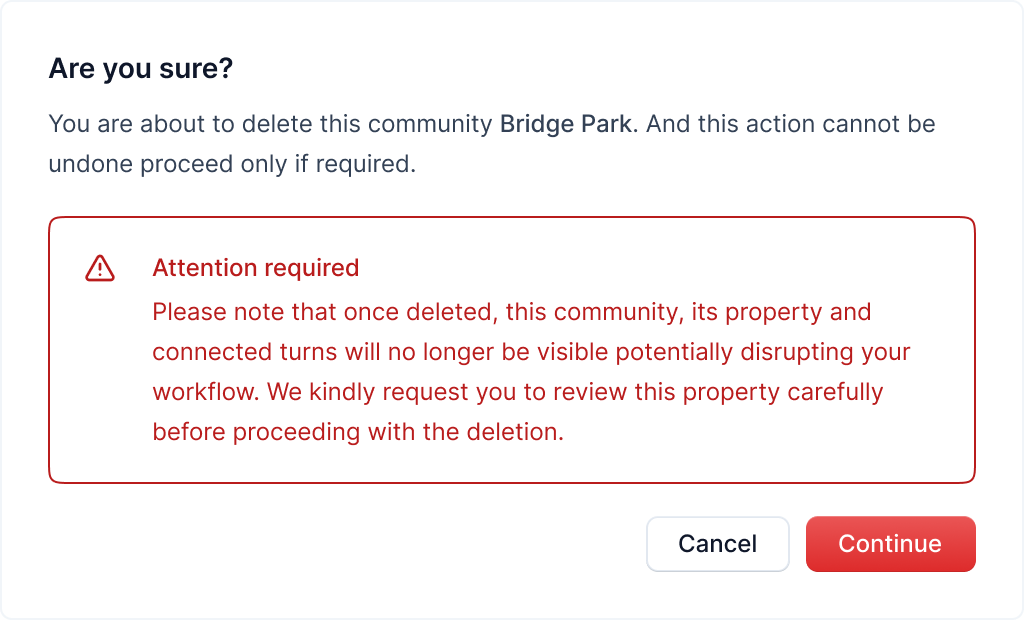
After clicking the button, a popup will open asking you to confirm the deletion.
Carefully read the warning and click on the "Continue" button to continue with the community deletion.
After clicking the Continue button, another popup will open for the final confirmation.

Warning
This action is irreversible. Once you delete a community, it cannot be recovered
Type in "delete-community" in the text field and click on the "Delete" button to delete the community.
After deleting the community, its units and connected turns will no longer be visible, and you'll be redirected to the communities page.
Community Details ↵
Introduction
You can view the detailed information of a community by clicking on the community card on the communities page.
The community details page contains the following information:
| Section | Information |
|---|---|
| Community card | It shows the basic community information |
The top part of the community details page shows the general information of the community like the community name with the logo, the number of managers, the number of units and the community.
The community details page also contains tabs to view and manage the budget and payment methods, community instructions and community services.
| Tab | Purpose |
|---|---|
| Community Instructions | View and manage the community instructions. |
| Community Services | View and manage the community services. |
| Community Form Template | View and manage the community Form Template. |
Community Instructions
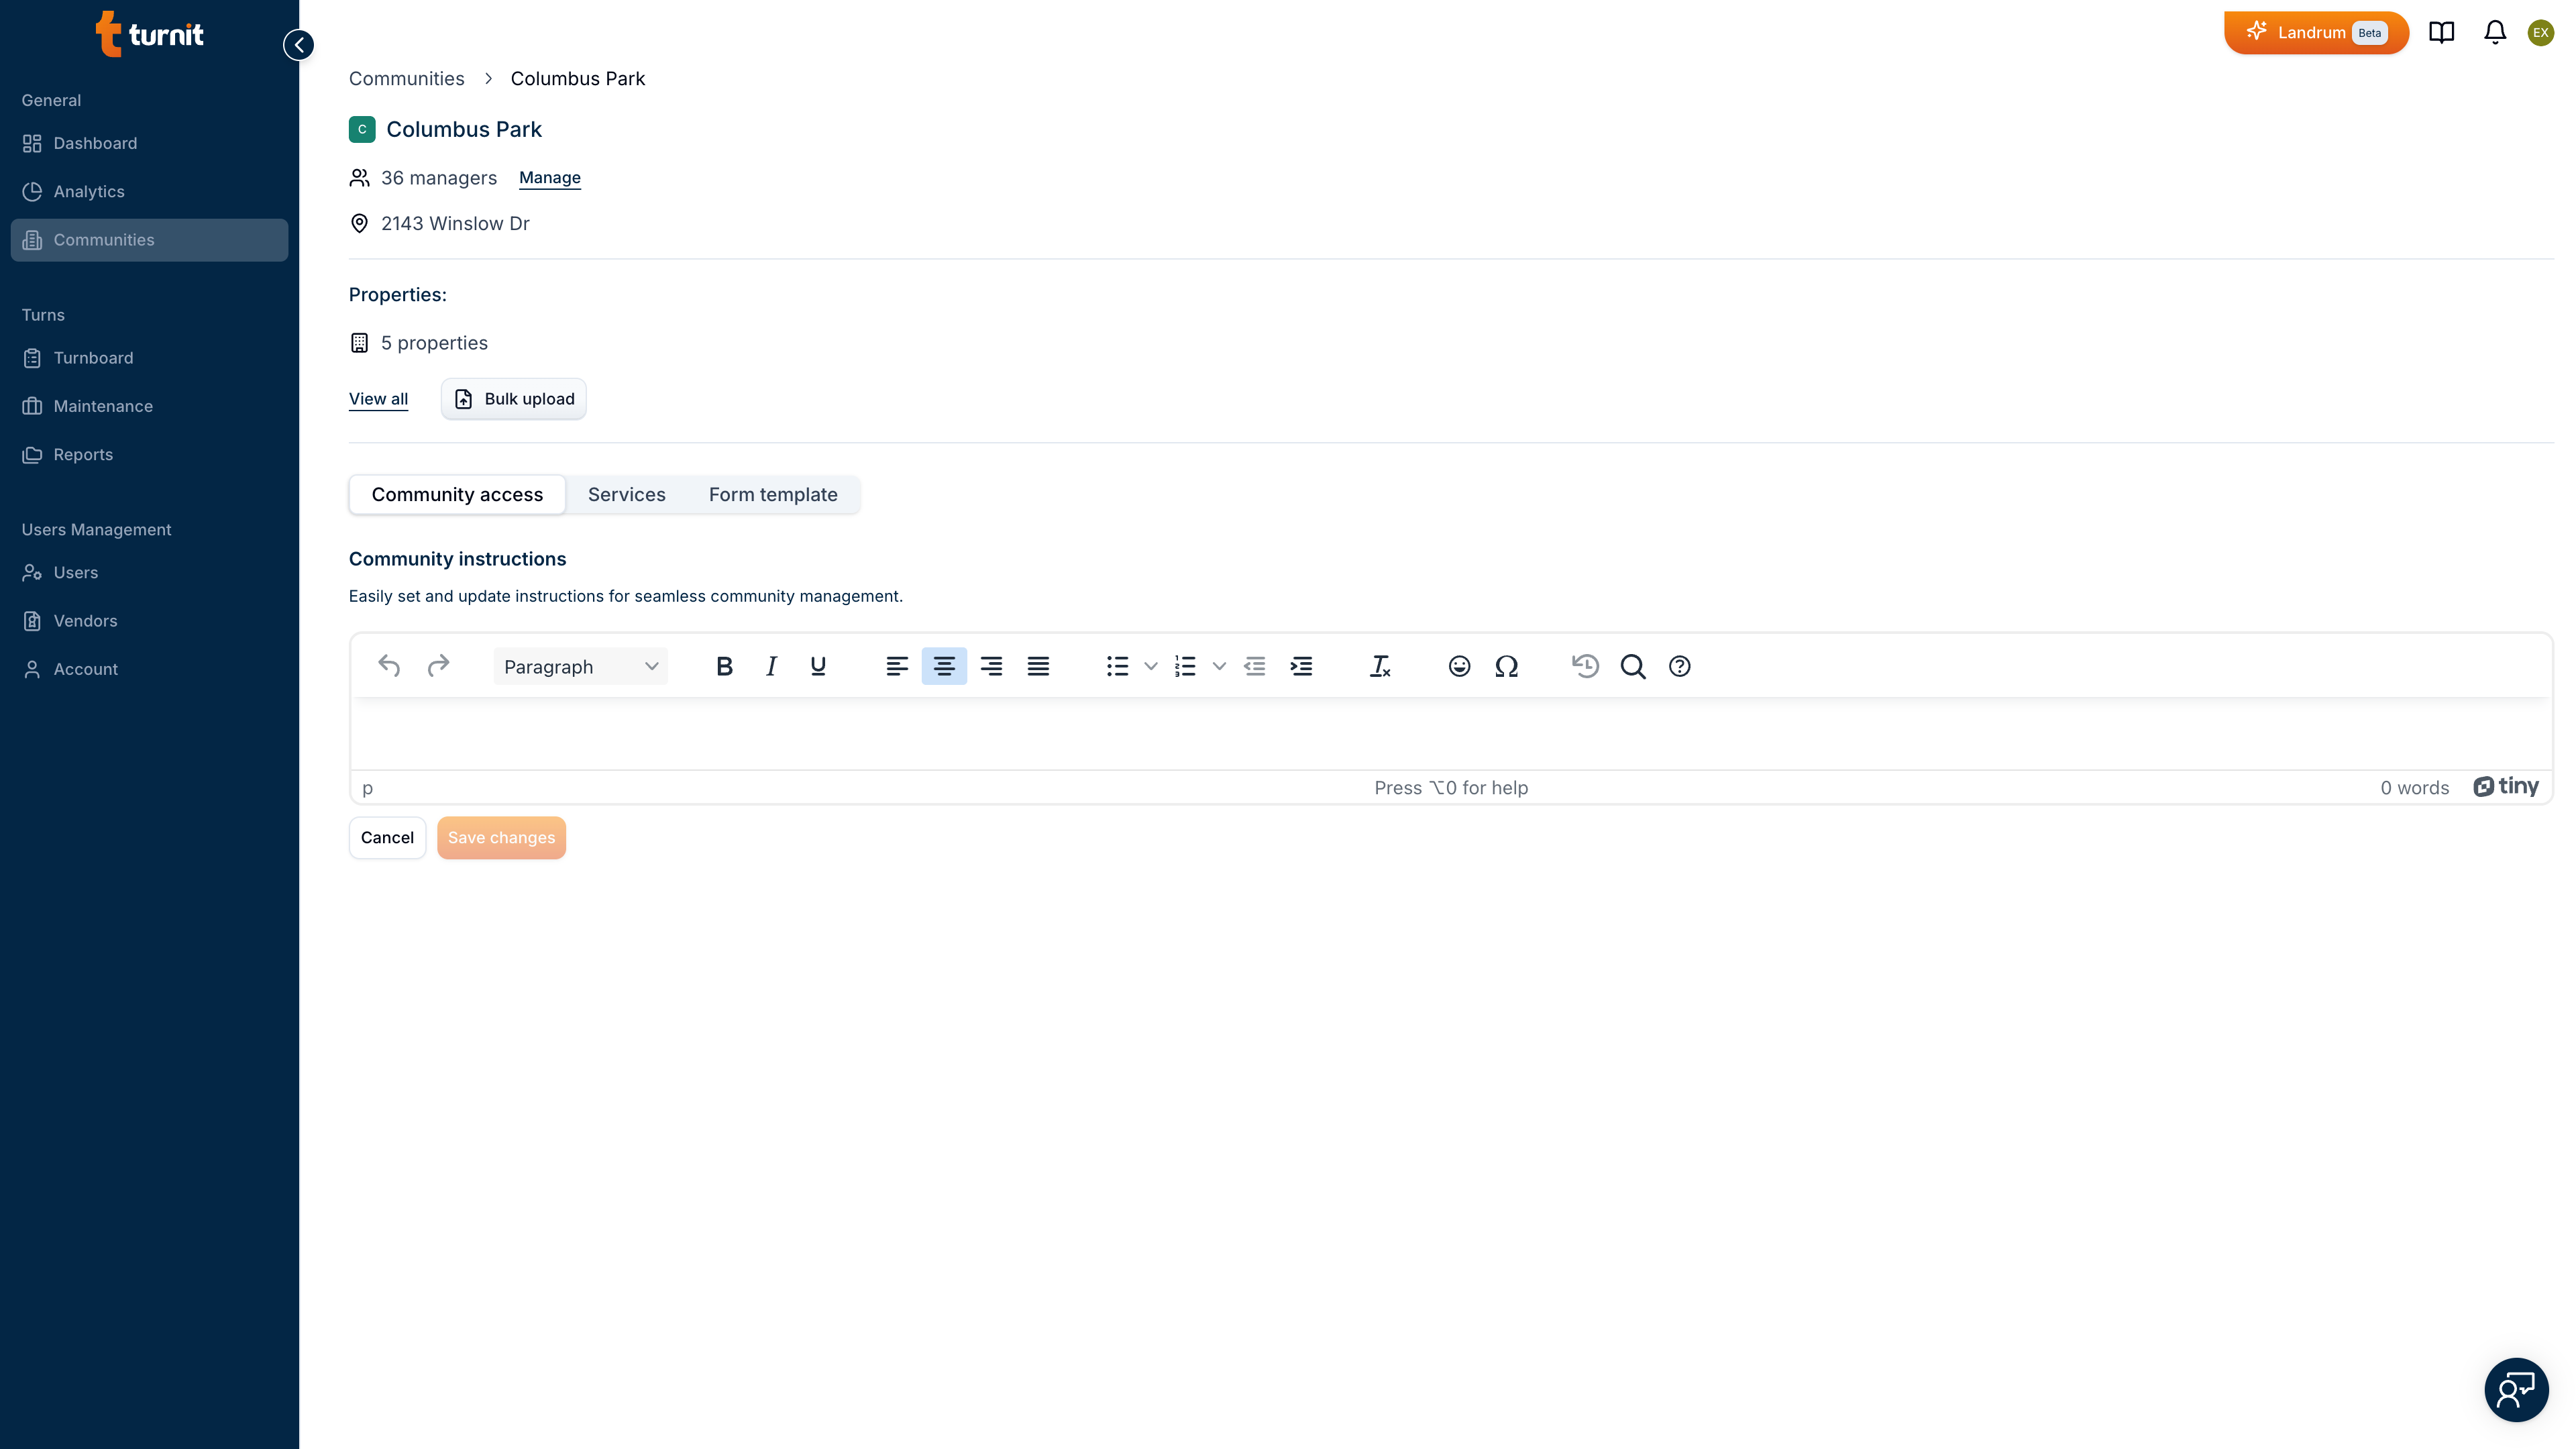
You can view and manage the instructions of the community in the instructions tab of the community details page.
Community Instructions
In this section, you can create, view and update community instructions. Community instructions are specific to community regardless of the jobs. These instructions are shown to the vendors when they're hired for a job from the community and are applicable to all the jobs in the community.
Info
Not available to all users
Add Community Instruction
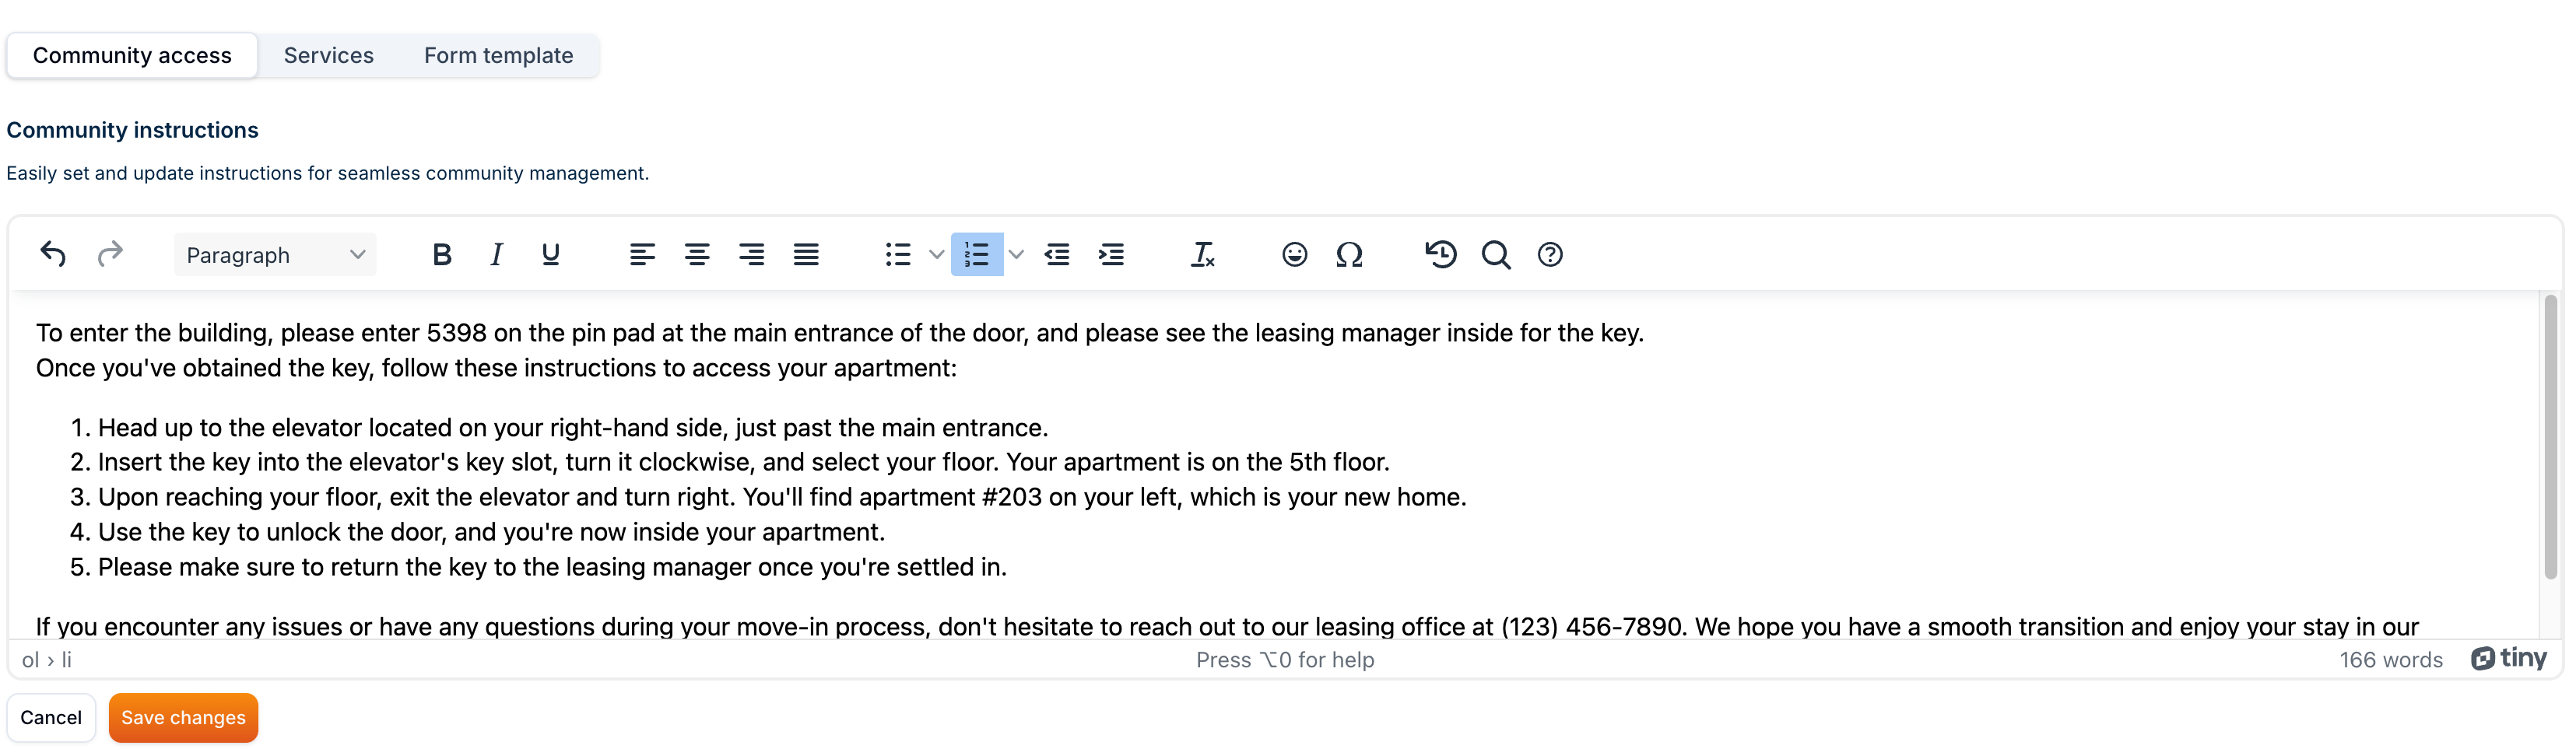
In order to add a community instruction, you need to type in the instruction in the text field as shown below.
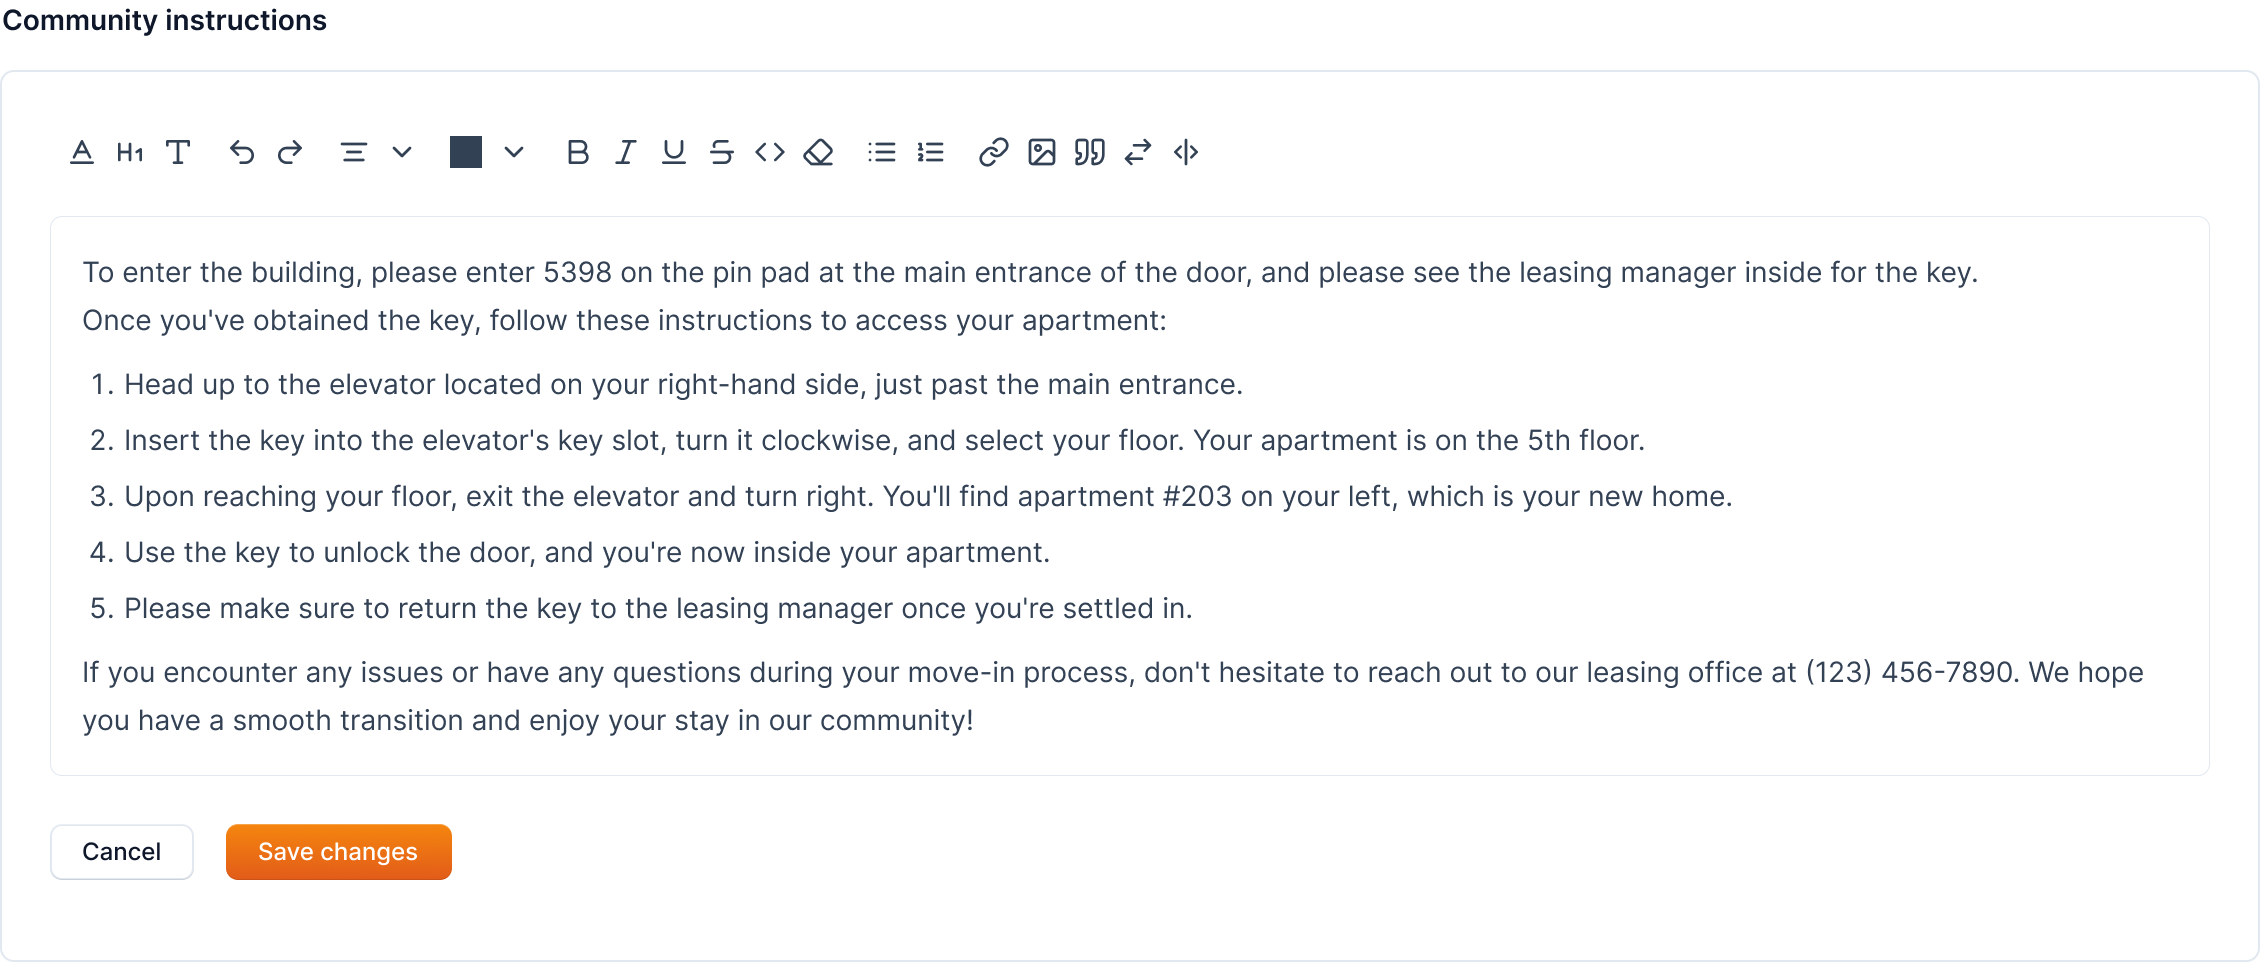
After adding instructions, click on the Save Changes button to save the instruction.
Note
The instructions will be shown as "Community Instructions" to vendors after they're hired for a job from the community.
Services
The Services tab in the community details page allows you to manage the services available in a community. The order of active services determines the sequence of service completion in the workflow.
Activating a Service
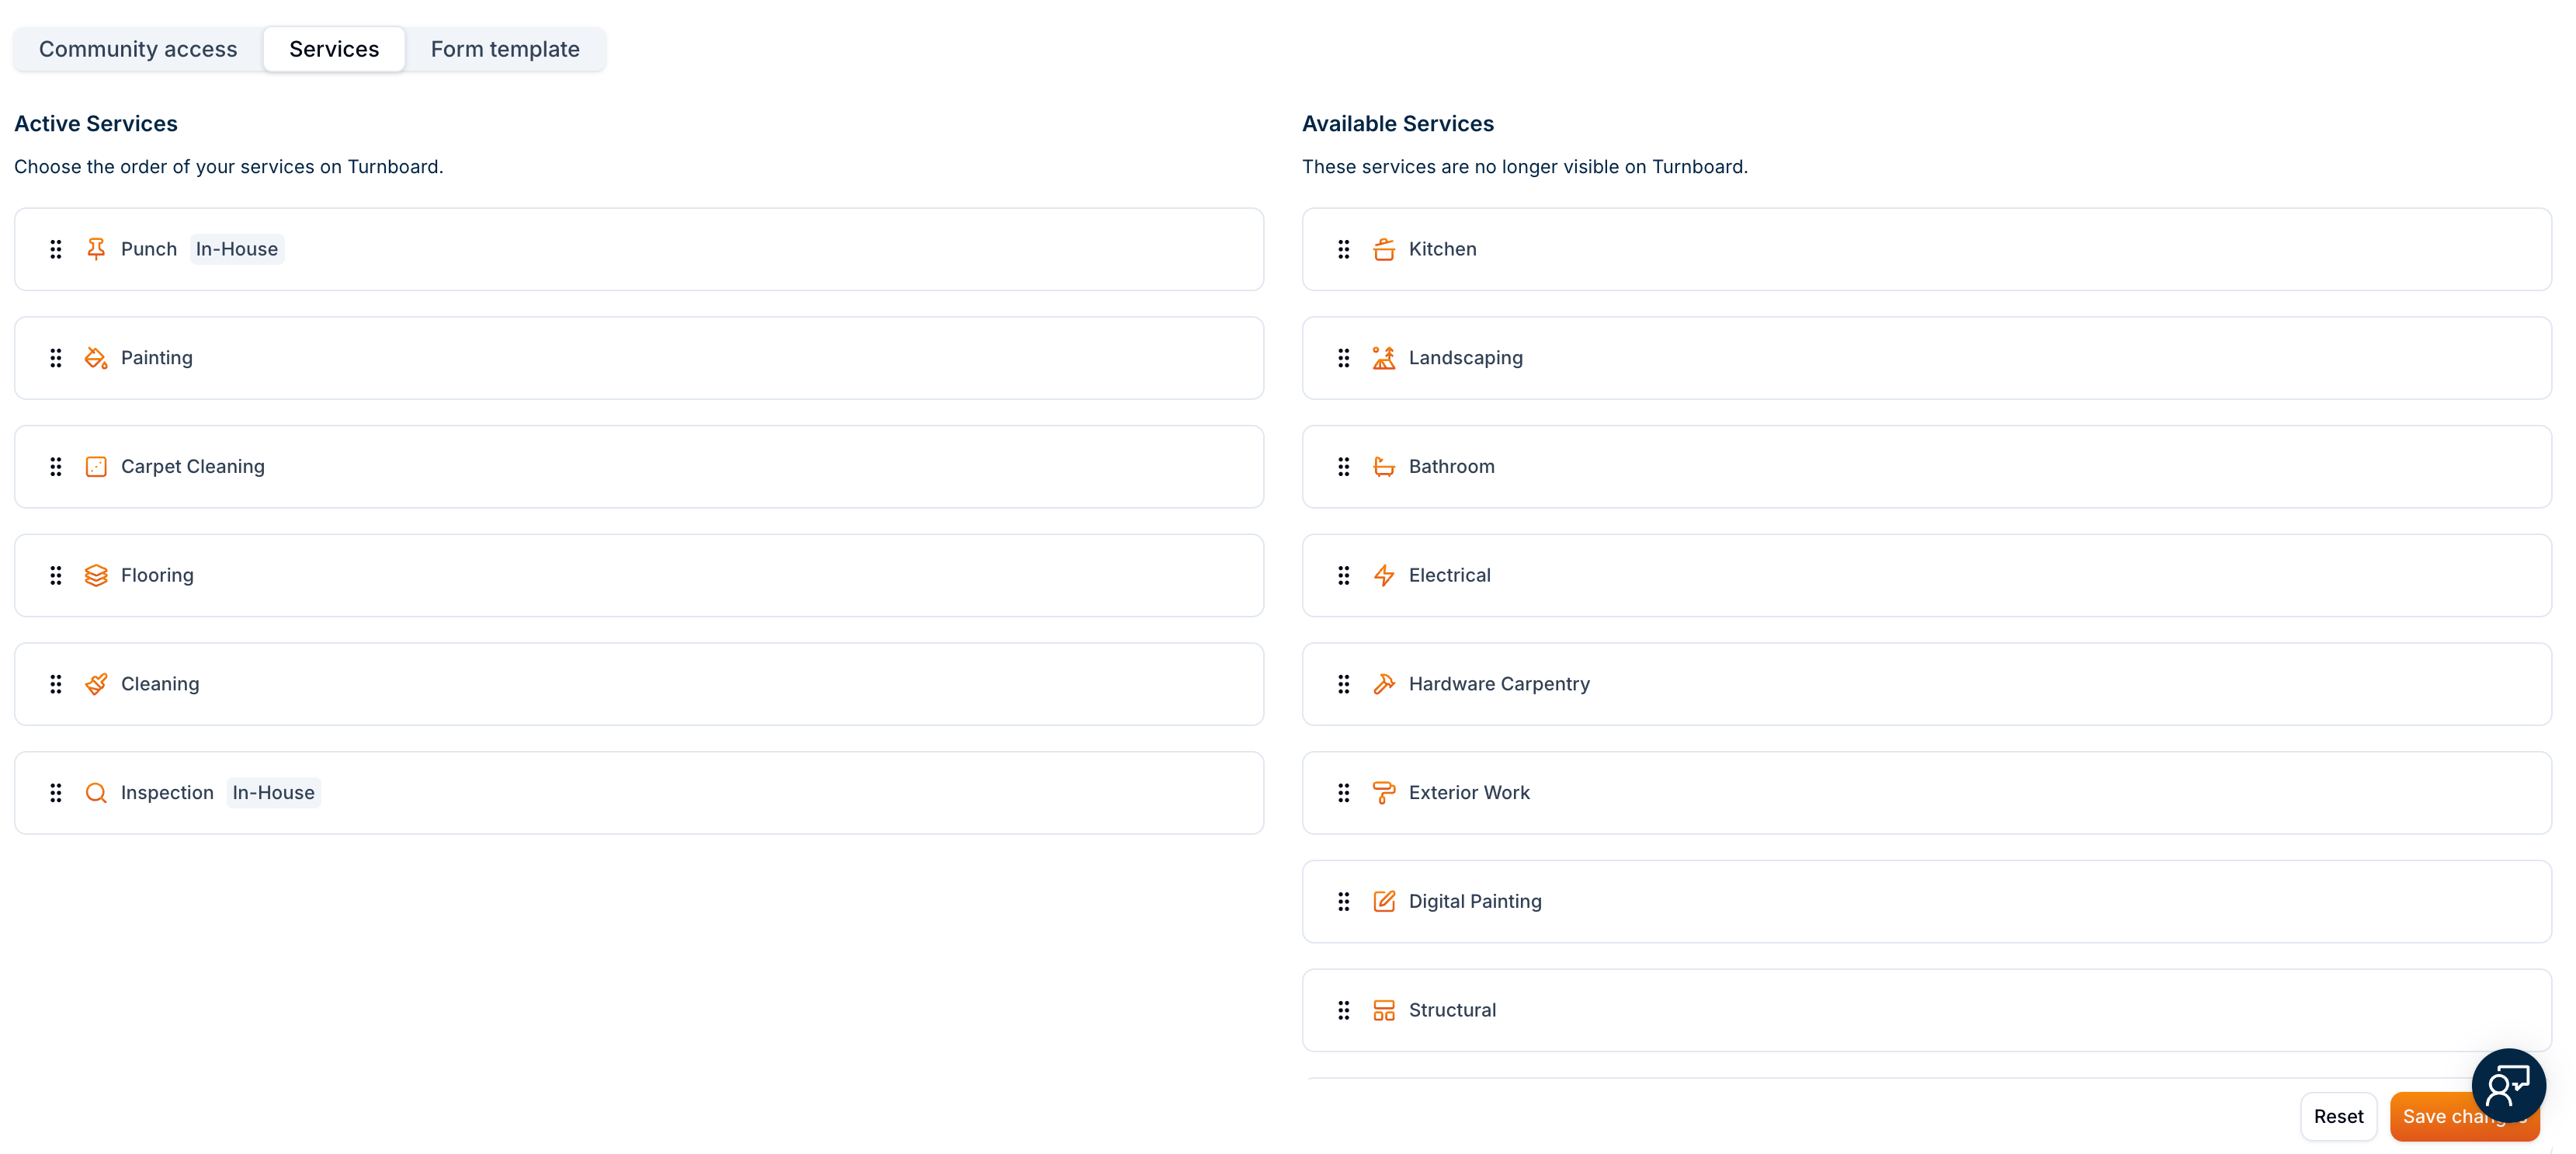
To activate a service, drag a service from the Available Services section to the Active Services section. Once moved, the service becomes visible on the Turnboard and part of the workflow.
Reordering Active Services
The order of services in the Active Services section defines their execution sequence. You can change the order by dragging and rearranging the services as needed.
Example
If you want cleaning to be done before the Inspection, move cleaning above Inspection in the list.
Removing an Active Service
To remove a service from Active Services, drag it back to the Available Services section. This action hides the service from the Turnboard but does not permanently delete it.
Saving Changes
After making adjustments, click the Save Changes button to confirm your modifications. If you need to revert to the previous state, click Reset.
Info
These changes will only take effect after saving. Exiting the page without saving will discard the updates.
Job Posting Template
In this section you can create templates for job instructions and tasks based on the type of the service in the community. These templates can be used while creating a job in the community.
Example
For example, for Painting service in your community, you can create a template for the instructions and tasks for Painting. Then, whenever you create a job for Painting, you can use the template to add the instructions and tasks to the job.

Info
Not available to all users
Add Job Posting Template
To add a job posting template, click on the Add button under Job Posting Template section.
It will open a popup menu from where you can select the service available in your community for which you want to create the template.
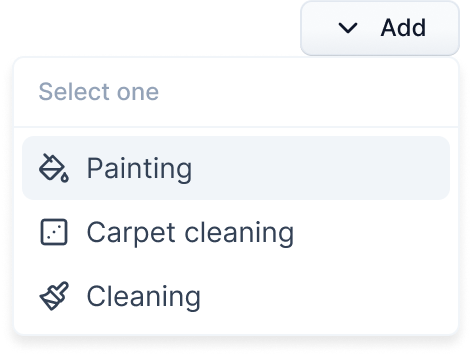
Click on the service name, and it will open a new page where you can create the template for job tasks and instructions.
Add Tasks Template
To add a job task template for the selected service, make sure the Tasks tab is selected.
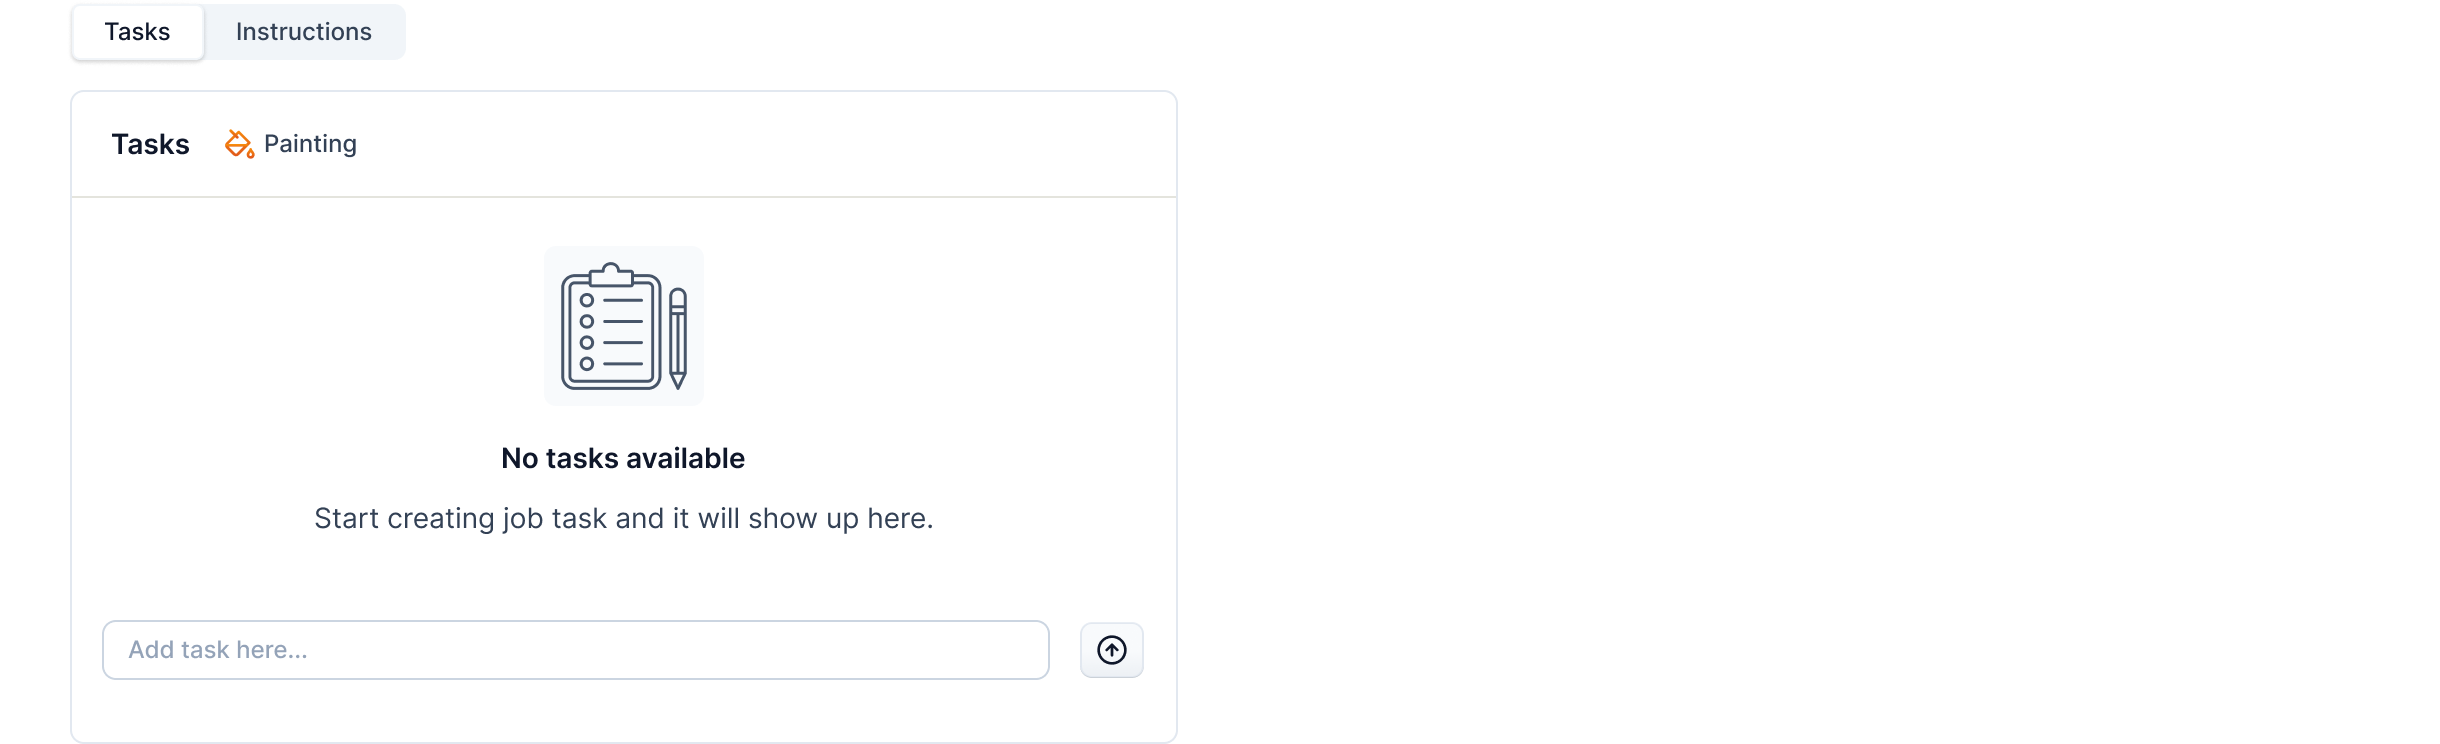
Add Job Task
To add a job task, enter the task in the input field and click on the add icon next to the field to add the task to the template.

The added job task is shown in the list of tasks as shown below.
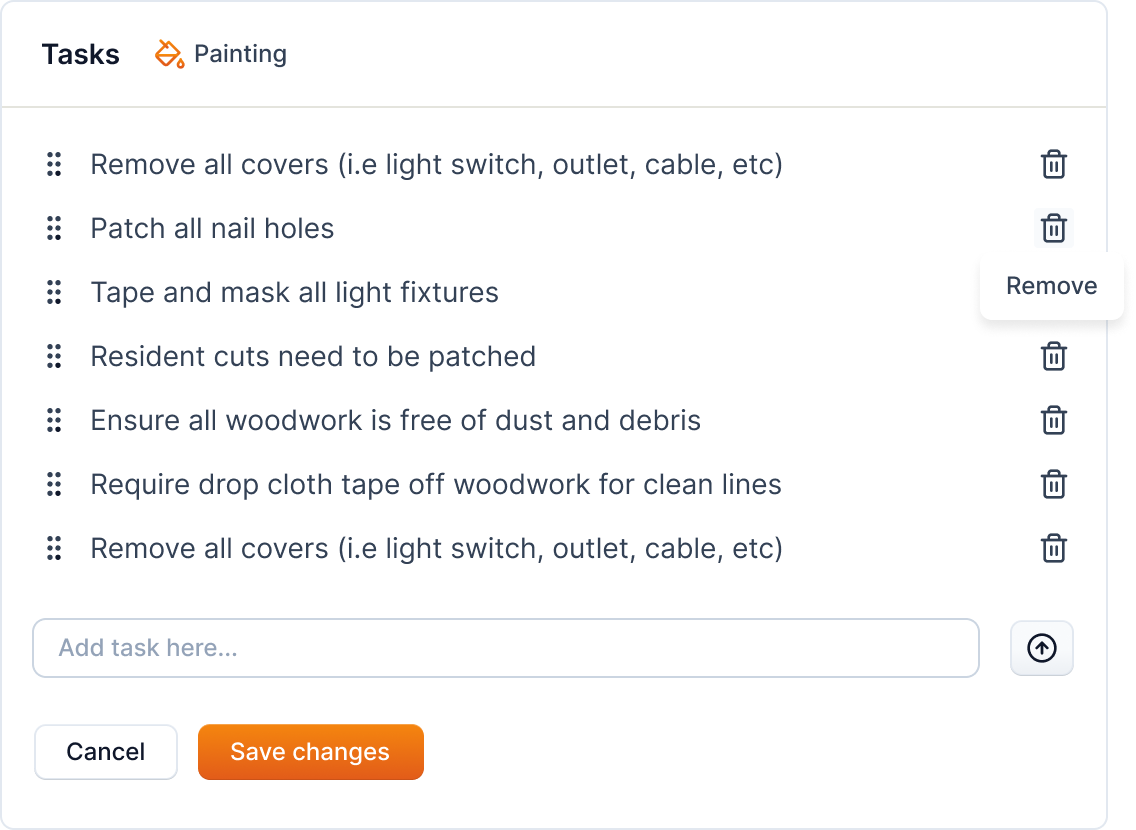
Remove Job Task
The added job task can be removed by clicking on the trash icon next to the task.
On clicking the icon, the task is removed from the template.
Arrange Job Tasks
The added job tasks can be arranged by dragging and dropping the tasks in the list. You can use the drag icon to the left of the task to drag the task and drop it in the desired position.

Click on the Save Changes button to save the job task template.

Warning
If you've made changes to the template and haven't saved them, you'll be prompted to save the changes before navigating away from the page.
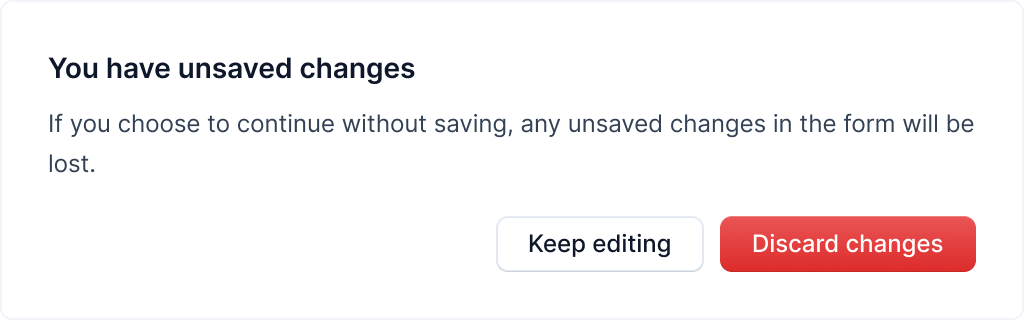
You will have the option to keep editing or discard the changes.
Add Instructions Template
To add a job instruction template for the selected service, make sure the Instruction templates tab is selected.
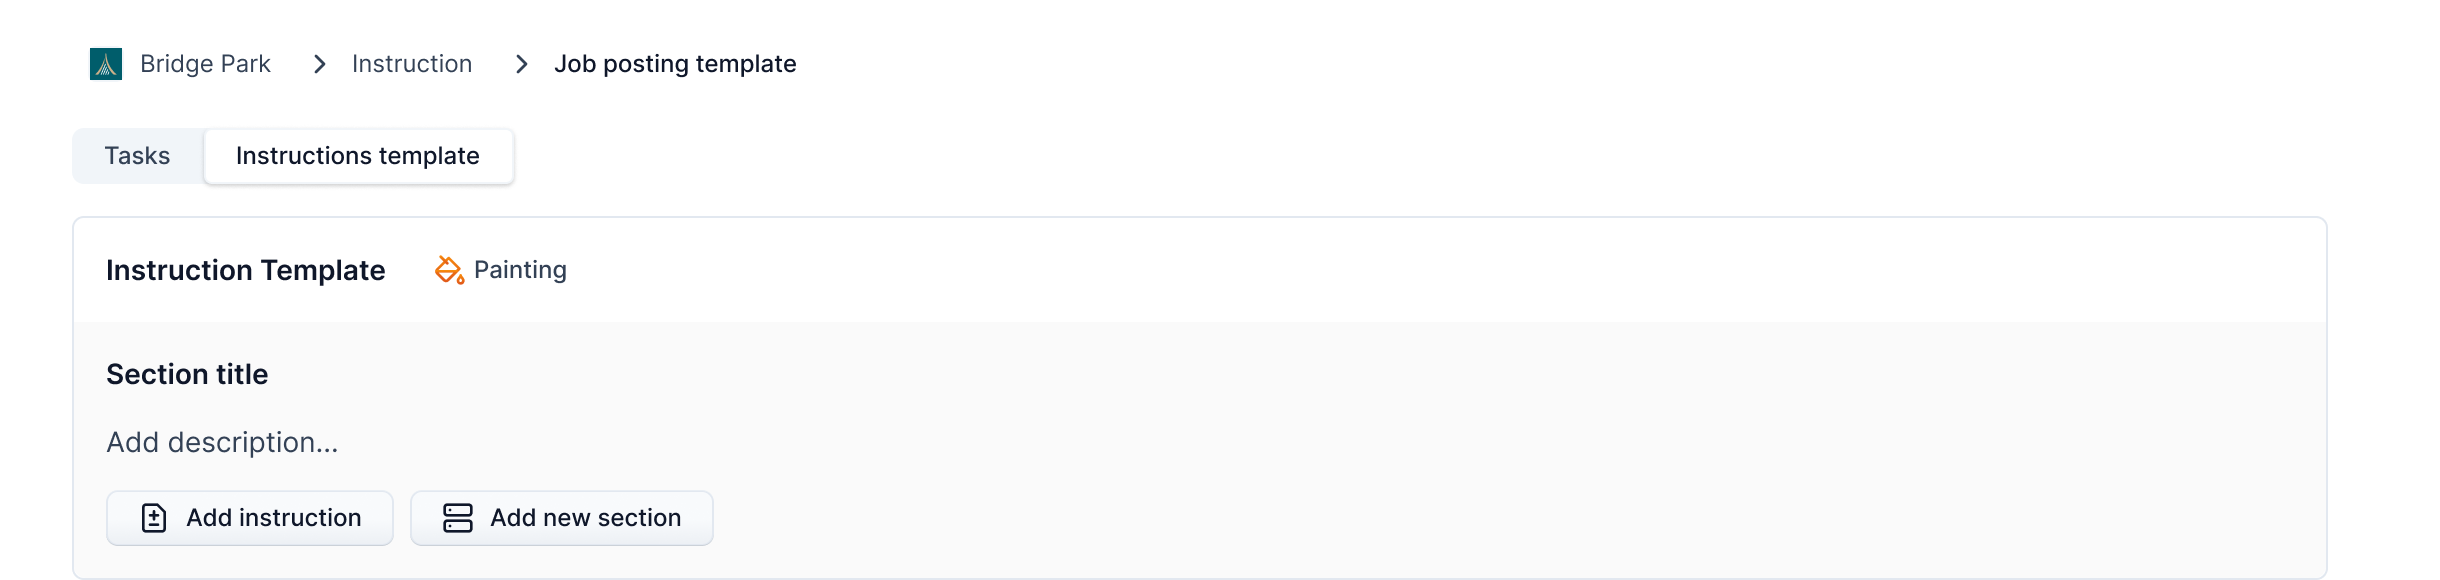
Instructions can be divided into sections. By default, a section is provided. More sections can be added by clicking on the Add new section button. Sections have title, description and instructions.

On clicking the button, a new section is appended to the template.
Info
Not available to all users
Section Actions
Actions on the section can be performed by clicking on the three dots icon on the section. The actions include: Duplicate, Move, Delete, and Collapse.

The following table shows the purpose of the actions along with the instructions to perform the action:
| Action | Purpose | Instruction | Component |
|---|---|---|---|
| Duplicate | It duplicates the current section. | Click on the Duplicate section option from the three dots menu. |  |
| Move | It moves the current section up or down. | Click on the Move section option from the three dots menu. It will open a popup which provides you with an interface to drag sections. |  |
| Delete | It deletes the current section. | Click on the Delete section option from the three dots menu. |  |
| Collapse/Expand | It collapses or expands the current section. | Click on the collapse icon next to the three dots menu. |  |
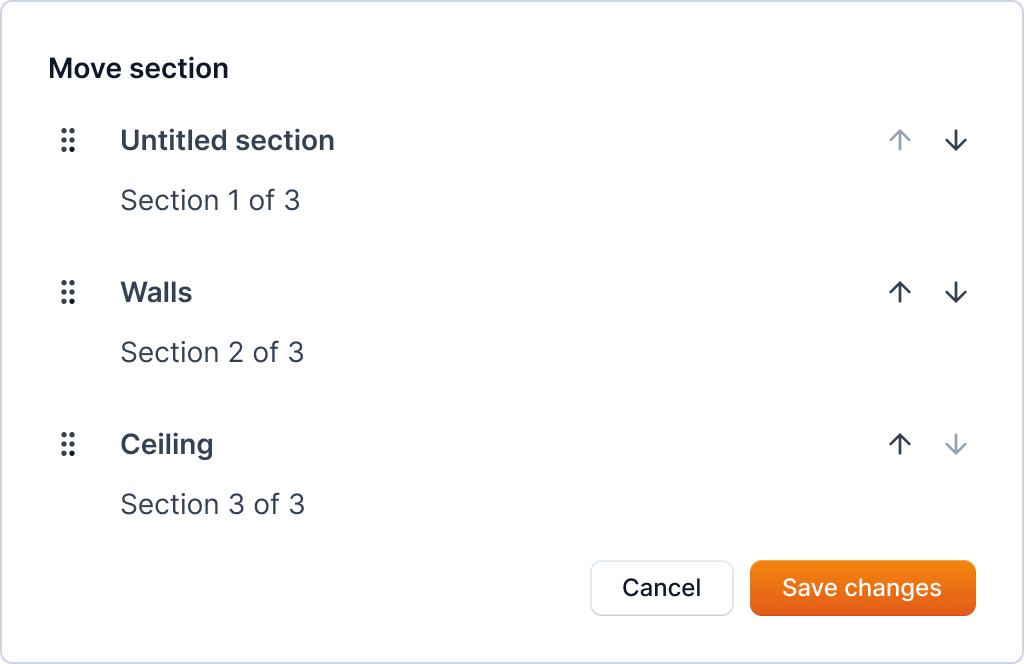
Move a section
When you click on the Move section option, it will open a popup which provides you with an interface to drag sections. Use the arrows or drag icon to move the section up or down. Click on the Save changes button to save the changes.
Delete a section
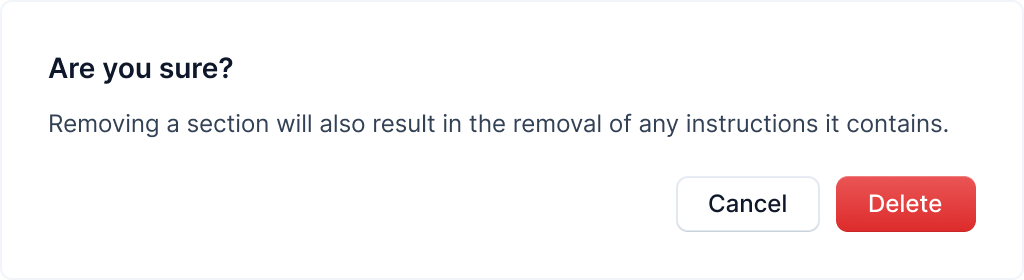
Warning
This action is irreversible. Once you delete a section, it will remove all the instructions in the section.
When you click on the Delete section option, it will open a popup to confirm the deletion of the section. Click on the Delete button to delete the section.
Add Job Instruction
To add a job instruction, click on the Add instruction button.

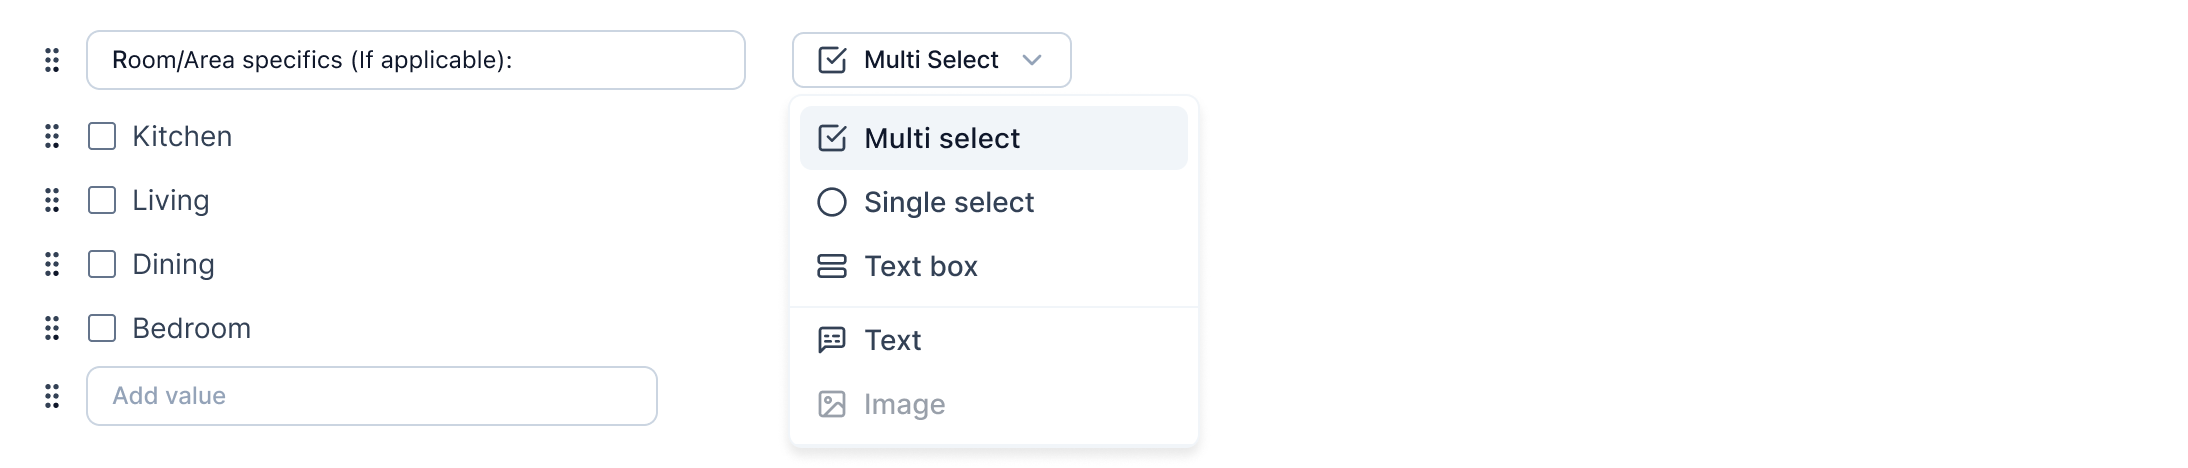
It will show an interface as below to add the instruction.

You can select the type of instruction from the dropdown menu. The types of instructions available are: Single select, Multi select, Text box, and Text.
| Instruction type | Purpose | Menu option |
|---|---|---|
| Single select | It's used when only one option needs to be selected from the list of options. |  |
| Multi select | It's used to select multiple options from the list of options. |  |
| Text box | It allows you to enter text in the input field while creating job. |  |
| Text | It allows you to write some text as instruction. |  |
After selecting the type of instruction, you can enter the instruction in the input field.
Tip
You can also add options for the instruction if the instruction type is single select or multi select as shown below.
Remove Job Instruction
The added job instruction can be removed by clicking on the trash icon next to the task.
On clicking the icon, the task is removed from the template.
Arrange Job Instruction
The added job instruction can be arranged by dragging and dropping the instruction in the list. You can use the drag icon to the left of the instruction to drag it and drop it in the desired position.
The added instruction is saved by default
Ended: Community Details
Ended: Communities
Properties ↵
Introduction
A property is a distinct living space such as an apartment, house, or loft, managed by a community and identified by its address and the number of units available.
When creating a job, we need to specify the property and the unit of the property where the job will be performed.
Search Property
To search for a property, you can use the search bar and enter the property name from the properties page. You can also use the community filter to search for a property in a specific community.

Property Actions
A property is represented by a card. The three dots icon on the property card allows you to edit or delete the property.
Add Property
Info
Not available to all users
To add a property, click the "Add new" button.
After clicking the button, a form will open in a popup. Here, you can enter the property's information.
Fields in the "Add Property" Form
The form consists of the following fields:
- Community: Select the community to which the property belongs.
- Type: Choose the type of property from the dropdown (Apartment, House, or Loft).
- Name: Enter the property's name.
- Address: Provide the full address of the property.
- Map View: Displays a visual representation of the entered address.
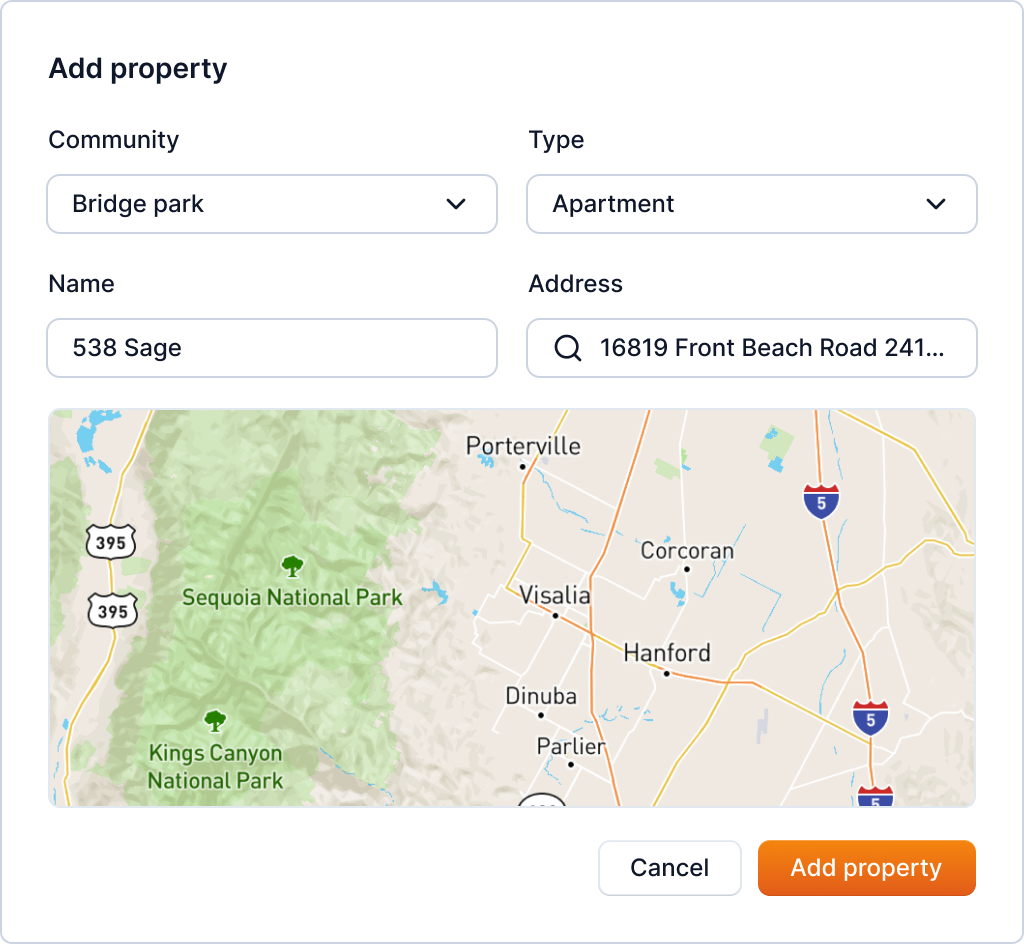
After filling the necessary information, click the "Add property" button. This will add the property to the community.
Note: The type of property can be either Apartment, House, or Loft which can be selected from the drop-down menu.
Tip
You can also add properties in bulk. Refer to Property Bulk Upload for more information.
Edit Property
Info
Not available to all users
You can edit a property from the properties page by clicking the three dots icon on the card and clicking on the "Edit" button.
After clicking the button, the same form which was used in property creation will open in a popup with prefilled information.
Here, you can update the property's information: community, type, name and address.
Fields in the "Edit Property" Form
The form consists of the following fields:
- Community: Select the community to which the property belongs.
- Type: Choose the type of property from the dropdown (Apartment, House, or Loft).
- Name: Enter the property's name.
- Address: Provide the full address of the property.
- Map View: Displays a visual representation of the entered address.
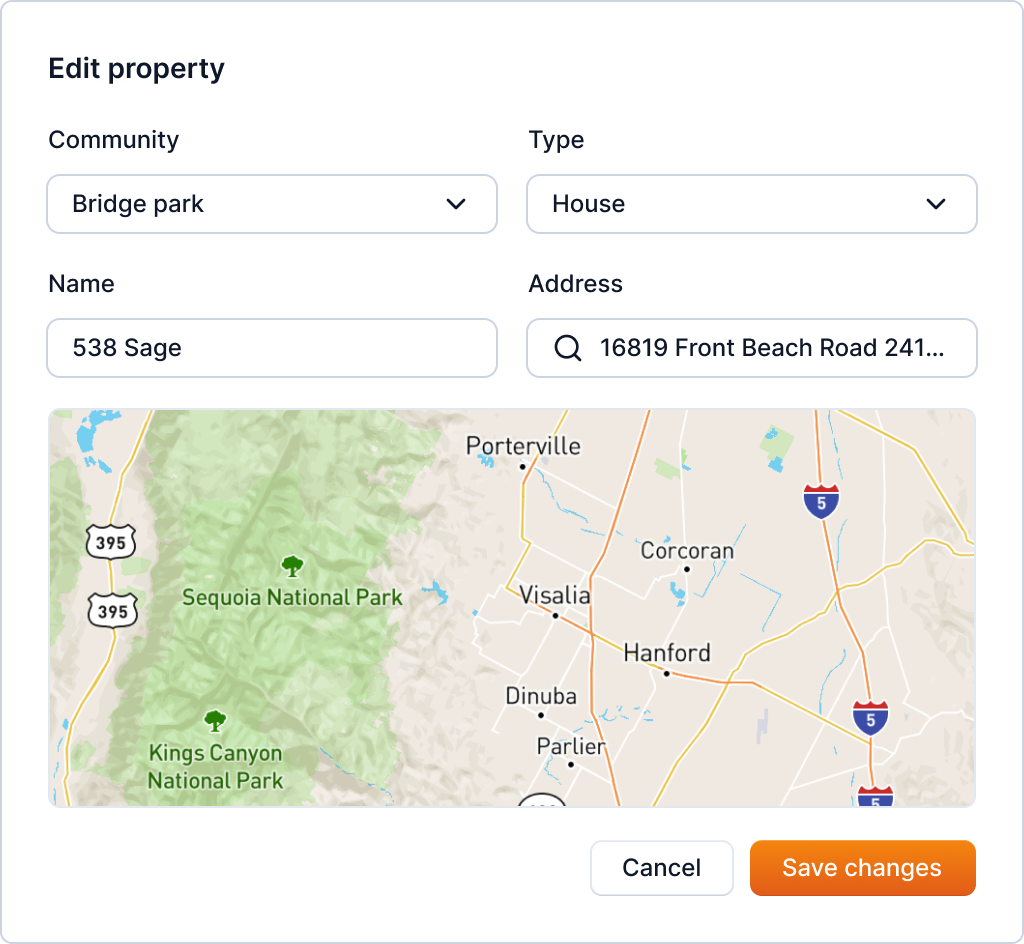
After updating the information, you can click on the "Save Changes" button to save the changes.
Delete Property
Info
Not available to all users
You can delete a property from the properties page by clicking the three dots icon and clicking on the "Delete" button.
After clicking the button, a popup will open asking you to confirm the deletion.
Warning
This action is irreversible. Once you delete a property, it cannot be recovered
Carefully read the warning and click on the "Delete" button to continue with the property deletion.
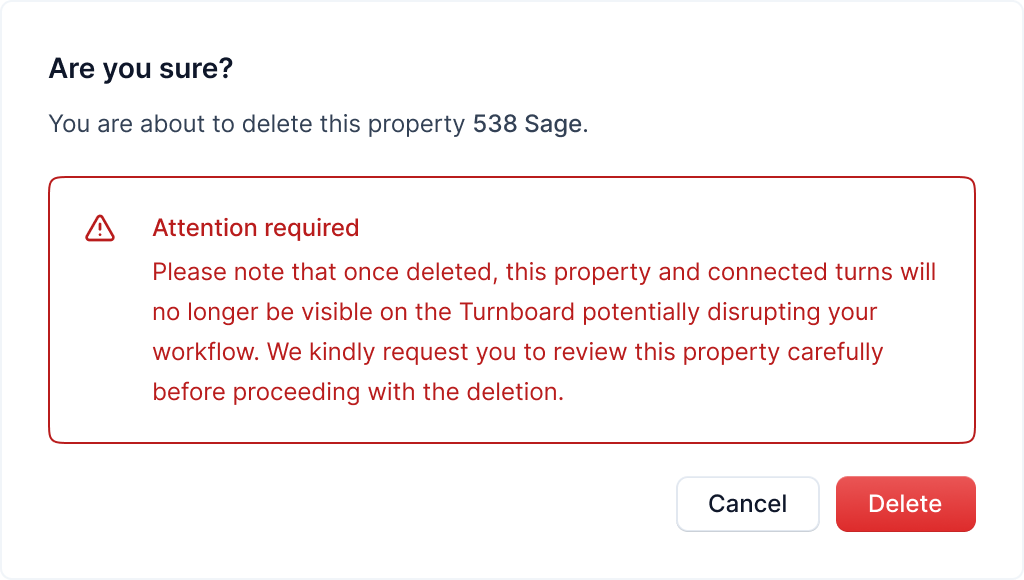
After deleting a property, its connected turns will no longer be visible, and you'll be redirected to the properties page.
Property Bulk Upload
Info
Not available to all users
If you prefer not to add properties individually, you can utilize the bulk upload feature to simultaneously add multiple properties to a community.
You can access the bulk upload feature from the properties page by clicking the "Bulk Upload" button.

After clicking the button, a new page will open to upload the properties as shown below.
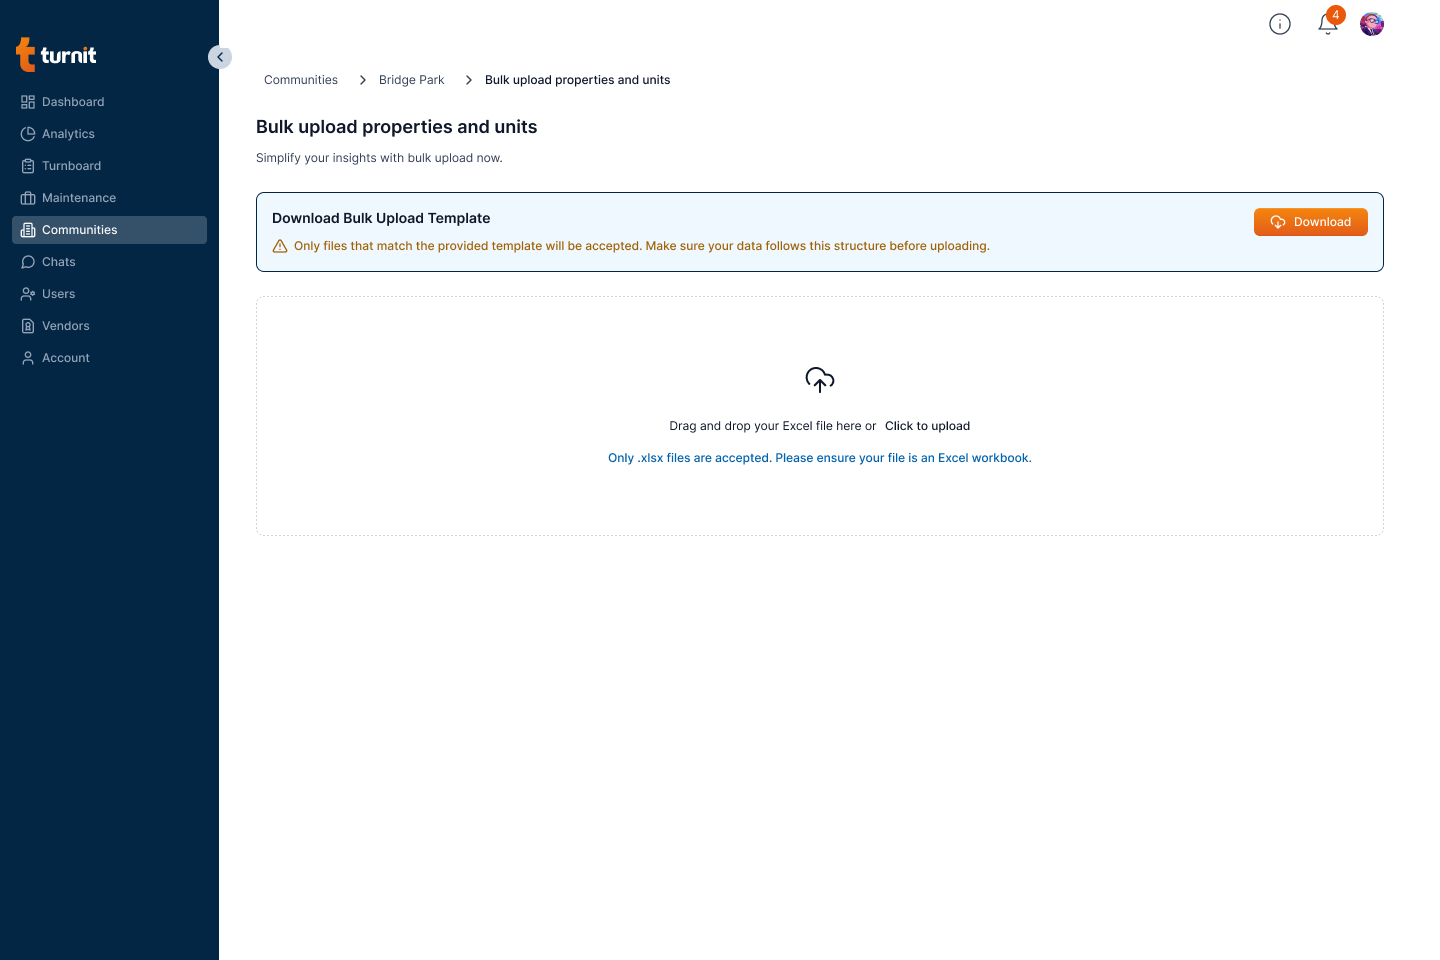
Here, you can download the sample CSV file by clicking the "Download" button. This file contains the format in which you need to enter the property information.

After downloading the CSV file, you can enter the property information in the file and upload it by clicking the "Click to upload" button or dragging the CSV or Excel file with the property data into the upload area.

After the upload is complete, you can click on the "Submit" button to continue with the bulk addition.
Tip
You can click on the change button to change the uploaded CSV.
Any missing data in the CSV file is indicated with the following icon and also shows the info on hover.
![]()
You can review the data and re-submit the CSV if required by cancelling the process.
Warning
If you continue with missing data, the properties with missing data will not be added to the community.
After reviewing the data, you can click on the "Submit" button to add the properties to the community.
You are then redirected to the submission status page. If the submission was successful, you can click on the "View properties" button to go back to the properties page and view the newly added properties.
Ended: Properties
Units ↵
Introduction
It is a unit of housing which can be leased to a tenant. A property can have multiple units. Jobs/turns are generally assigned to a unit.
You can view the units of a property by clicking on the property card on the Properties page.
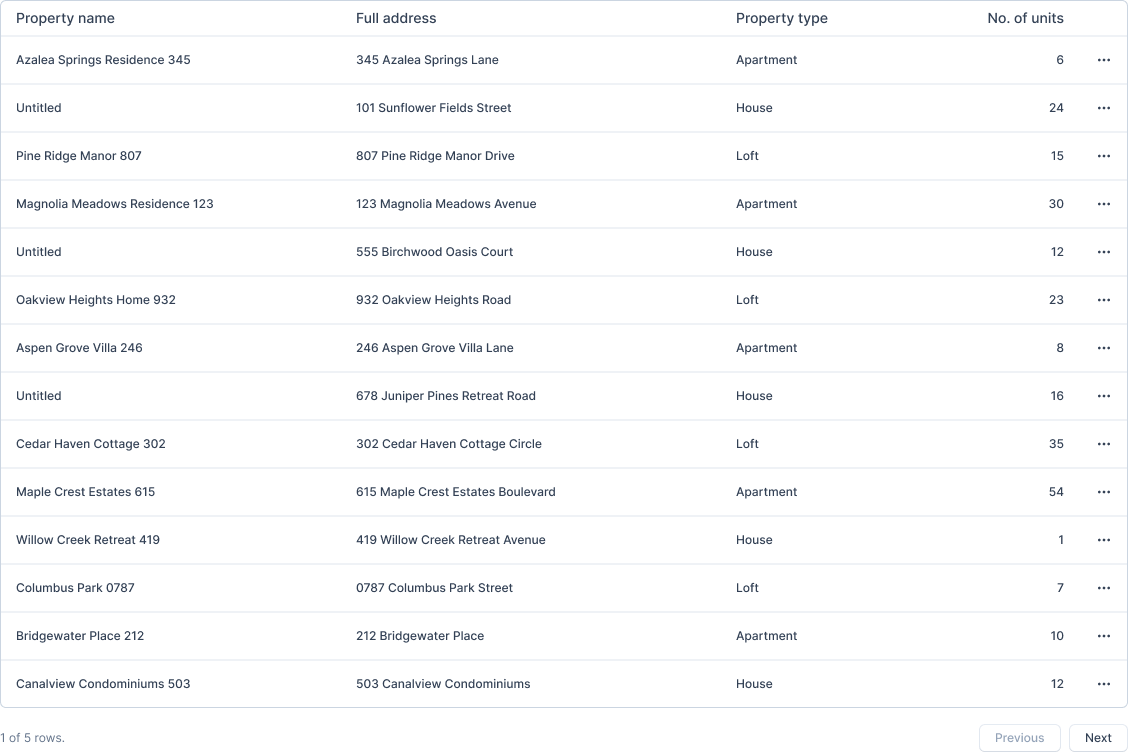
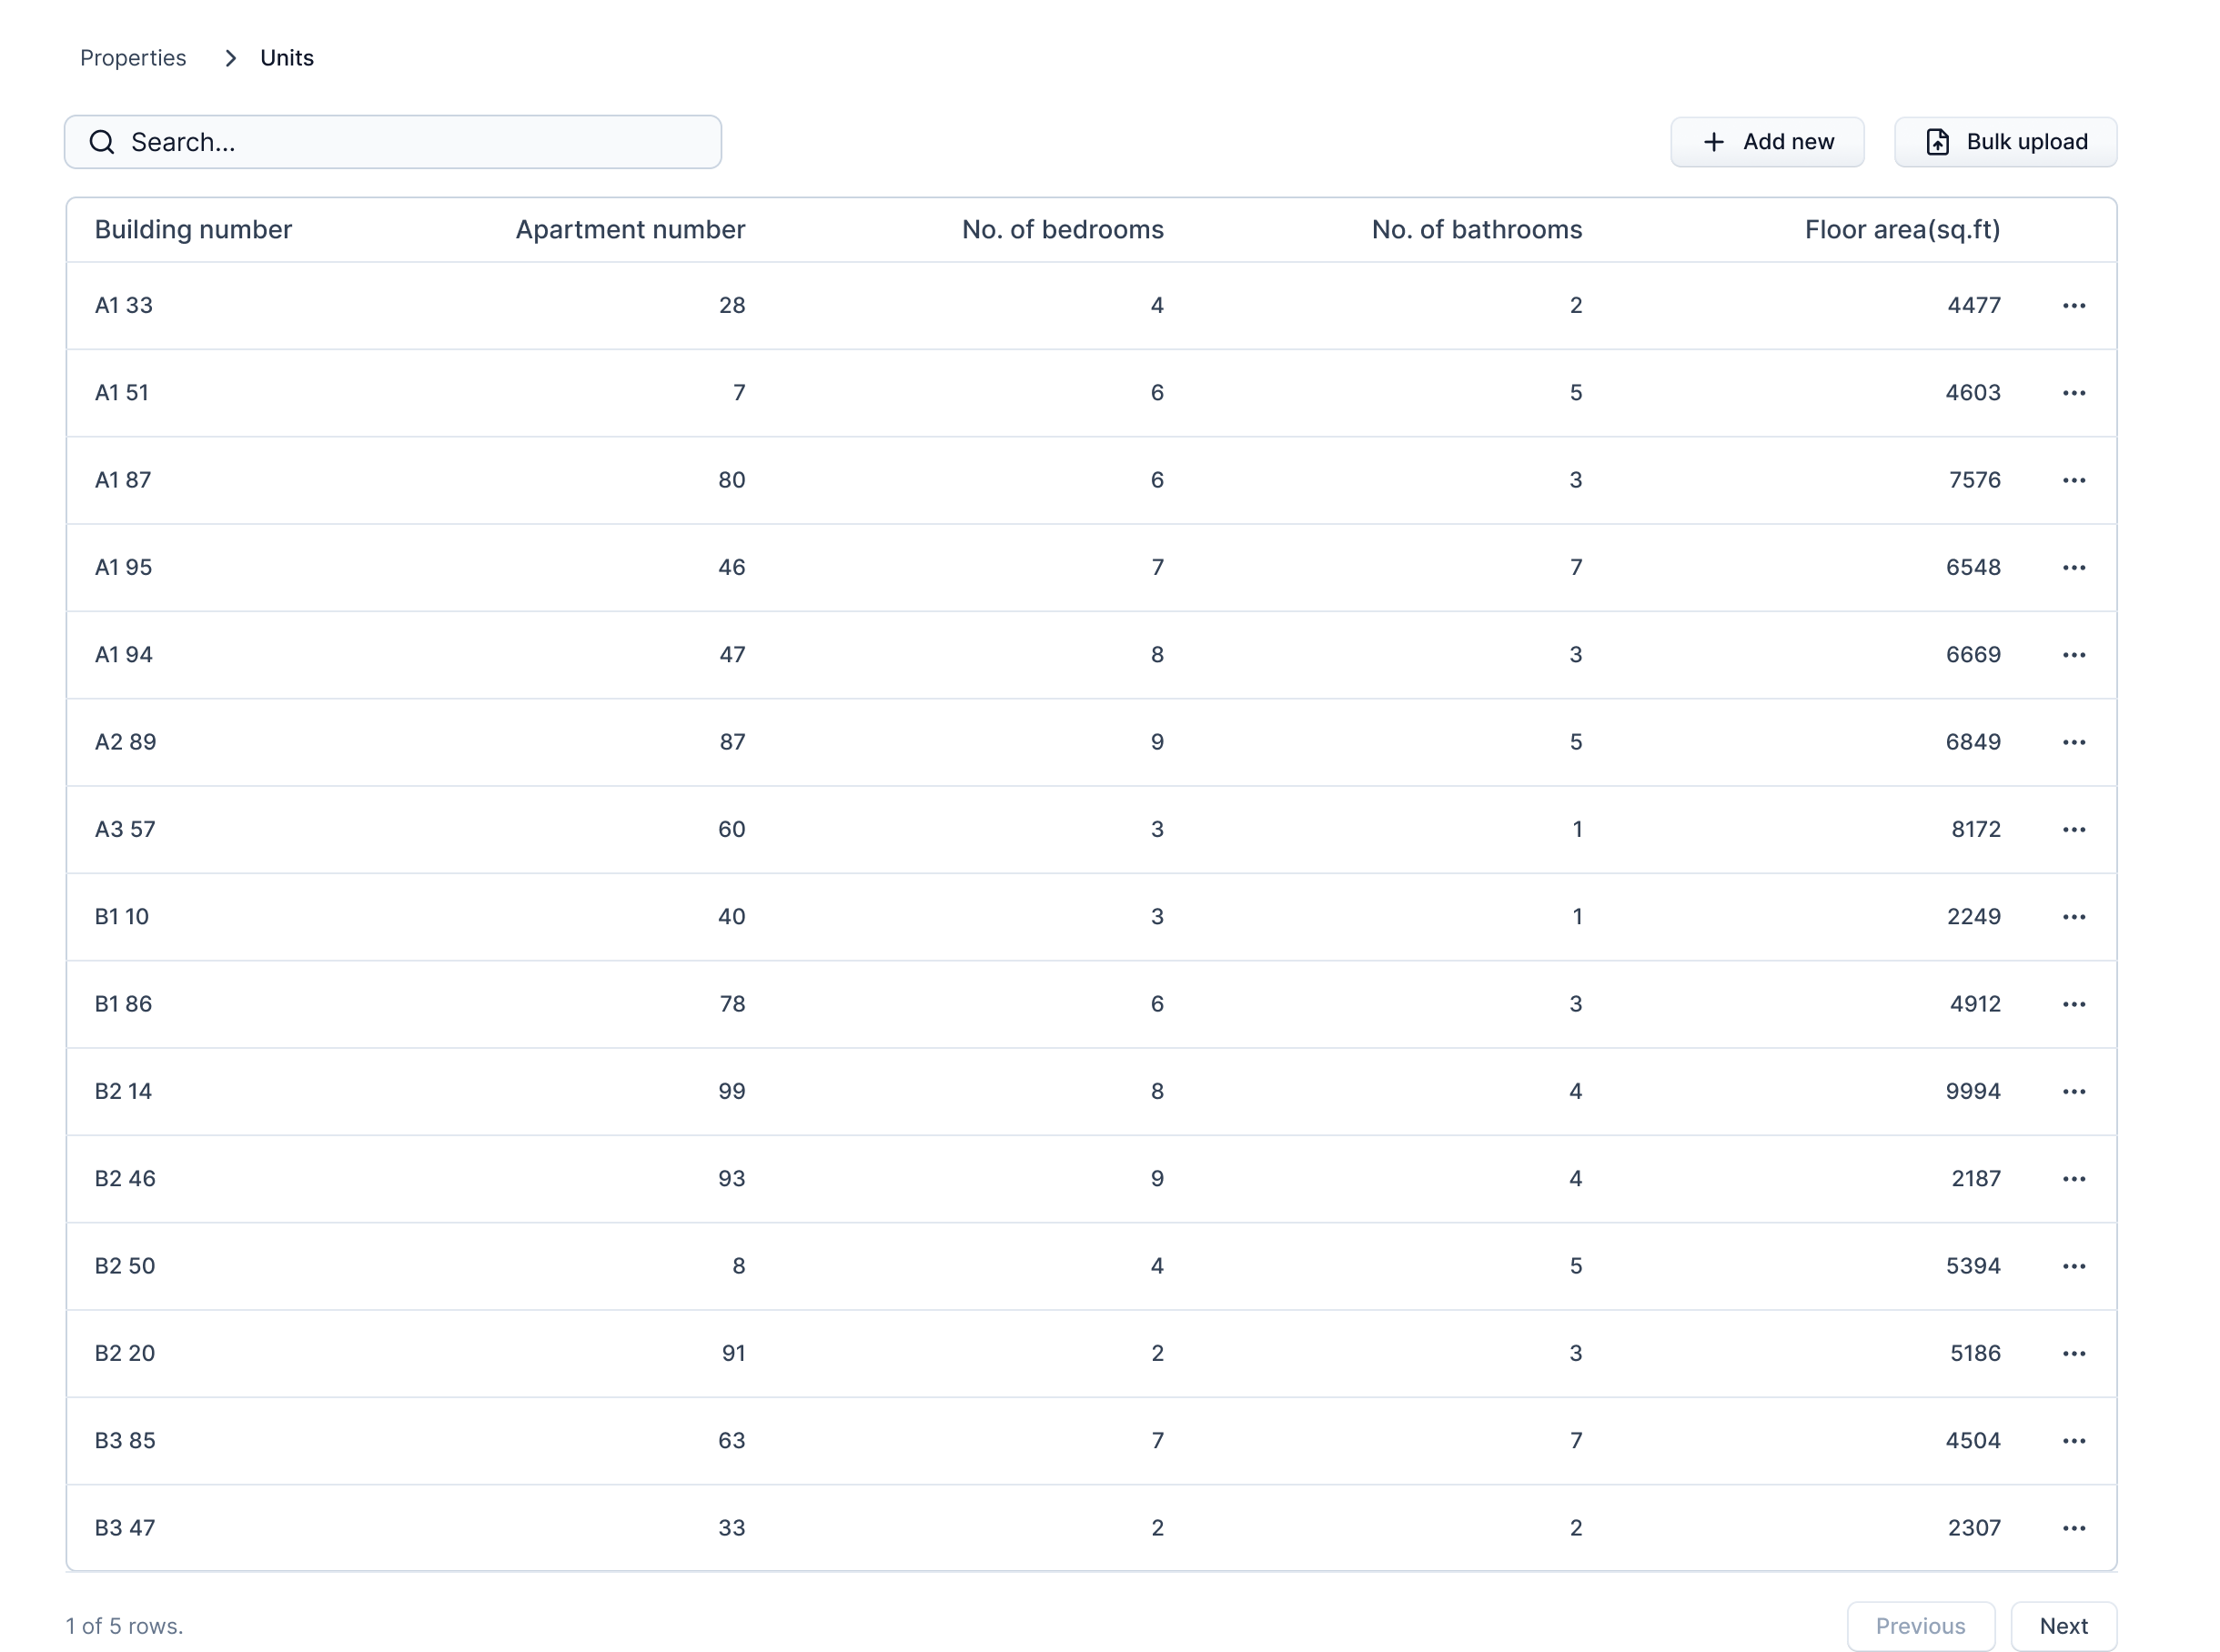
A units page shows a list of units of the property.
Search Unit
To search for a unit, you can use the search bar and enter the unit name from the units page.
Unit Actions
A unit is represented by a row on the table. The three dots icon on the right allows you to edit or delete the unit.
Add Unit
Info
Not available to all users
To add a unit, click the "Add new" button.
After clicking the button, a form will open in a pop-up. Here, you can enter the unit's information.
Fields in the "Add Unit" Form
The form consists of the following fields:
- Building Number: Enter the building number where the unit is located.
- Apartment Number: Provide the apartment or unit number.
- No. of Bedrooms: Specify the number of bedrooms in the unit.
- No. of Bathrooms: Enter the number of bathrooms.
- Floor Area (sq. ft.): Indicate the unit’s total floor area in square feet.
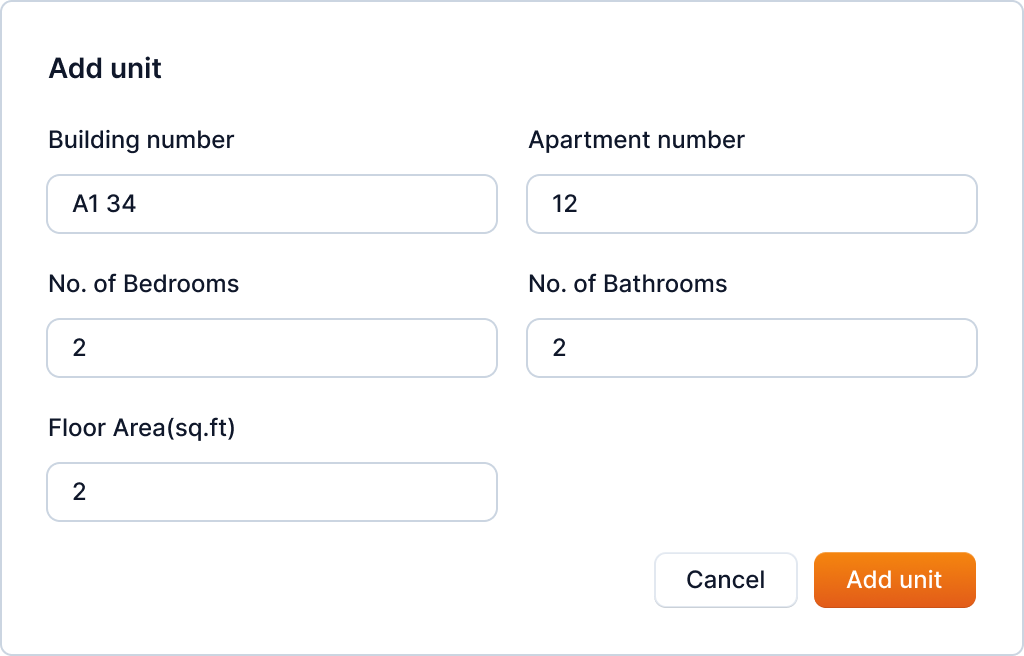
After filling in the necessary information, click the "Add unit" button. This will add the unit to the property.
Tip
You can also add units in bulk. Refer to Unit Bulk Upload for more information.
Edit and Delete Unit
Info
Not available to all users
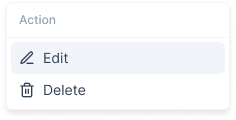
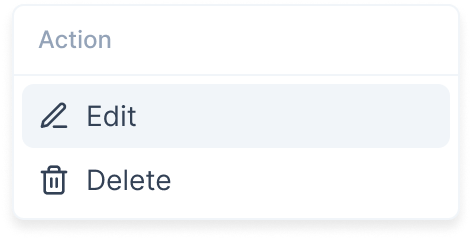
You can update information of the Unit after you have created the unit. To start editing, click the three-dots icon.
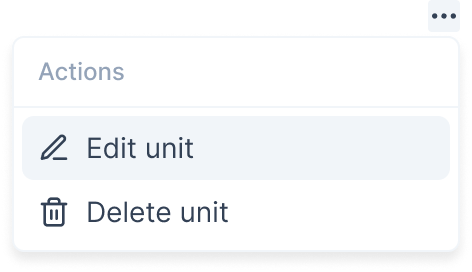
Here, you can select the edit option to edit the unit.
After clicking the button, the same form which was used in unit creation will open in a popup with prefilled information.
Fields in the "Edit Unit" Form
The form consists of the following fields:
- Building Number: Enter the building number where the unit is located.
- Apartment Number: Provide the apartment or unit number.
- No. of Bedrooms: Specify the number of bedrooms in the unit.
- No. of Bathrooms: Enter the number of bathrooms.
- Floor Area (sq. ft.): Indicate the unit’s total floor area in square feet.

Here, you can update the unit's information: Building number, Apartment number, Number of bedrooms, Number of bathrooms and Floor area.
After updating the information, you can click on the "Save Change" button to save the changes.
You can also delete the unit by clicking on the "Delete" button from the action menu.
After clicking the button, a popup will open asking you to confirm the deletion.
Warning
This action is irreversible. Once you delete a unit, it cannot be recovered
Carefully read the warning and click on the "Delete" button to continue with the unit deletion.
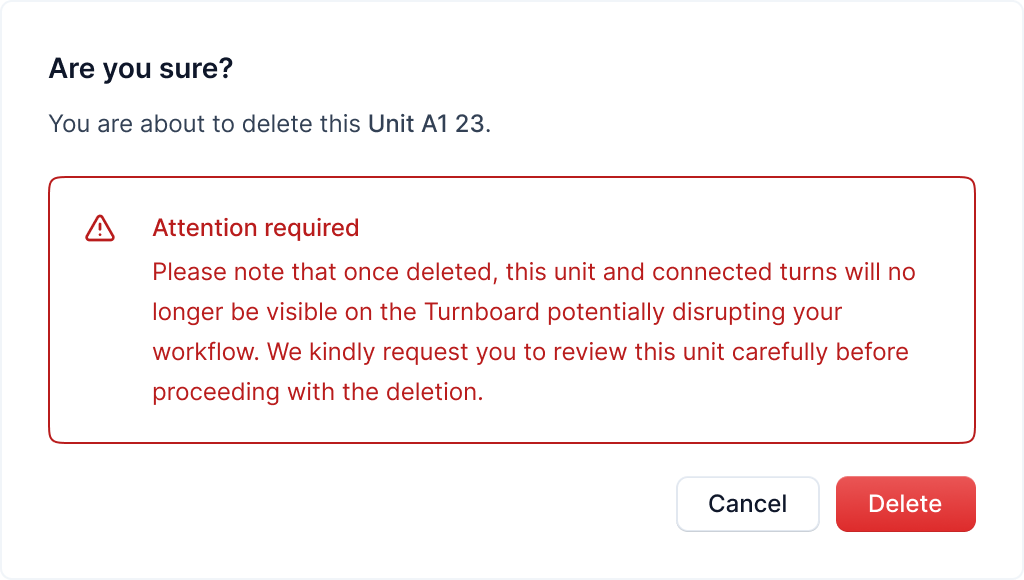
After deleting a unit, its connected turns will no longer be visible, and you'll be redirected to the units page.
Property Bulk Upload
Info
Not available to all users
If you prefer not to add units individually, you can utilize the bulk upload feature to simultaneously add multiple units to a Properties.
You can access the bulk upload feature from the properties page by clicking the "Bulk Upload" button.
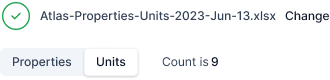
After clicking the button, a new page will open to upload the properties as shown below.
Here, you can download the sample CSV file by clicking the "Download" button. This file contains the format in which you need to enter the property & units information.
After downloading the CSV file, you can enter the property & units information in the file and upload it by clicking the "Click to upload" button or dragging the CSV or Excel file with the property data into the upload area.
After the upload is complete, you can click on the "Submit" button to continue with the bulk addition.
Tip
You can click on the change button to change the uploaded CSV.
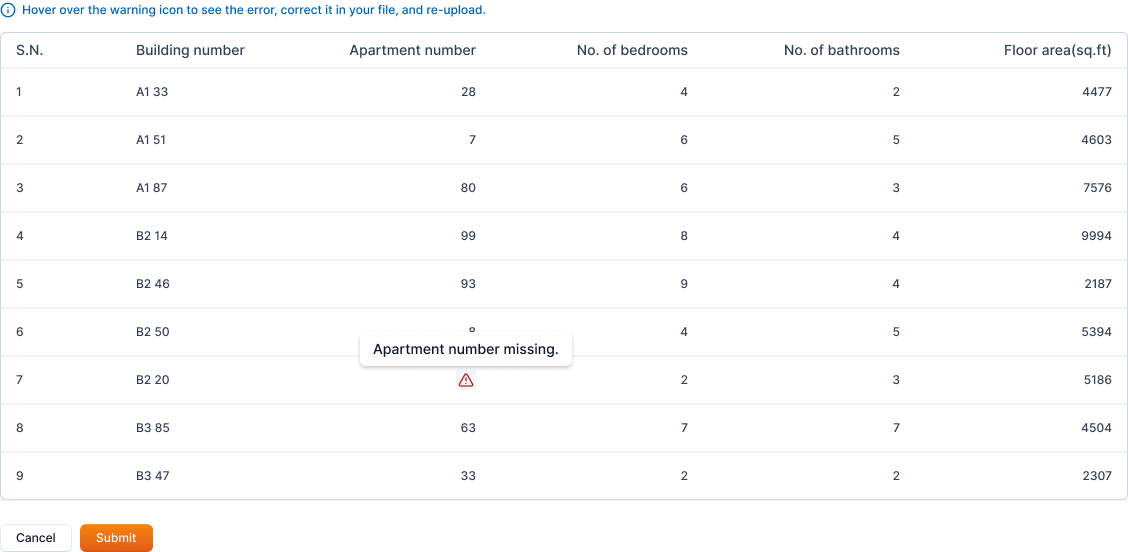
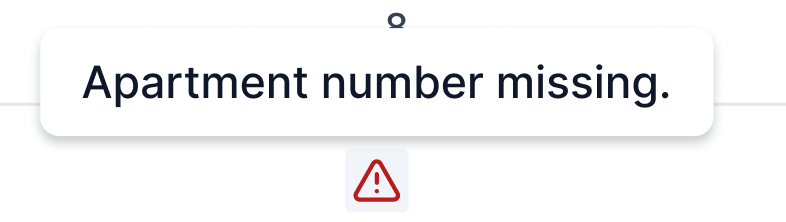
Any missing data in the CSV file is indicated with the following icon and also shows the info on hover.
![]()
You can review the data and re-submit the CSV if required by cancelling the process.
Warning
If you continue with missing data, the properties with missing data will not be added to the community.
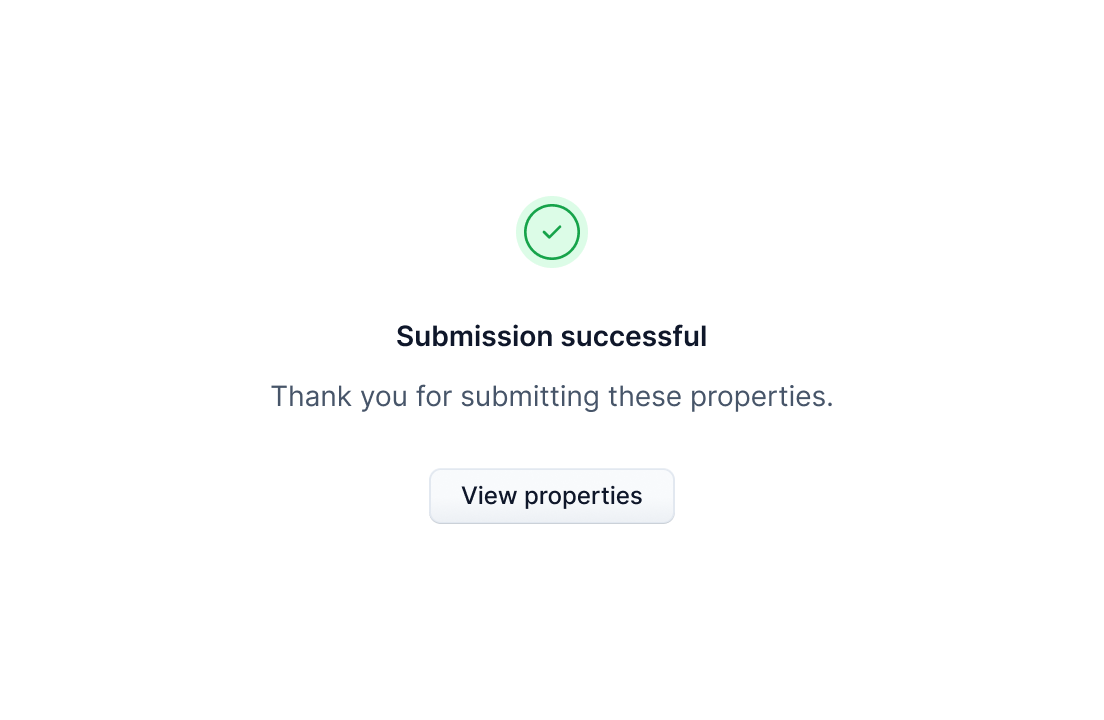
After reviewing the data, you can click on the "Submit" button to add the properties to the community.
You are then redirected to the submission status page. If the submission was successful, you can click on the "View properties" button to go back to the properties page and view the newly added properties.
Ended: Units
Turnover ↵
Understanding Turnboard
Turnboard Action Buttons
Active and Completed Switch
You can switch between active and completed turnovers through switch at the top.

Search, Filter and Sort
You can filter the units by searching them through names or applying other filters. You can also sort the results by clicking the Sort button.

Community Selection
Use the community selection input to switch between different communities that a manager has access to. Each community has its own sets of configuration.
For example, some communities might not have "Carpet Cleaning" in their services flow. Likewise, in some properties "Painting" might come before "Carpet Cleaning" whereas, it might not be the case for other communities.
Tip: See communities config screen for setting up this configuration.
Add Turnover Button
Click the "Add Turnover" button to start adding a turnover on the board.

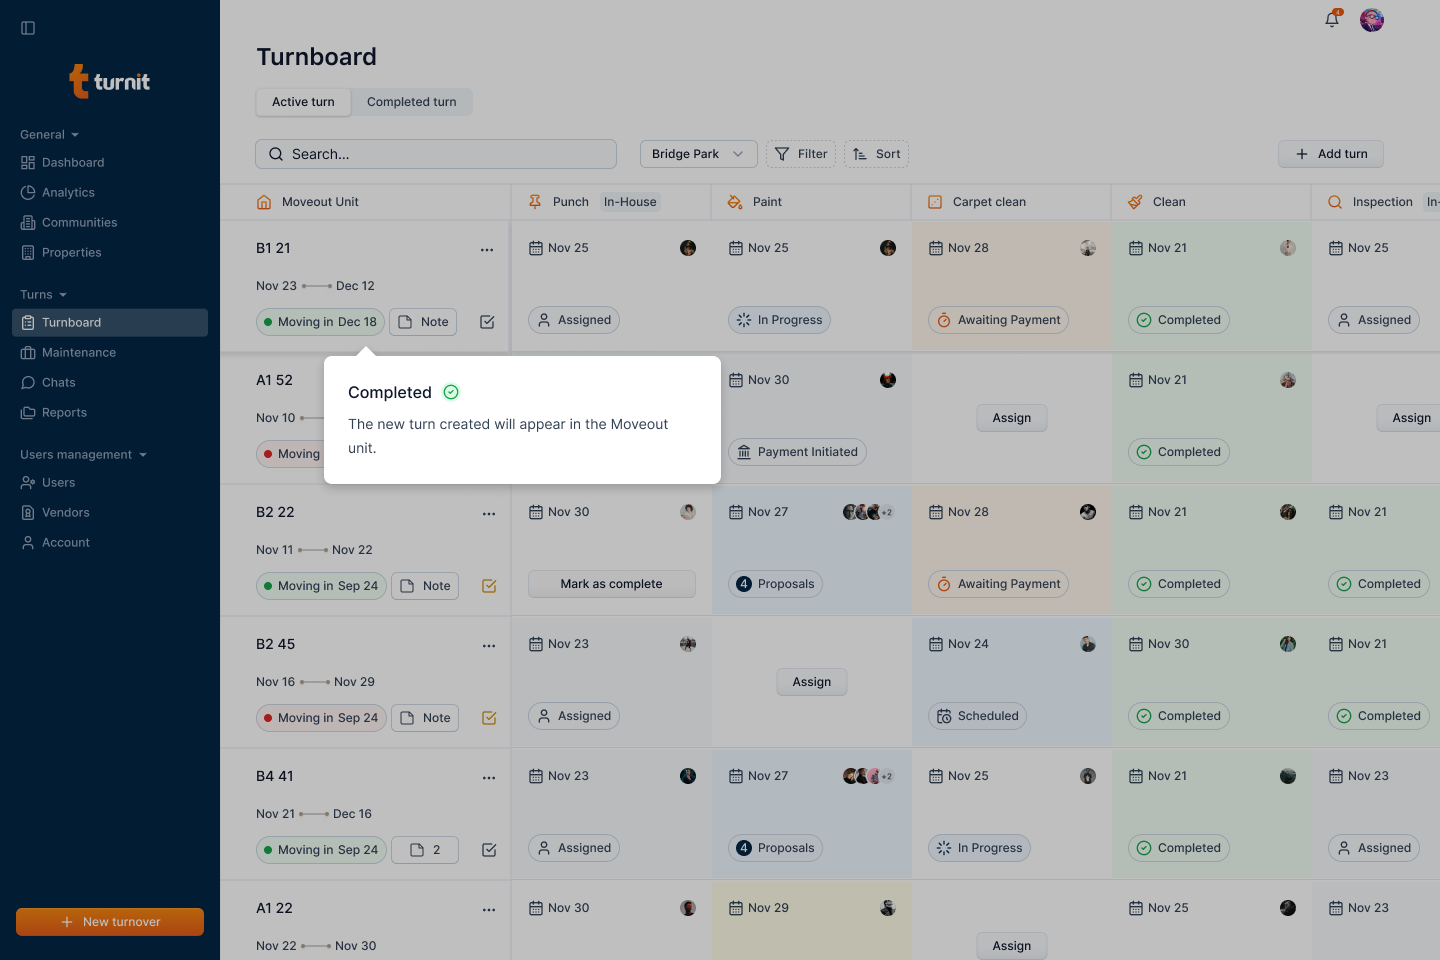
Turnboard Table
A turnboard looks as follows.
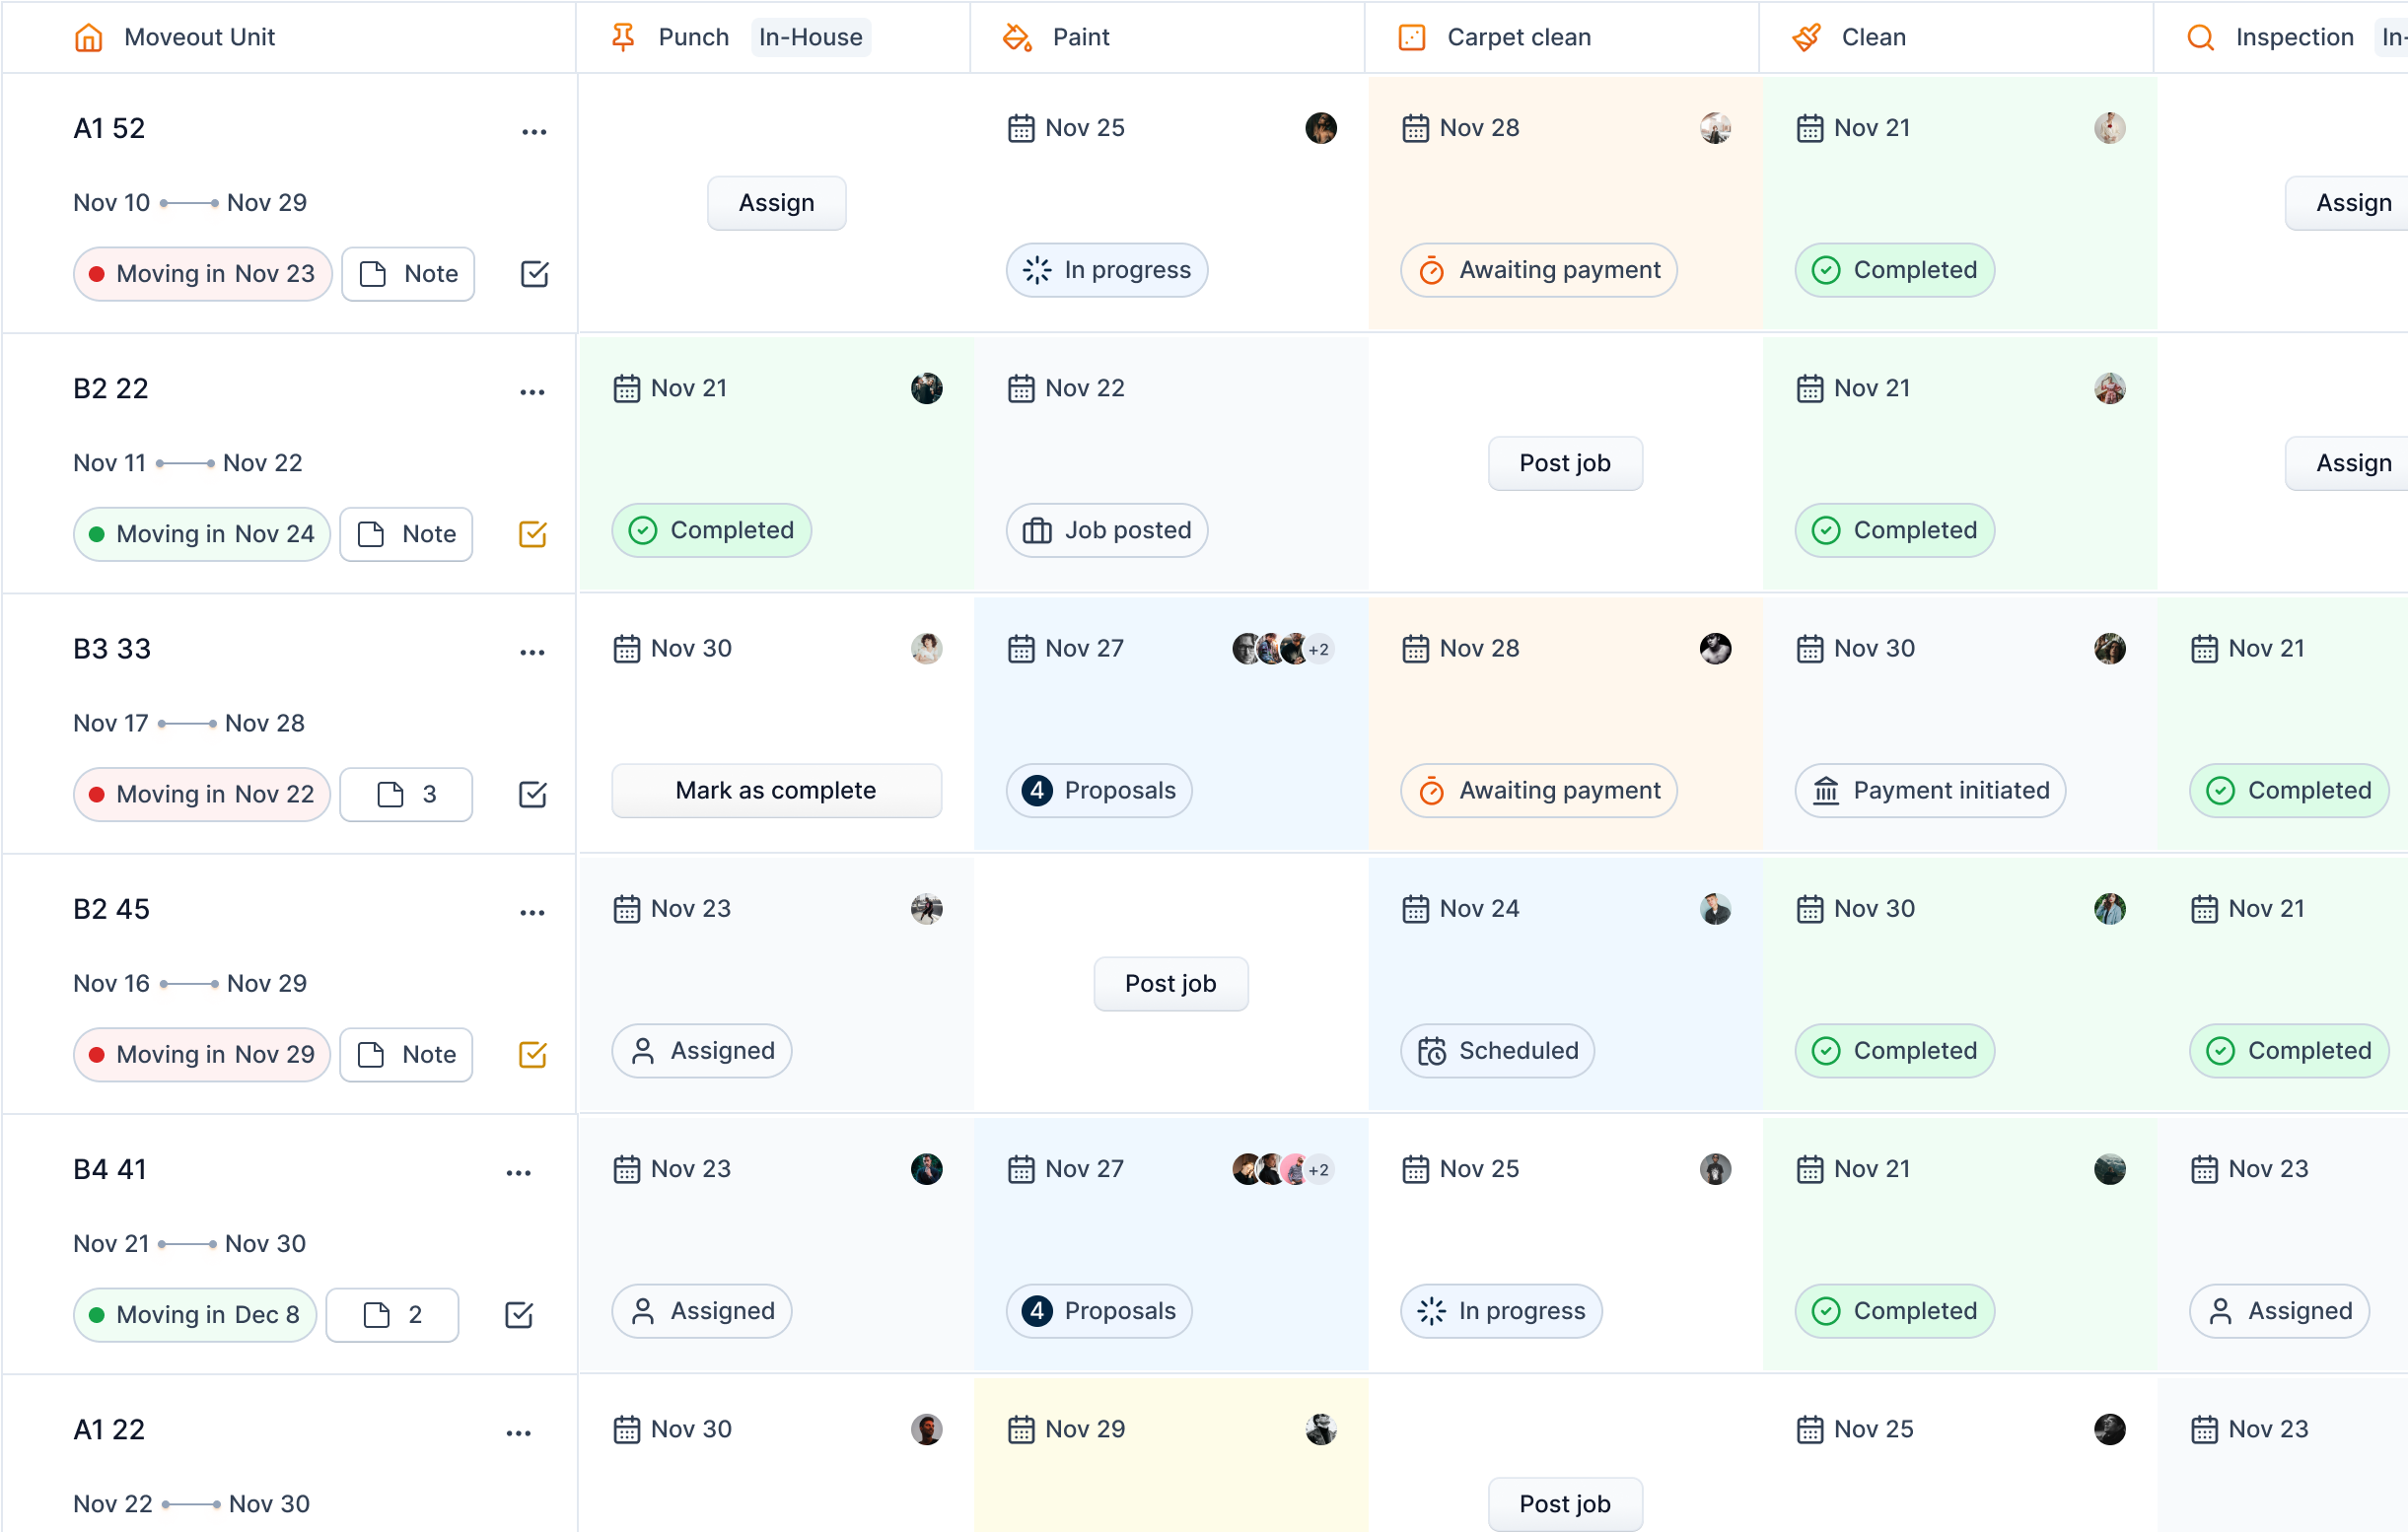
Moveout Unit
The first column of the turnboard refers to the turnover information.
The dates joined by a horizontal line refer to the start and end dates of the turnover.

Below it, there is a chip to indicate the status of move in date. The styles of the chip refers to different level of urgency.
| Move in chip style | Reason | Example |
|---|---|---|
| Green dot with light green background | The move in date is in the future | 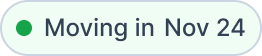 |
| Orange dot with yellow background | The move in date is within 3 days | TODO: Add appropriate example |
| Red dot with light red background | The move in is due. This turnover probably is already completed and should be marked as complete in the turnboard. |  |
You can access notes dialog using "Note" icon. There will be a text "Note" if there isn't any note added to the turnover yet. 
If there is any note added, it will be indicated in the icon. 
On the top right of the cell, we get an ellipses icon, through with we can perform other actions such as editing, deleting and viewing the timeline of the turnover.
![]()
Status of Turnover
This chip in the bottom left of each cell denotes the latest status of the turnover.
| Status | Text | Type | Style |
|---|---|---|---|
| Assigned | Service assigned | In-house |  |
| Job Posted | Service is posted and no proposals yet | Vendor |  |
| Proposals | There are proposals for the service | Vendor |  |
| Scheduled | The vendor is hired, but the task is scheduled to start in future | Vendor |  |
| In Progress | Service is in progress | Vendor |  |
| Awaiting Payment | Vendor is requesting payment | Vendor |  |
| Payment Initiated | Payment has already been initiated | Vendor |  |
| Completed | Job is paid and is completed forever | Vendor |  |
| Completed | The service is completed by the assigned manager | In-house | |
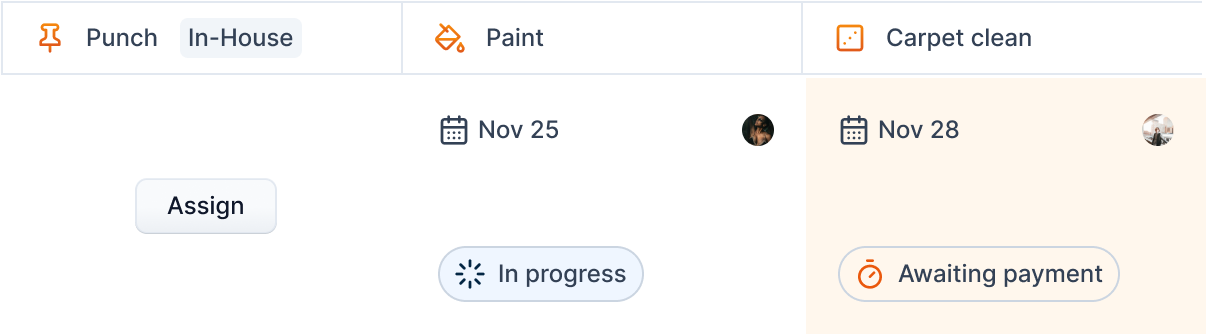
Dynamic Information
The top row of each service contains dynamic information, dates and person.

The date and people avatar change according to the status of turnover as follows.
| Status | Date Information | Avatar Information |
|---|---|---|
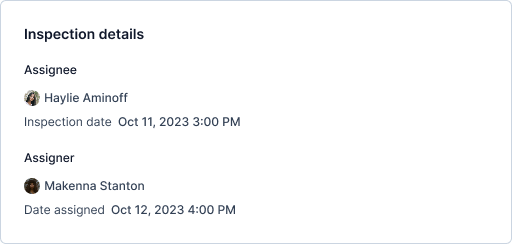
| Punch assigned | Expected punch date as assigned | Assigned manager |
| Punch completed | Punch completed date | Manager who completed the punch |
| Inspection assigned | Expected inspection date as assigned | Assigned manager |
| Inspection completed | Inspection completed date | Manager who completed the inspection |
| Job posted | Date to complete the service | None |
| Proposals | Date to complete the service | Vendors who have sent bids |
| Scheduled | Date to complete the service | Hired vendor |
| In progress | Date to complete the service | Hired vendor |
| Awaiting payment | Date when payment requested | Hired vendor |
| Payment initiated | Date when payment initiated | Hired vendor |
| Job completed | Date when job is completed | Hired vendor |
Add Turnover
Info
Not available to all users
To add a turnover on the community, click the "Add turn" button.

After clicking the button, a form will open in a pop-up. Here, you can enter the turnover's information.
Some key points:
- Only units of the current community will be listed.
- The move-out date for the current tenant is optional.
- Punch and inspection can be assigned later.
- If you add a punch or an inspection, you must also add the corresponding dates.
Fields in the "Add Turnover" Form
Unit Details (Required)
- Property – Select the property from the drop-down list.
- Unit – Choose the unit where the turnover is happening (only units in the current community will be available).
- Expected Turnover Duration – Pick a date range that indicates the expected time needed to complete the turnover.
- Upcoming Move-in Date – Select the date when the new tenant is expected to move in.
- Current Move-out Date (Optional) – If applicable, enter the date when the previous tenant is vacating.
Punch Details (Optional)
- Punch Assigned for Date – Pick a date for when the punch will be scheduled.
- Punch Assign – Select an option from the dropdown to assign the punch work to a specific person or team.
Inspection Details (Optional)
- Inspection Assigned for Date – Pick a date for when the inspection will take place.
- Inspection Assign – Select an option from the dropdown to assign the inspection to a responsible party.
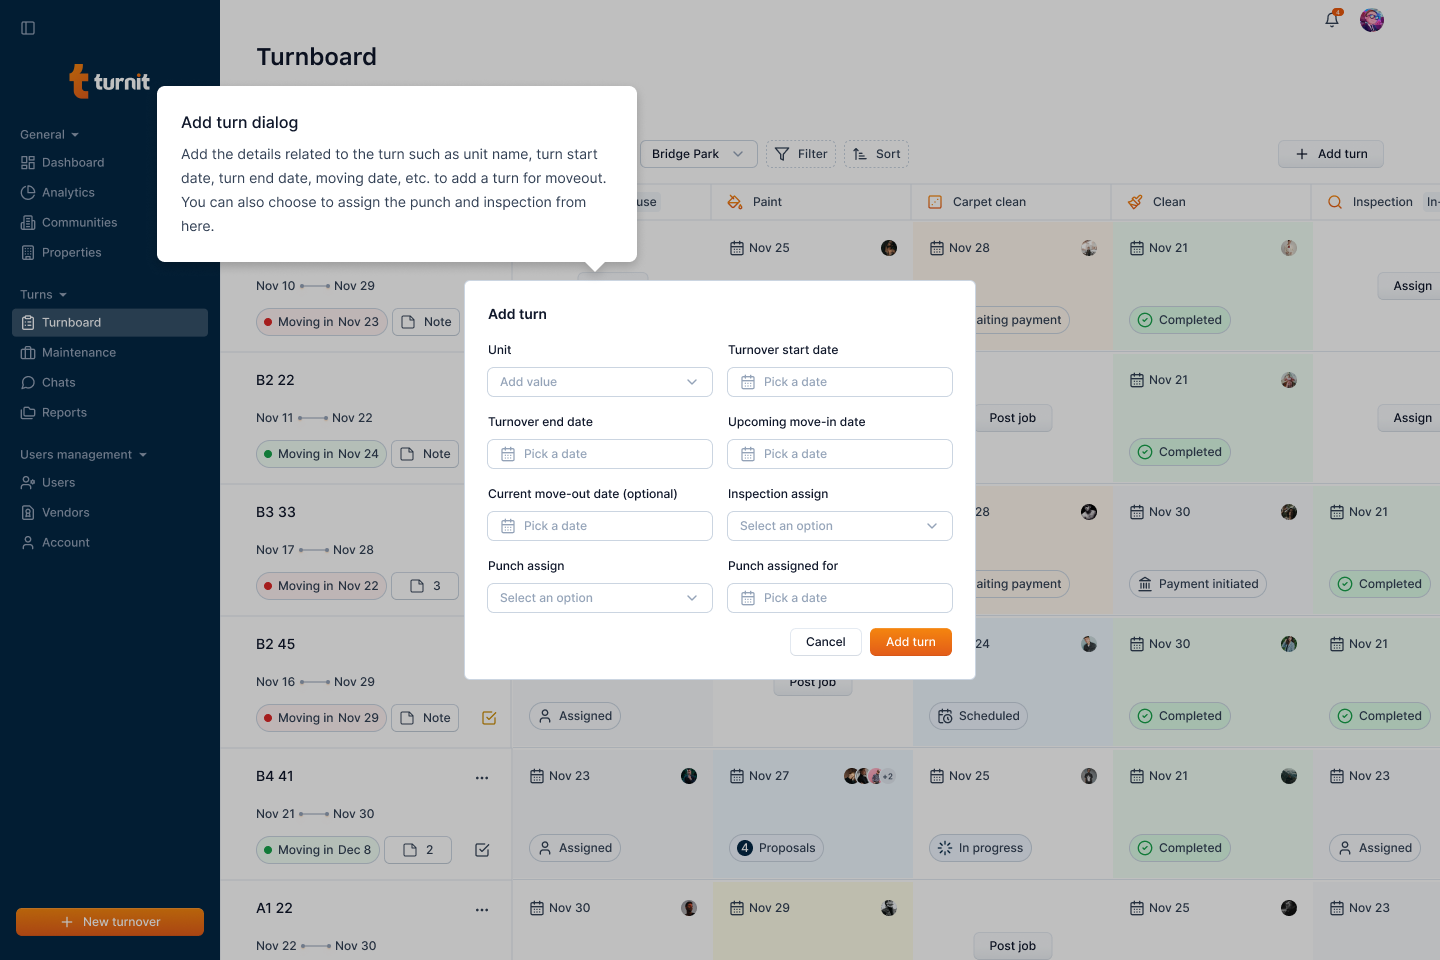
Once all necessary details are filled in, click the "Add turn" button to confirm the turnover creation.
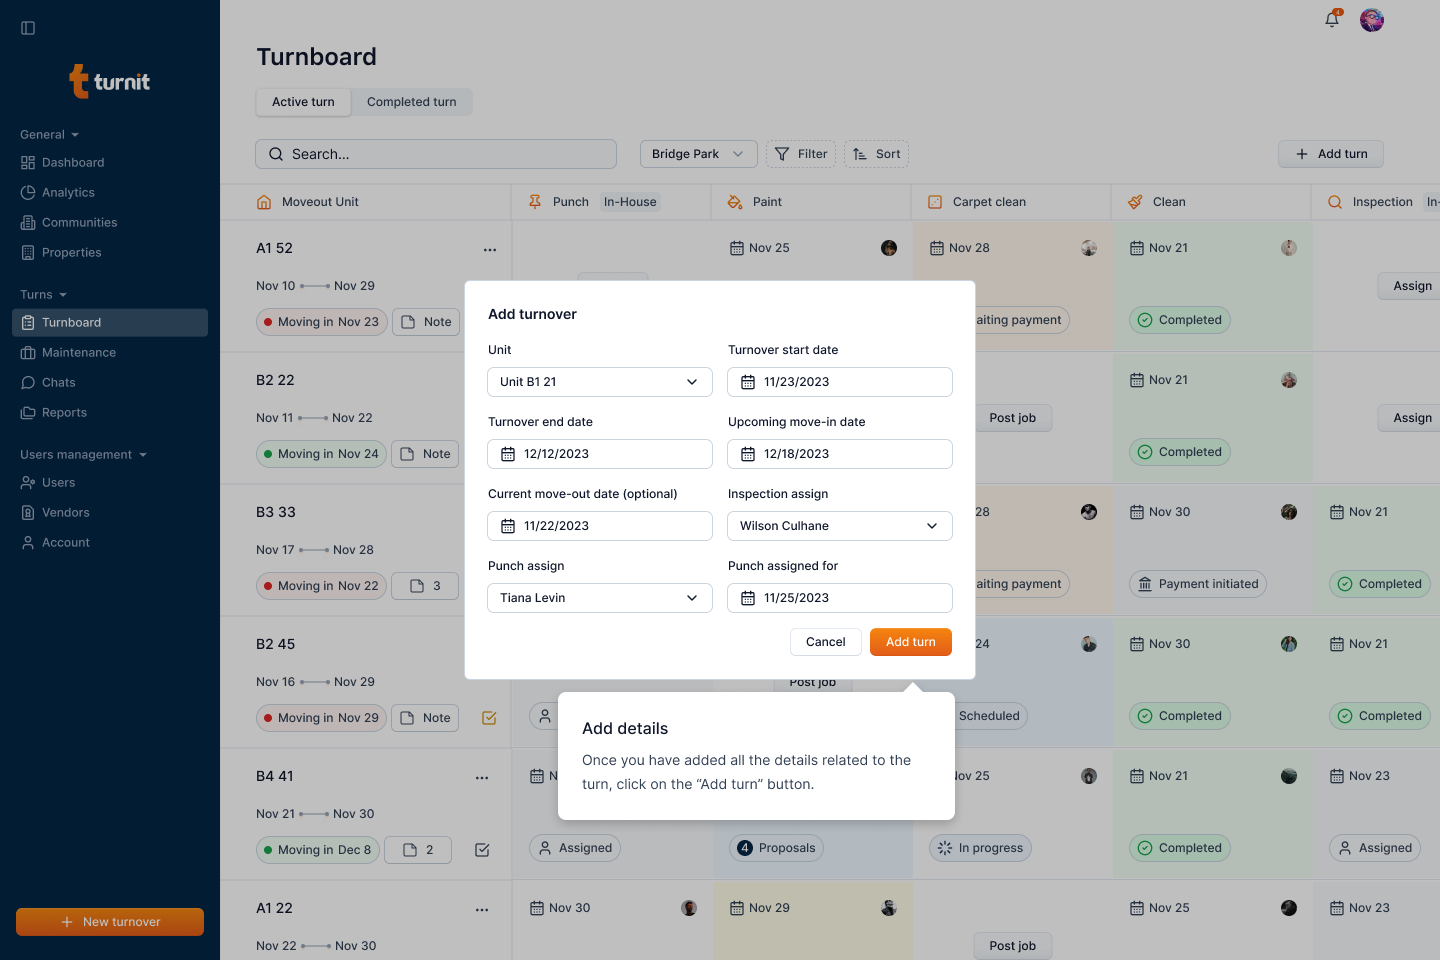
After submission, the newly created turnover will appear on the Turnboard, along with its assigned tasks and status.
In-house Services ↵
Assign Punch
Info
Not available to all users
To assign a punch for the turnover, click the "Assign" button on the Punch service.

Once you click the button, you will see a form in a popup where you can select a manager and a date for punch.
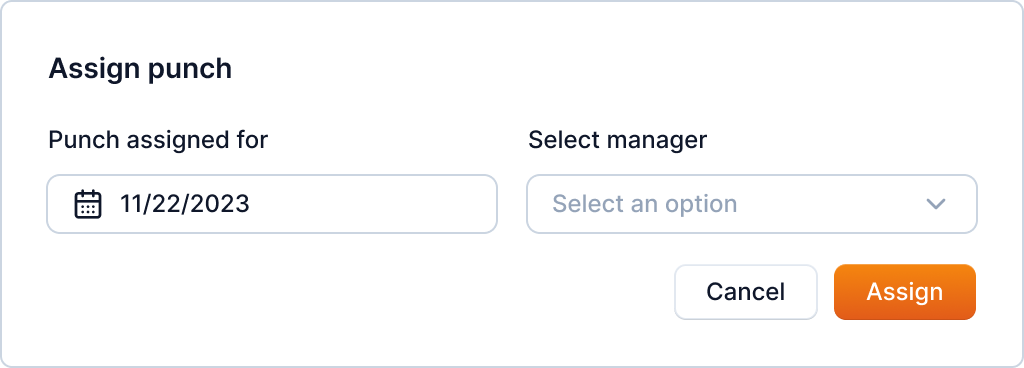
You can only do this to the managers of the community of the turnover.
You can view the details through the same cell once assigned.
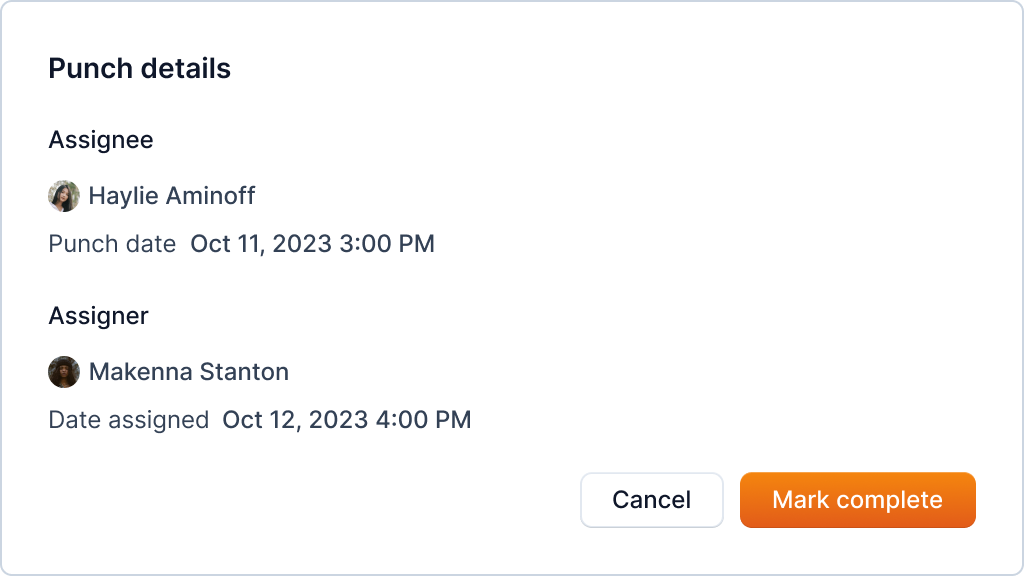
Complete Punch
Info
Only available to punch assigned user
To complete a punch for the turnover, open the punch detail.
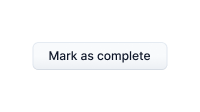
Click the "Mark as complete" button on the corresponding cell.
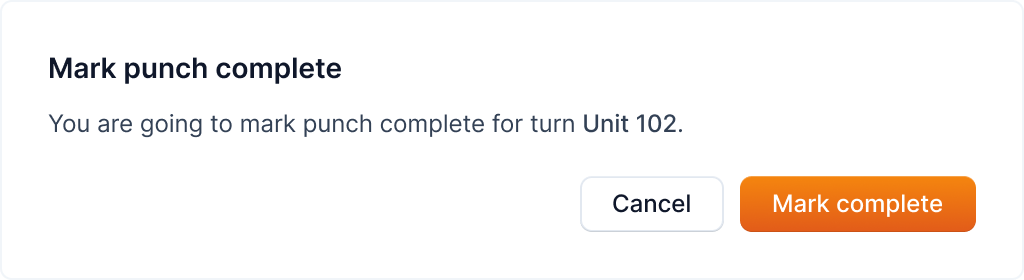
after that, the confirmation dialog will appear, click the "Yes" button to confirm the action.
Assign Inspection
Info
Not available to all users
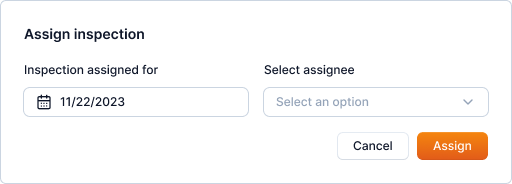
To assign a Inspection for the turnover, click the "Assign" button on the Inspection service. Once you click the button, you will see a form in a popup where you can select a manager and a date for Inspection.
You can only do this to the managers of the community of the turnover.
Confirm the operation.
You can view the details through the same cell once assigned.
Complete Punch
Info
Only available to inspection assigned user
To complete a inspection for the turnover, open the inspection detail.
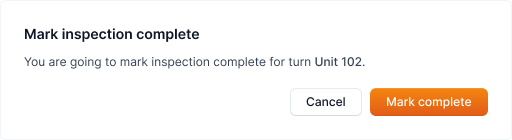
Click the "Mark as complete" button on the corresponding cell.
after that, the confirmation dialog will appear, click the "Mark Complete" button to confirm the action.
Ended: In-house Services
Vendor Services ↵
Post Vendor Jobs
Info
Not available to all users
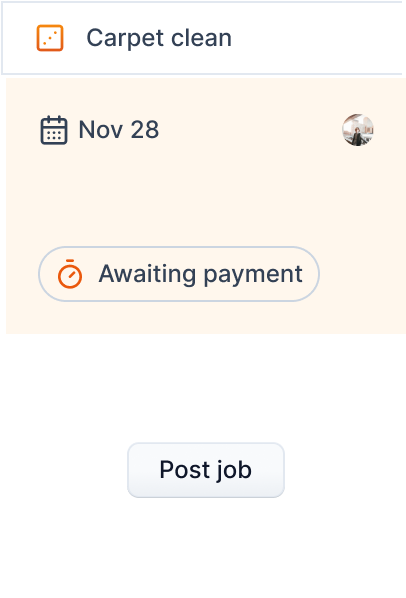
The in-house services are marked as "In-house" whereas external vendor services aren't.
Click the "Post job" button to post a job.
You will be greeted with a multi-step form where you can fill in the job information.
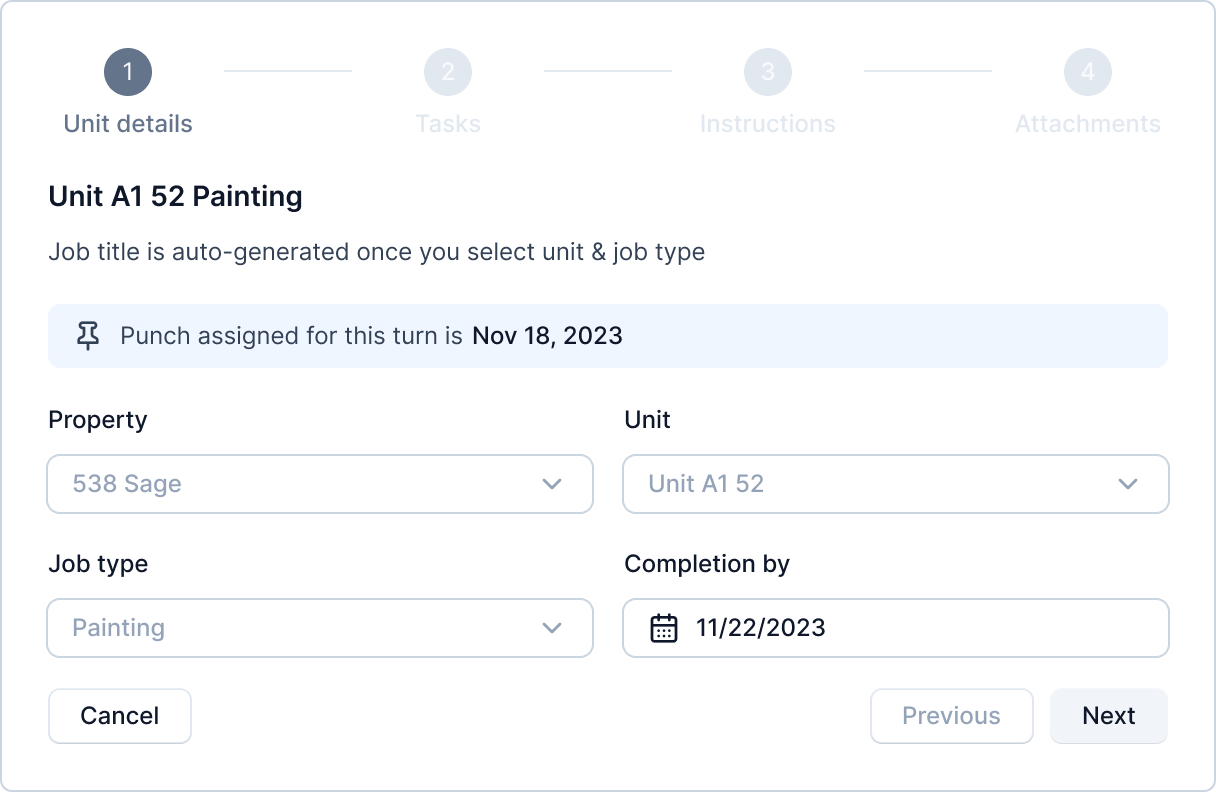
Step 1 - Add unit information
In the first step, you will get a form to select property, unit, job type and completion date. In the turnover post job form, property, unit and job type fields are disabled.
If a punch is assigned, the information is also presented in this step.
Step 2 - Add tasks
In this step, you add tasks for the job. This is a simple to-do list. For example, for cleaning, it might look as:
- Clean table top
- Clean kitchen sink
- and so on...
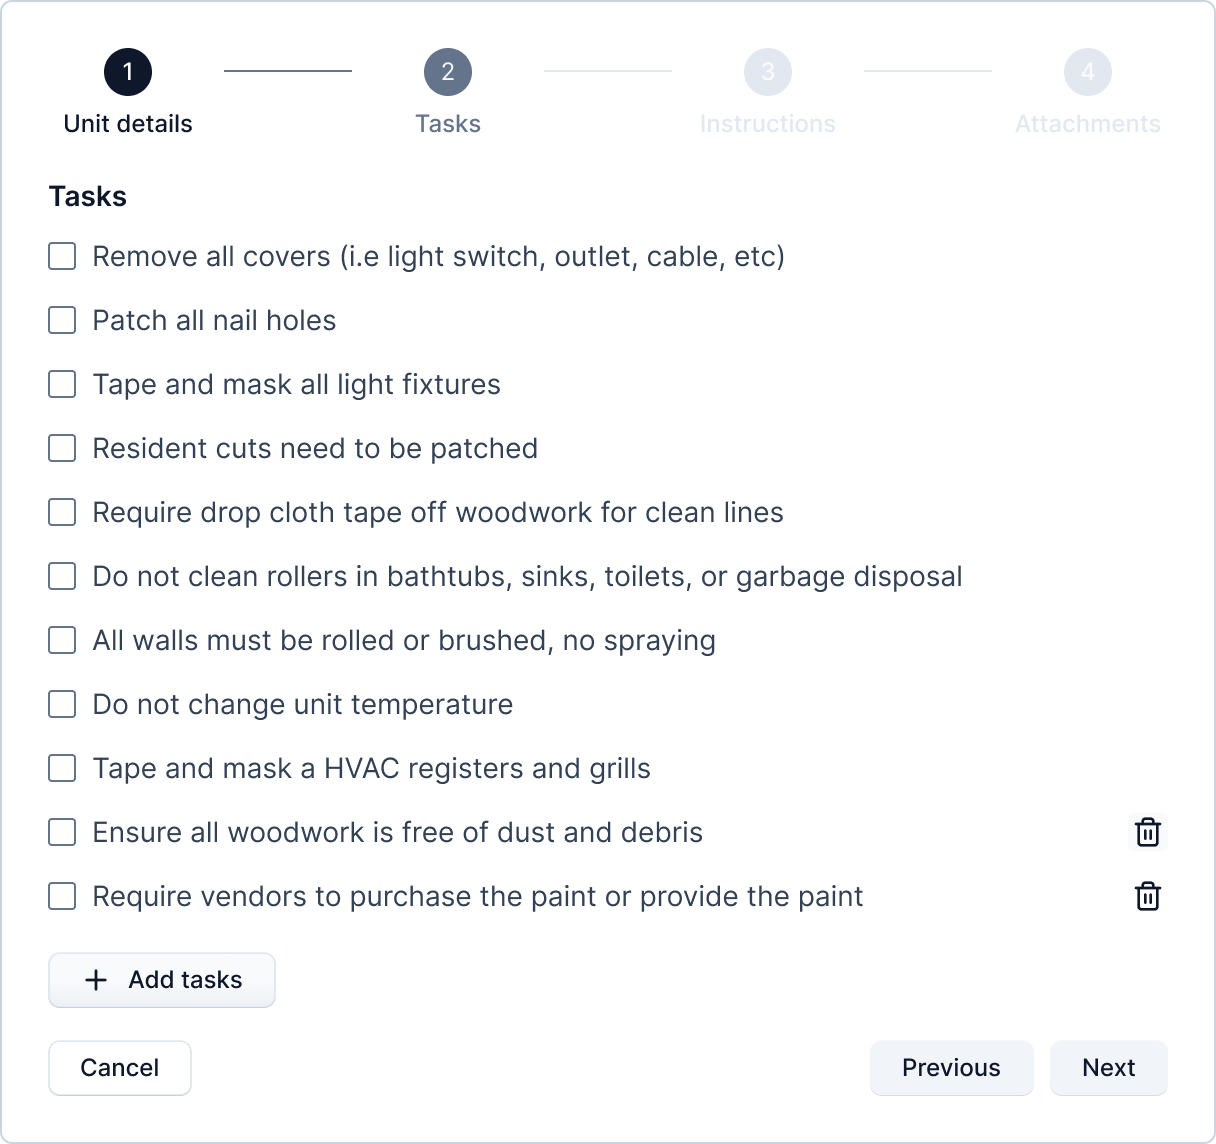
The tasks will be autopopulated from the community settings.
Tip: TODO: See community tasks settings for setting default tasks for the community.
You can also add or remove tasks for each jobs. This won't affect the default tasks set in community tasks settings.
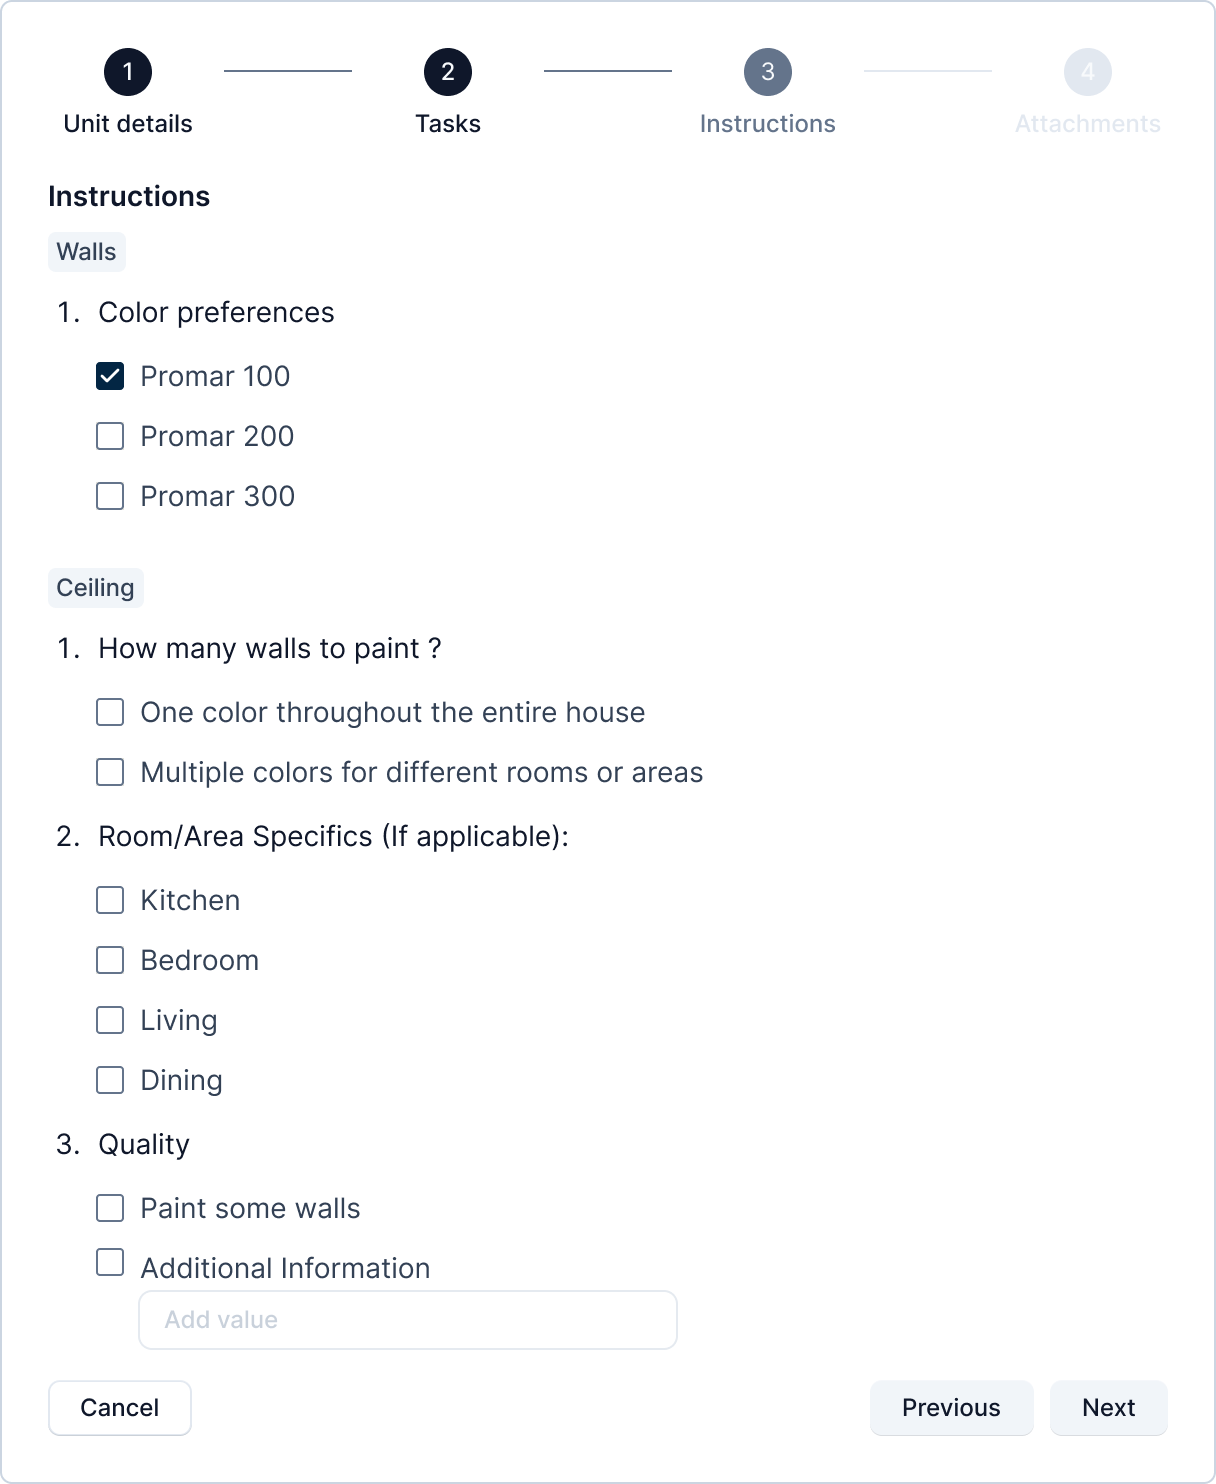
Step 3 - Add Instructions
Instructions are similar to tasks in that they can also be set through community settings for each community.
The concept of instructions is similar to that of a form. Here, a manager can set a form structure through community settings where, they define various sections, questions, options, and type of answers for the questions. When a job is posted on the community, the form is populated to the manager posting it. The filled form is then displayed to the vendors while viewing the job details. The instruction form looks as follows.
Step 4 - Add attachments
Finally, you can add any additional information and supporting attachments to the job.
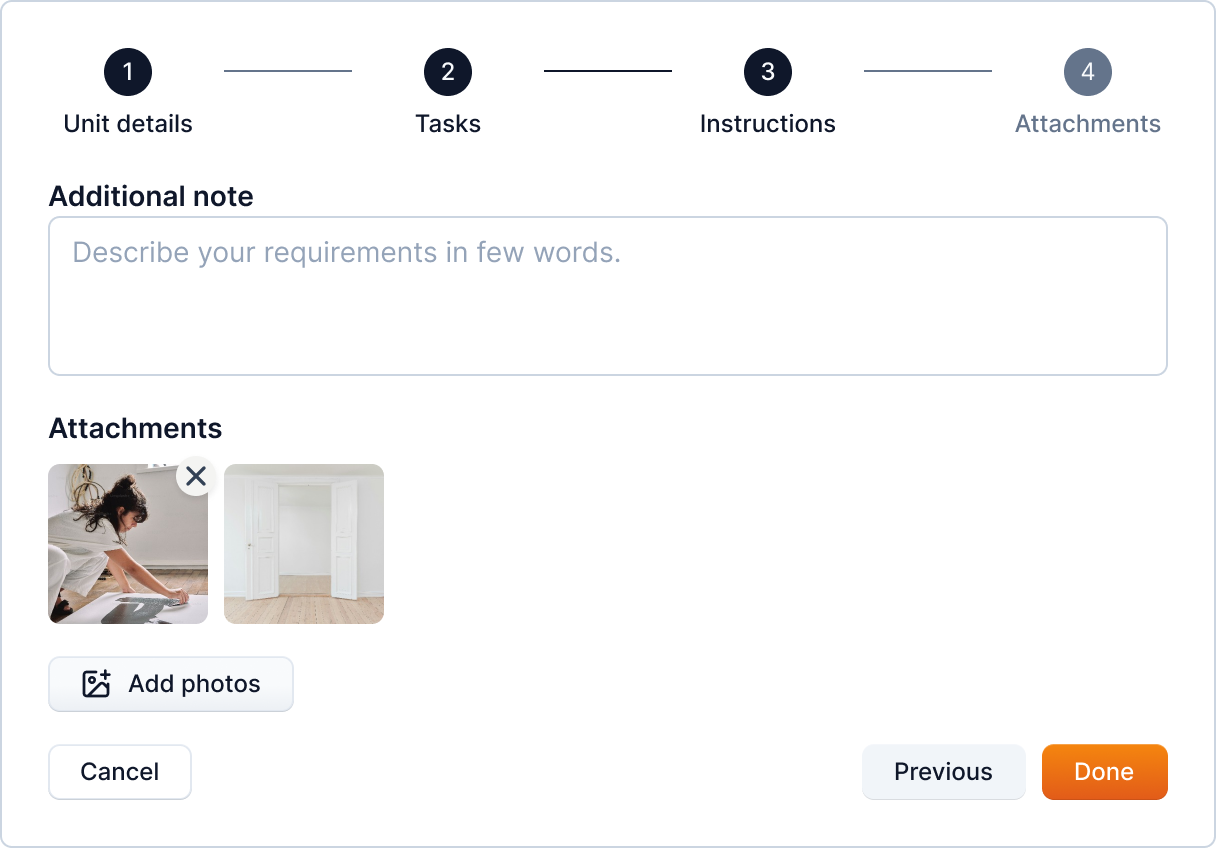
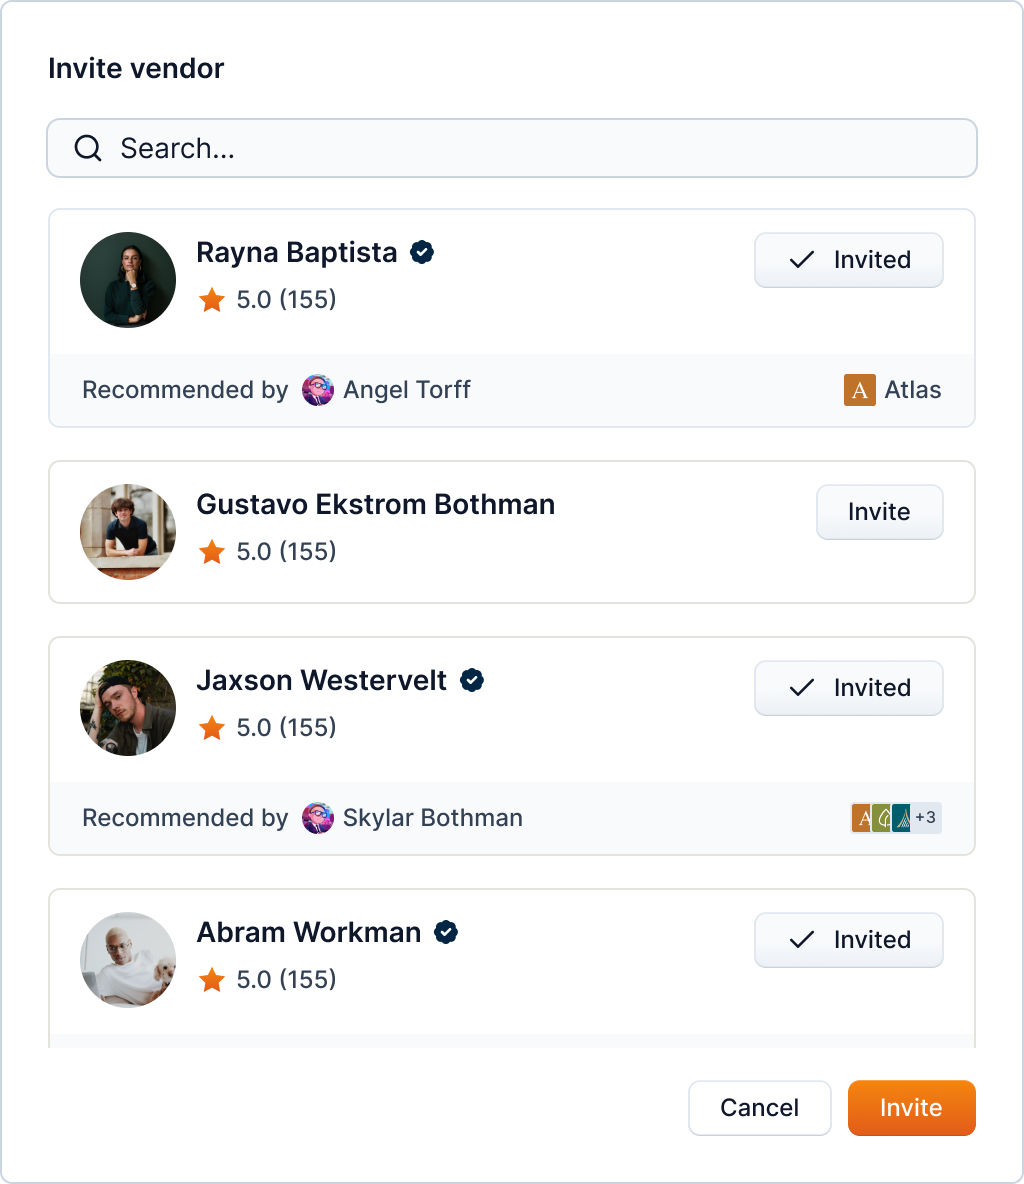
As an optional step, you can also invite vendors to bid on the job.
Once you complete this step, the job cell changes to "Job posted" status.
By clicking on the cell, you can view the job details.
Proposals
When there is a proposal on a job, the status of the job changes to "Proposals" as follows.
TODO: Confirm the following Click the proposals status chip to view the proposals.

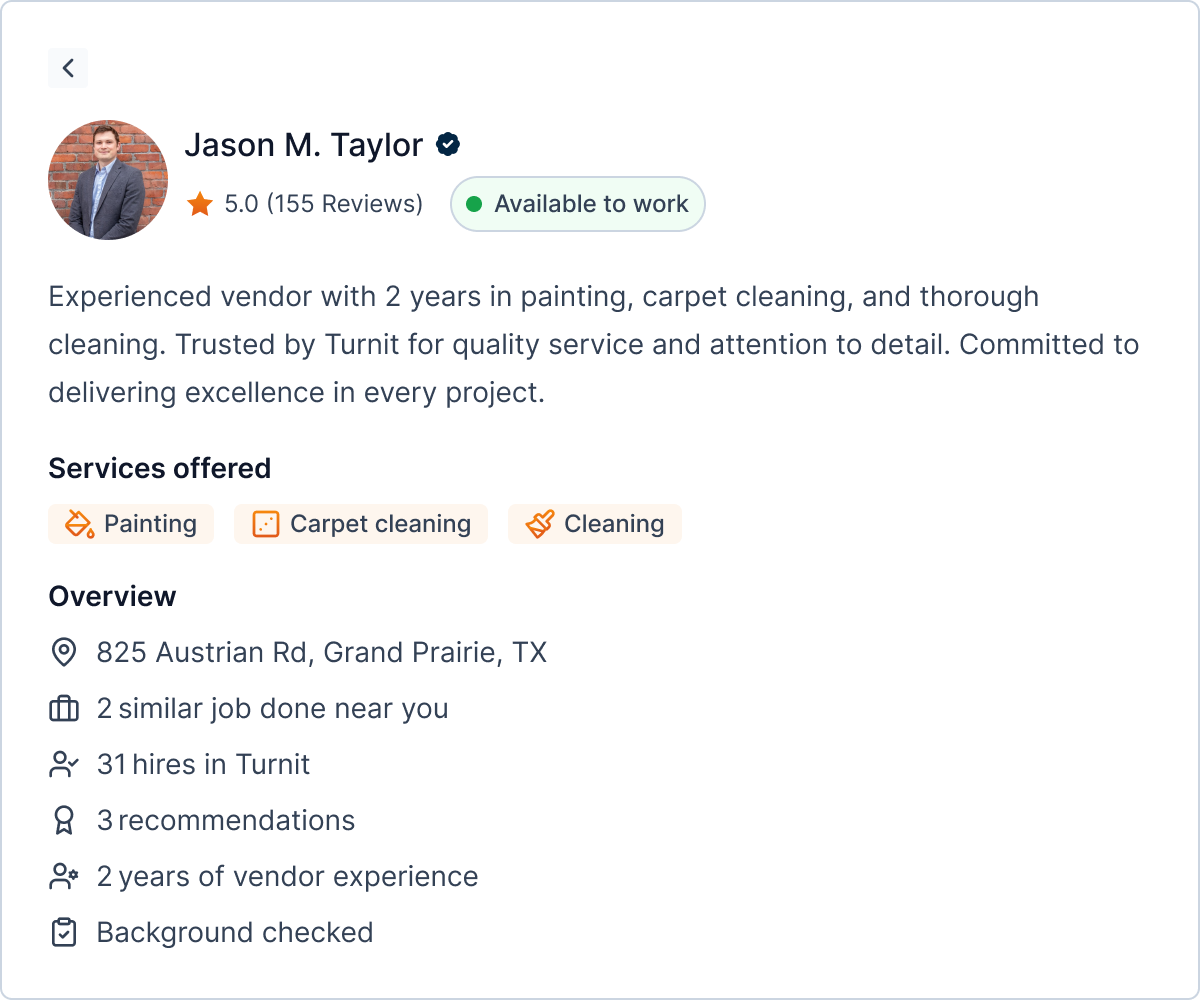
You can also view the details of the vendor by clicking the "View details".
Info
Not all users can hire vendors
By clicking the "Hire" button on the bid list, you will hire the vendor for the job.
This will change the status of the job to "Scheduled" if the job's start date is in the future. Otherwise, it will be "In progress".
Price Change History
You can find the price change history and any pending request from the "Price change request" tab in the job details.
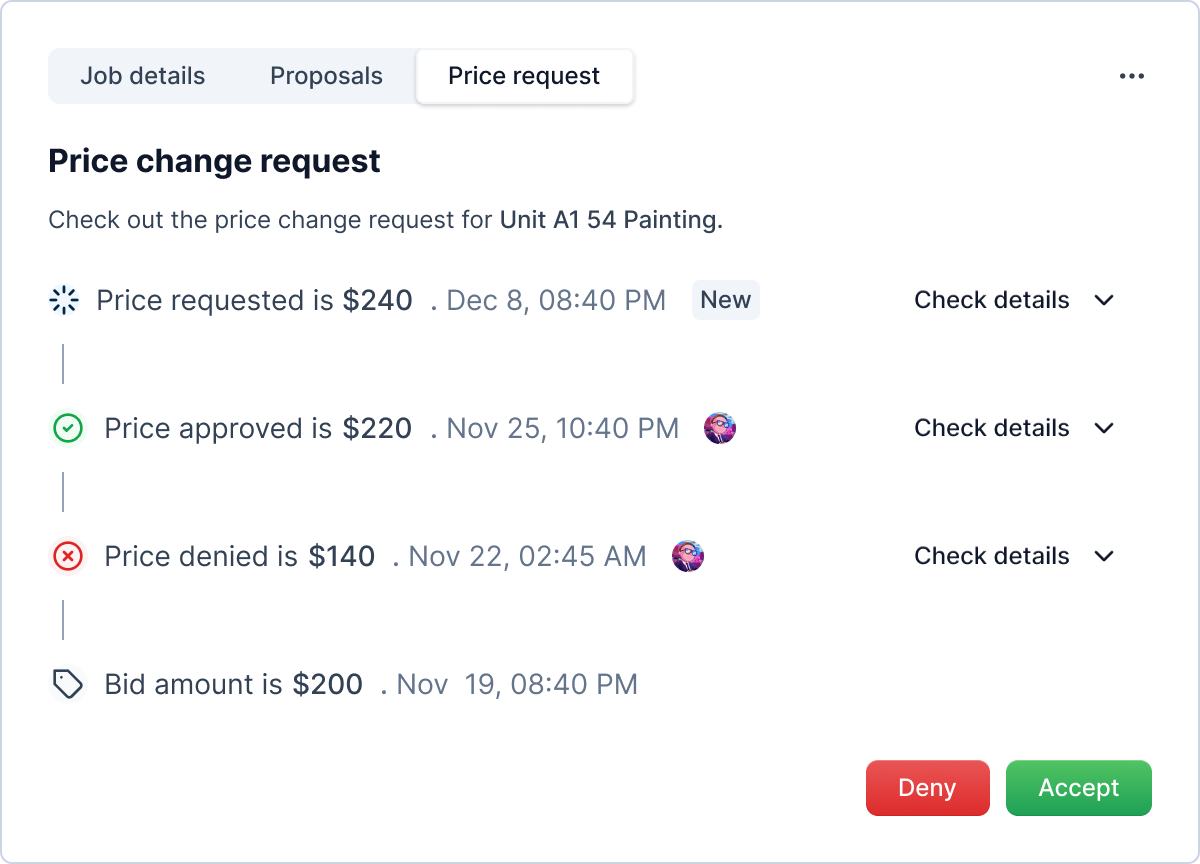
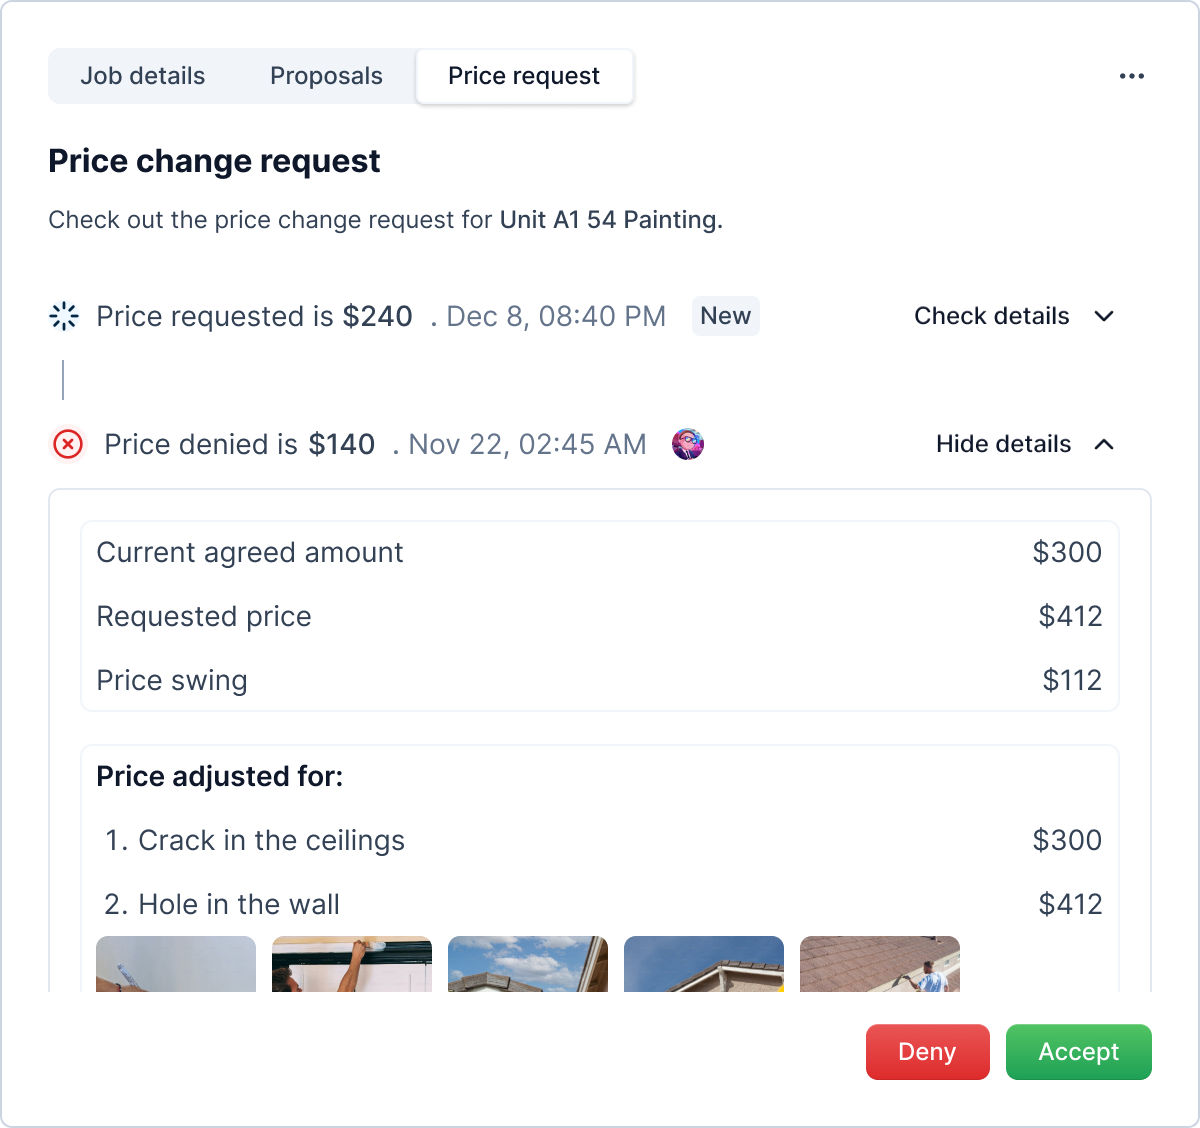
You can check the details of the price change request as sent by the vendor by expanding each request using "View details" link.
Price Change Request Actions
Info
Not available to all users
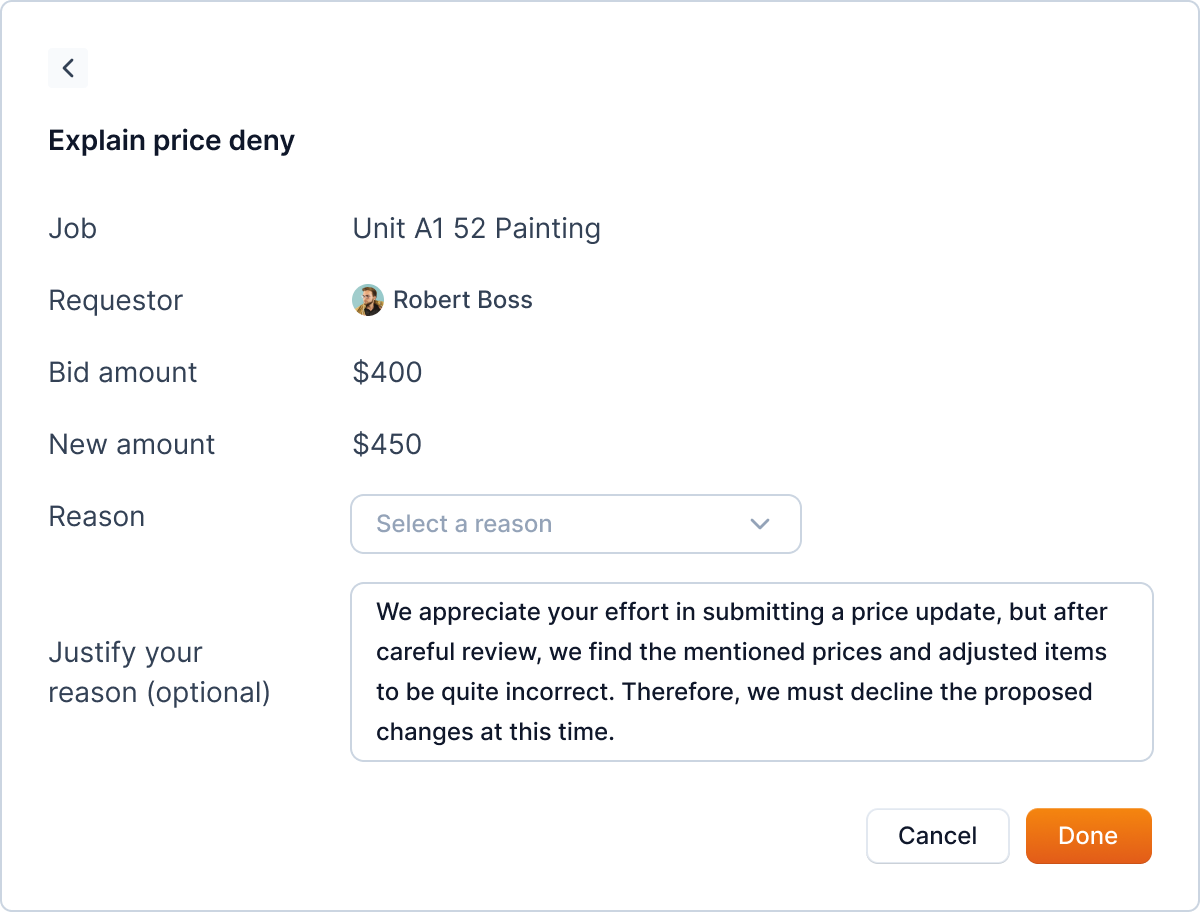
If there is any pending request, you will see two buttons "Deny" and "Accept". As the name suggests they deny or accept the price change request.
Upong denying, you will be asked to provide reason.
Note
Some requests are denied automatically, when a vendor send another price change request while one being pending. Likewise, when a job is completed with a pending request, it will be denied by the systems.
Such requests don't have a vendor avatar (e.g. ![]() ).
).
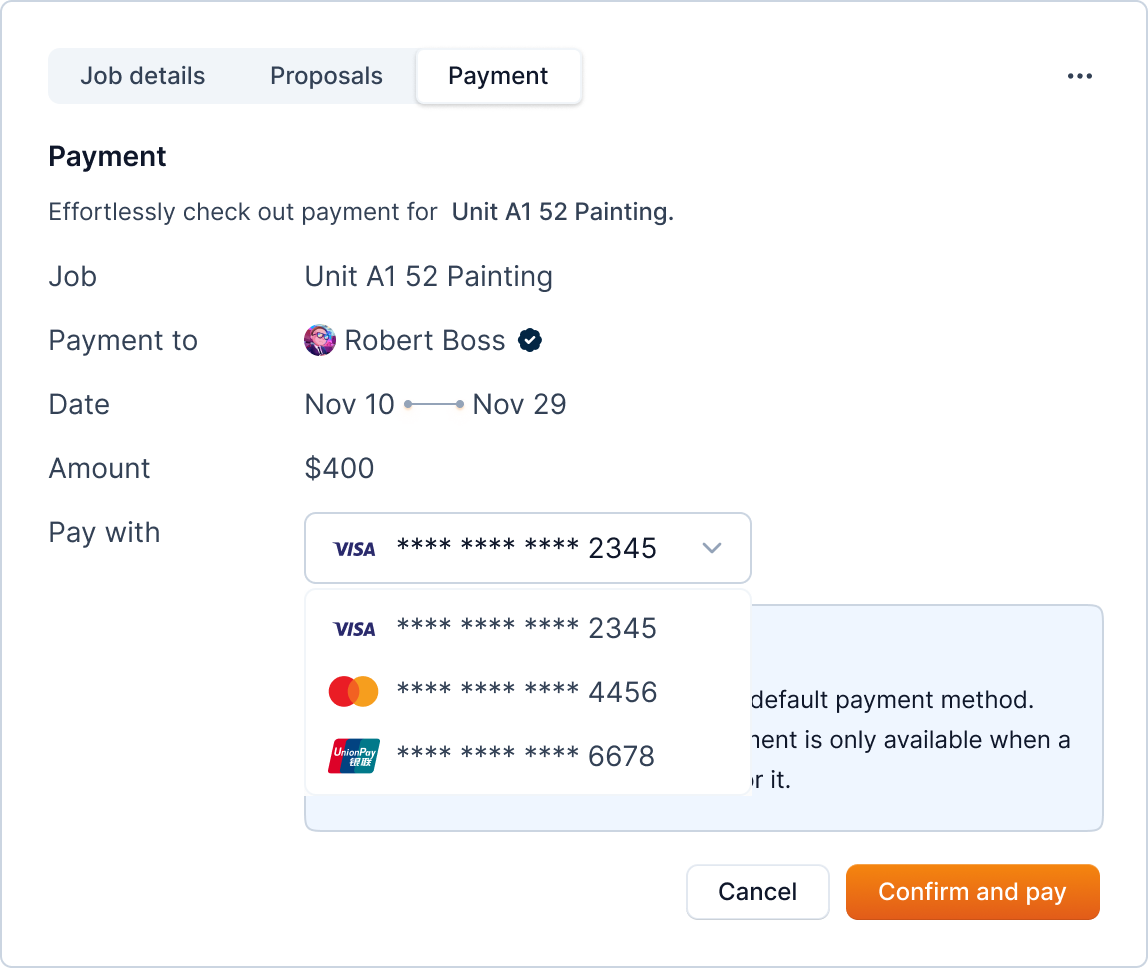
Payment
A new tab "Payment" will be available once the vendor is eligible for getting paid. As of now, the vendor can be paid at any time after being hired.
Warning
In the future, vendor might only be paid only after the vendor requests payment.
Ended: Vendor Services
Turnover Actions ↵
Edit and Delete Turnover
Info
Not available to all users
You can update information of the turnover after you have created the turnover. To start editing, click the three-dots icon in Moveout unit cell.
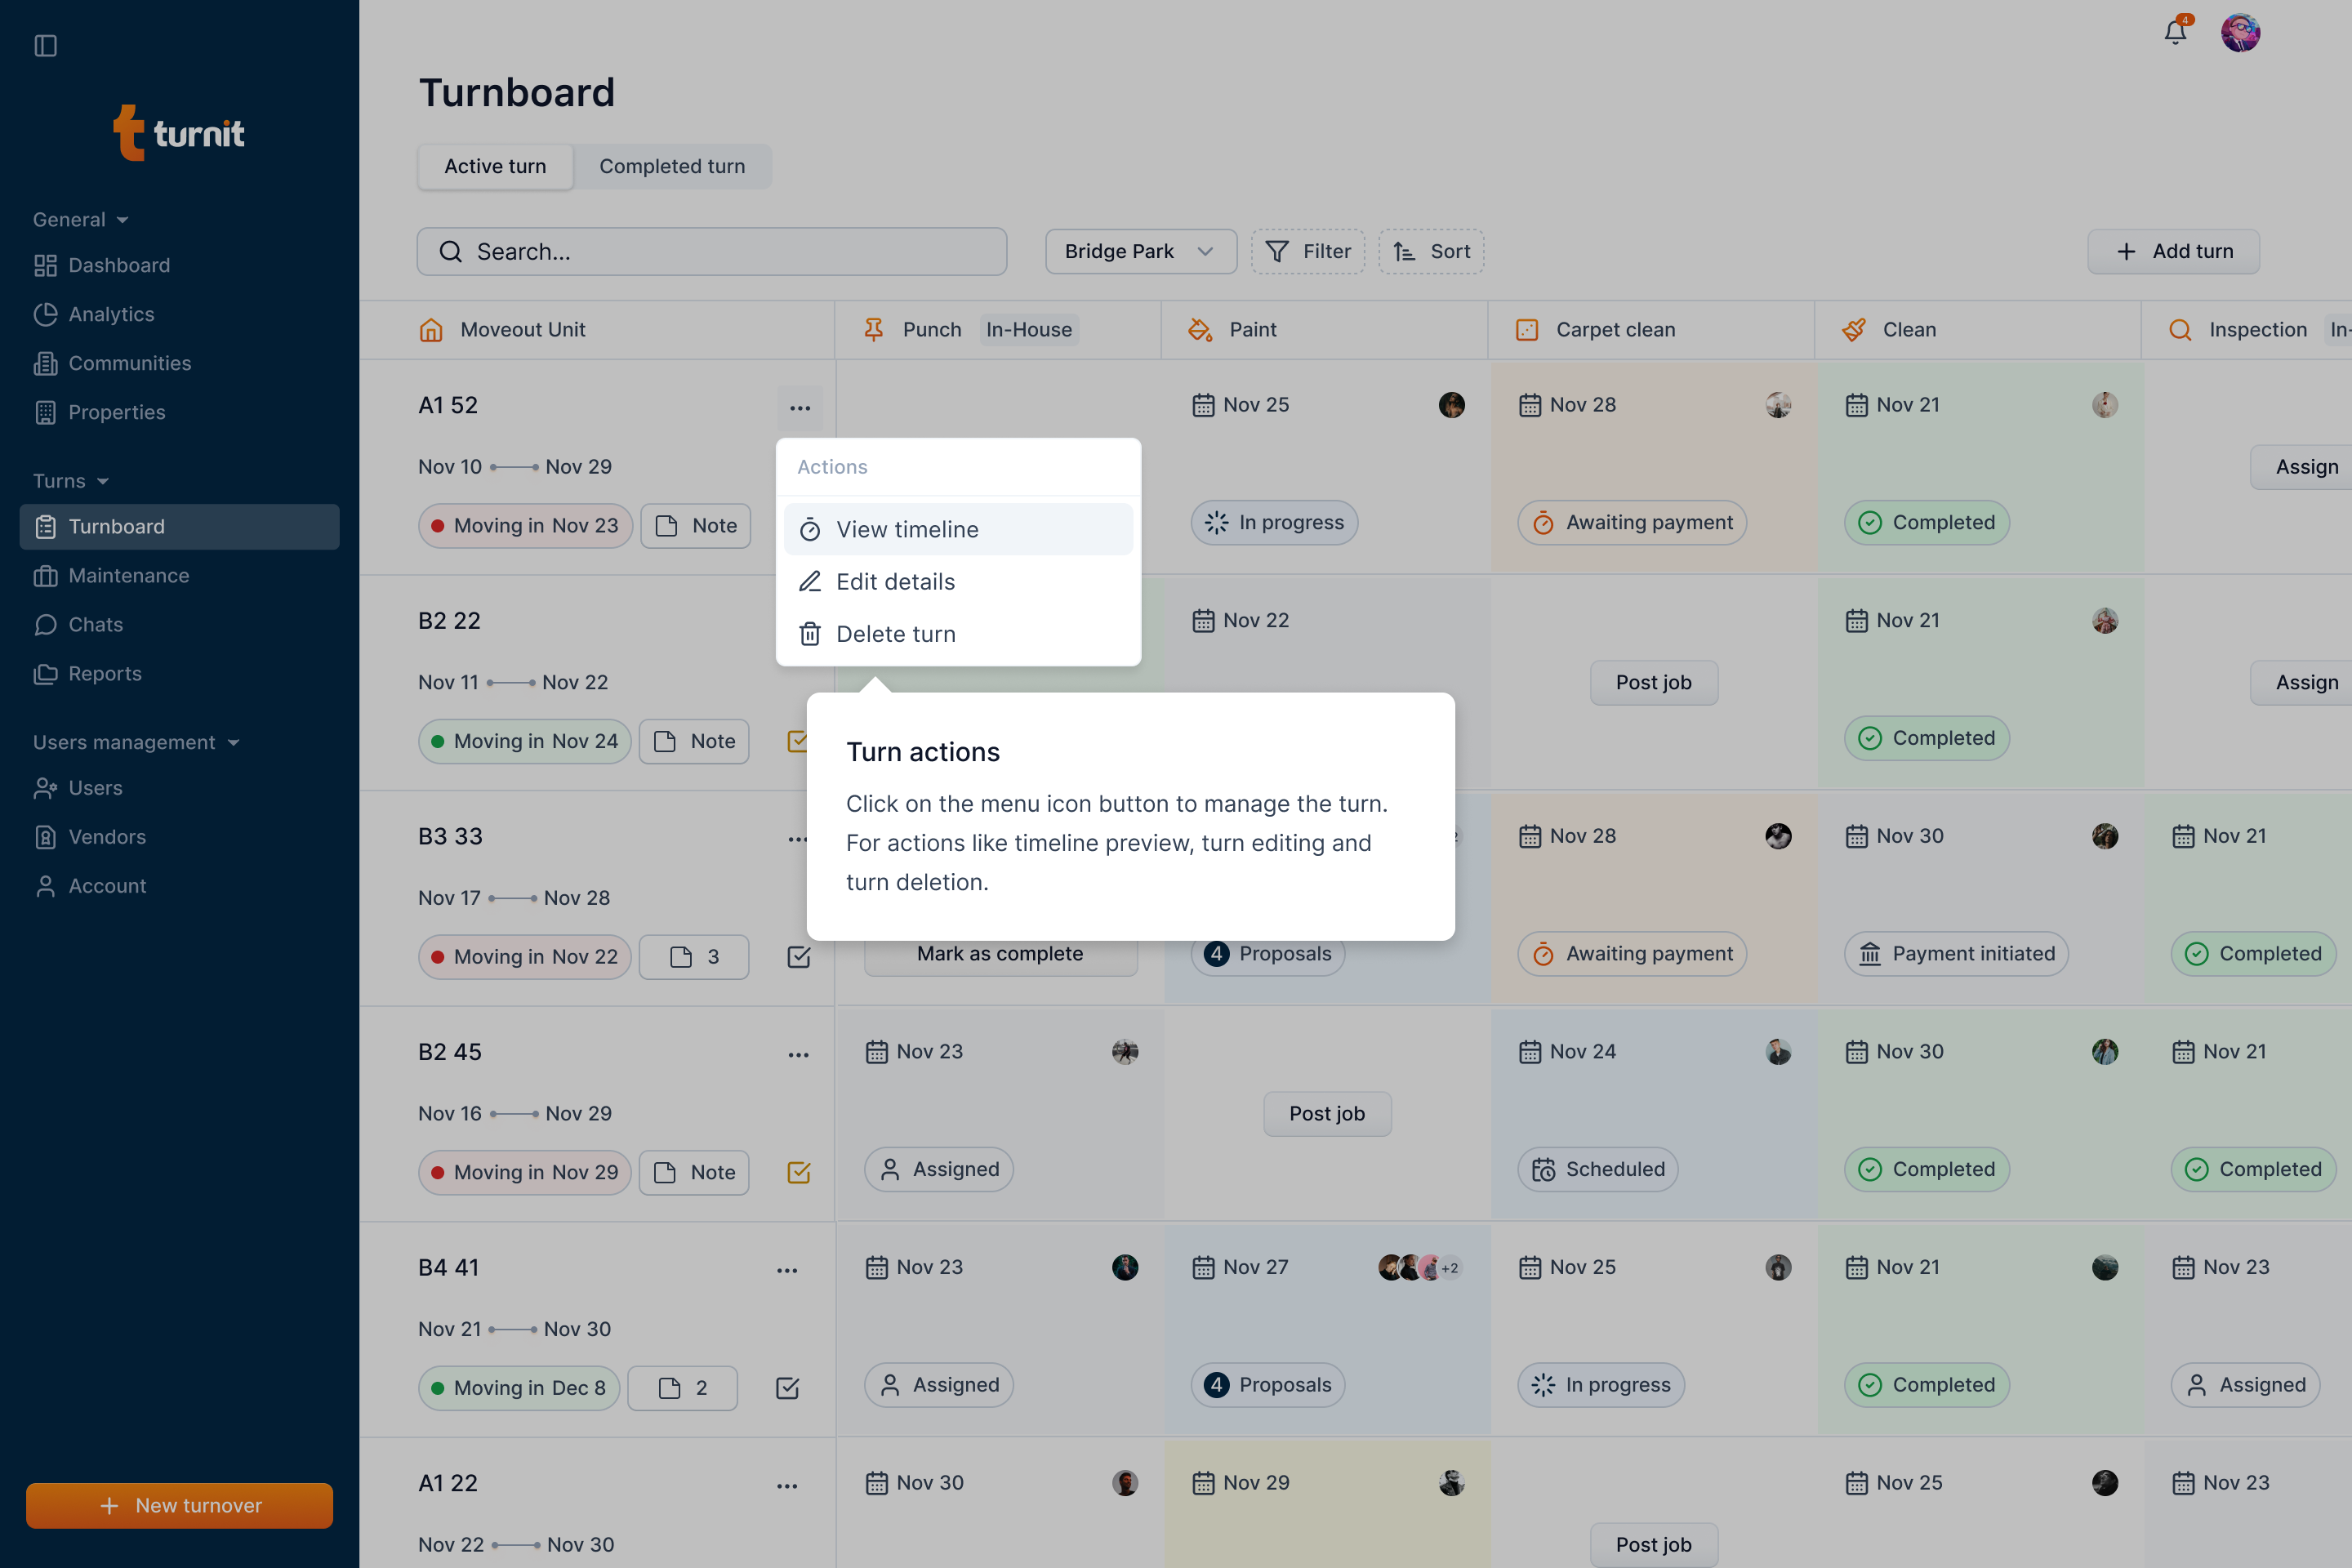
Here, you can select edit option to open the popup.
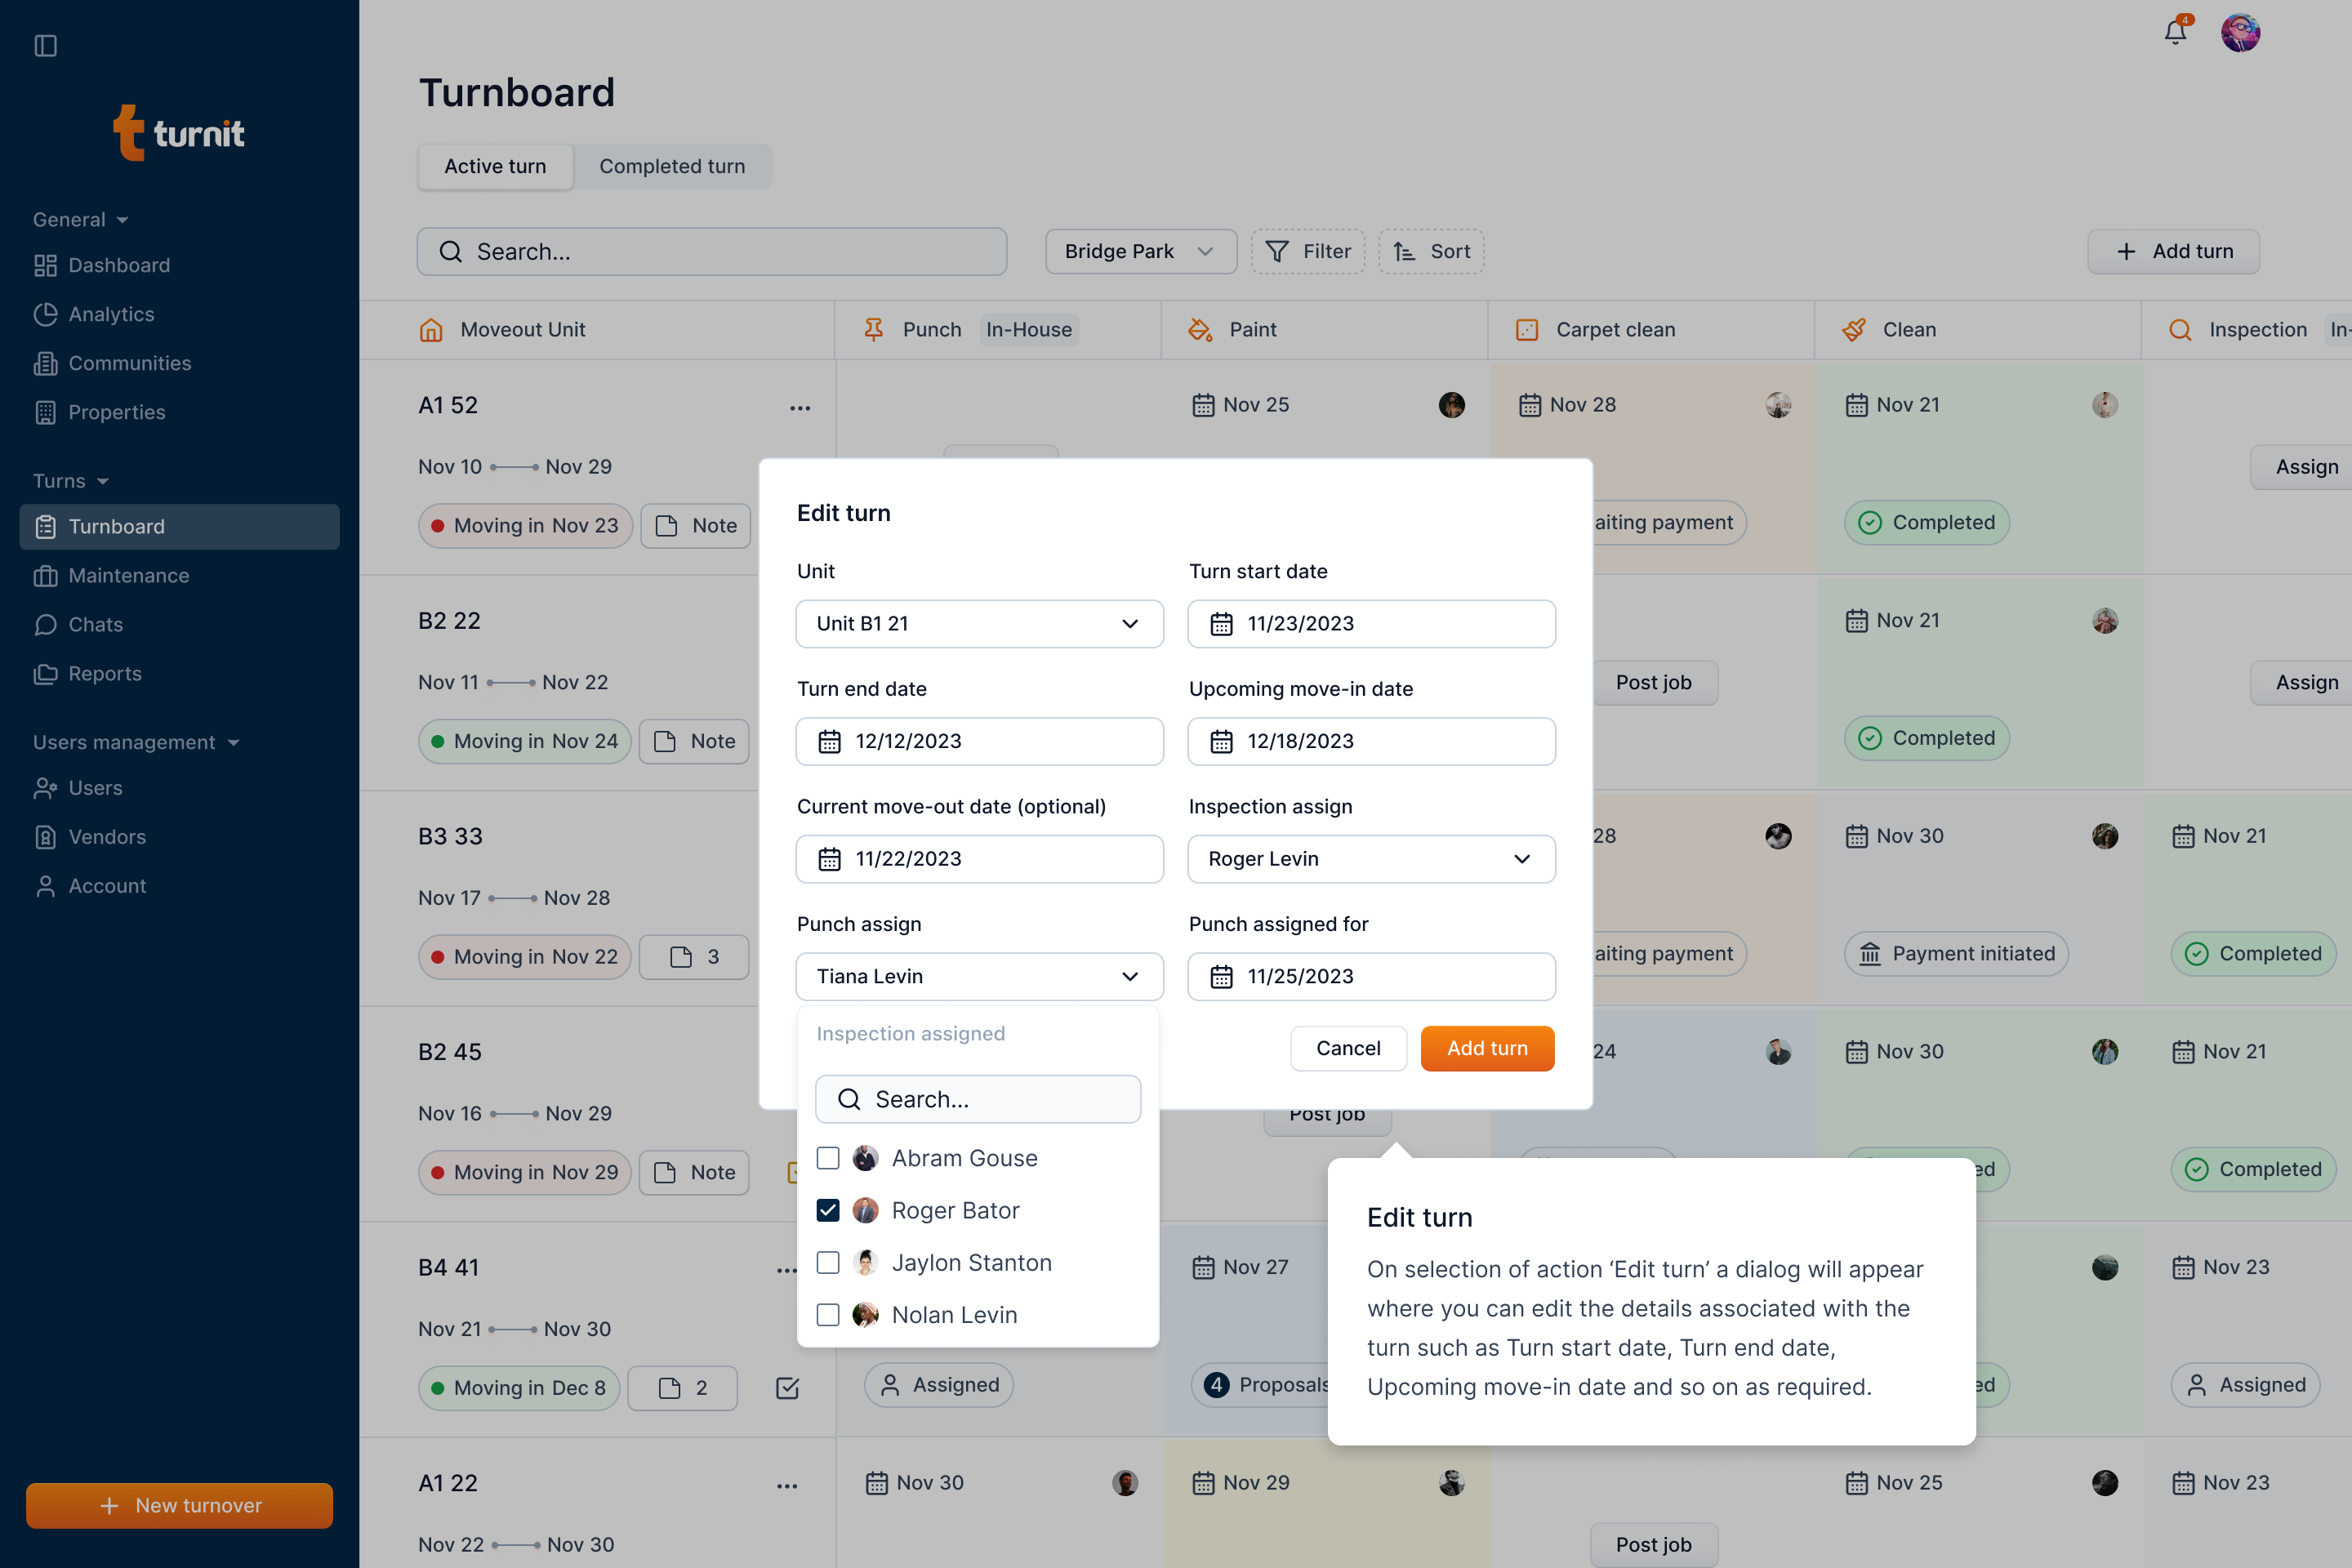
Fields in the "Edit Turnover" Form
Unit Details (Required)
- Property – Select the property from the drop-down list.
- Unit – Choose the unit where the turnover is happening (only units in the current community will be available).
- Expected Turnover Duration – Pick a date range that indicates the expected time needed to complete the turnover.
- Upcoming Move-in Date – Select the date when the new tenant is expected to move in.
- Current Move-out Date (Optional) – If applicable, enter the date when the previous tenant is vacating.
Punch Details (Optional)
- Punch Assigned for Date – Pick a date for when the punch will be scheduled.
- Punch Assign – Select an option from the dropdown to assign the punch work to a specific person or team.
Inspection Details (Optional)
- Inspection Assigned for Date – Pick a date for when the inspection will take place.
- Inspection Assign – Select an option from the dropdown to assign the inspection to a responsible party.
You can also delete the turnover if not needed using the delete option in the menu.

Turnover Timeline
You can view the history of all actions of a turnover as a timeline. For this, click the three-dots menu.
Click the view timeline option.

In the timeline, the date is the actioned date. For example, for an event of hiring a vendor, the date represents when the manager hired the vendor in turnit.
Similarly, for the completed turnover event, the date implies when the manager completed the turnover in Turnit. Even though manager backdates the turnover completion time, this actioned timed won't be changed since it represents the time when user performs the action in Turnit.
Ended: Turnover Actions
Ended: Turnover
User Management ↵
Introduction
Turnit offers users management through "Users" navigation.
Users can be Property Manager, Executive Property Manager, or Service Professional.
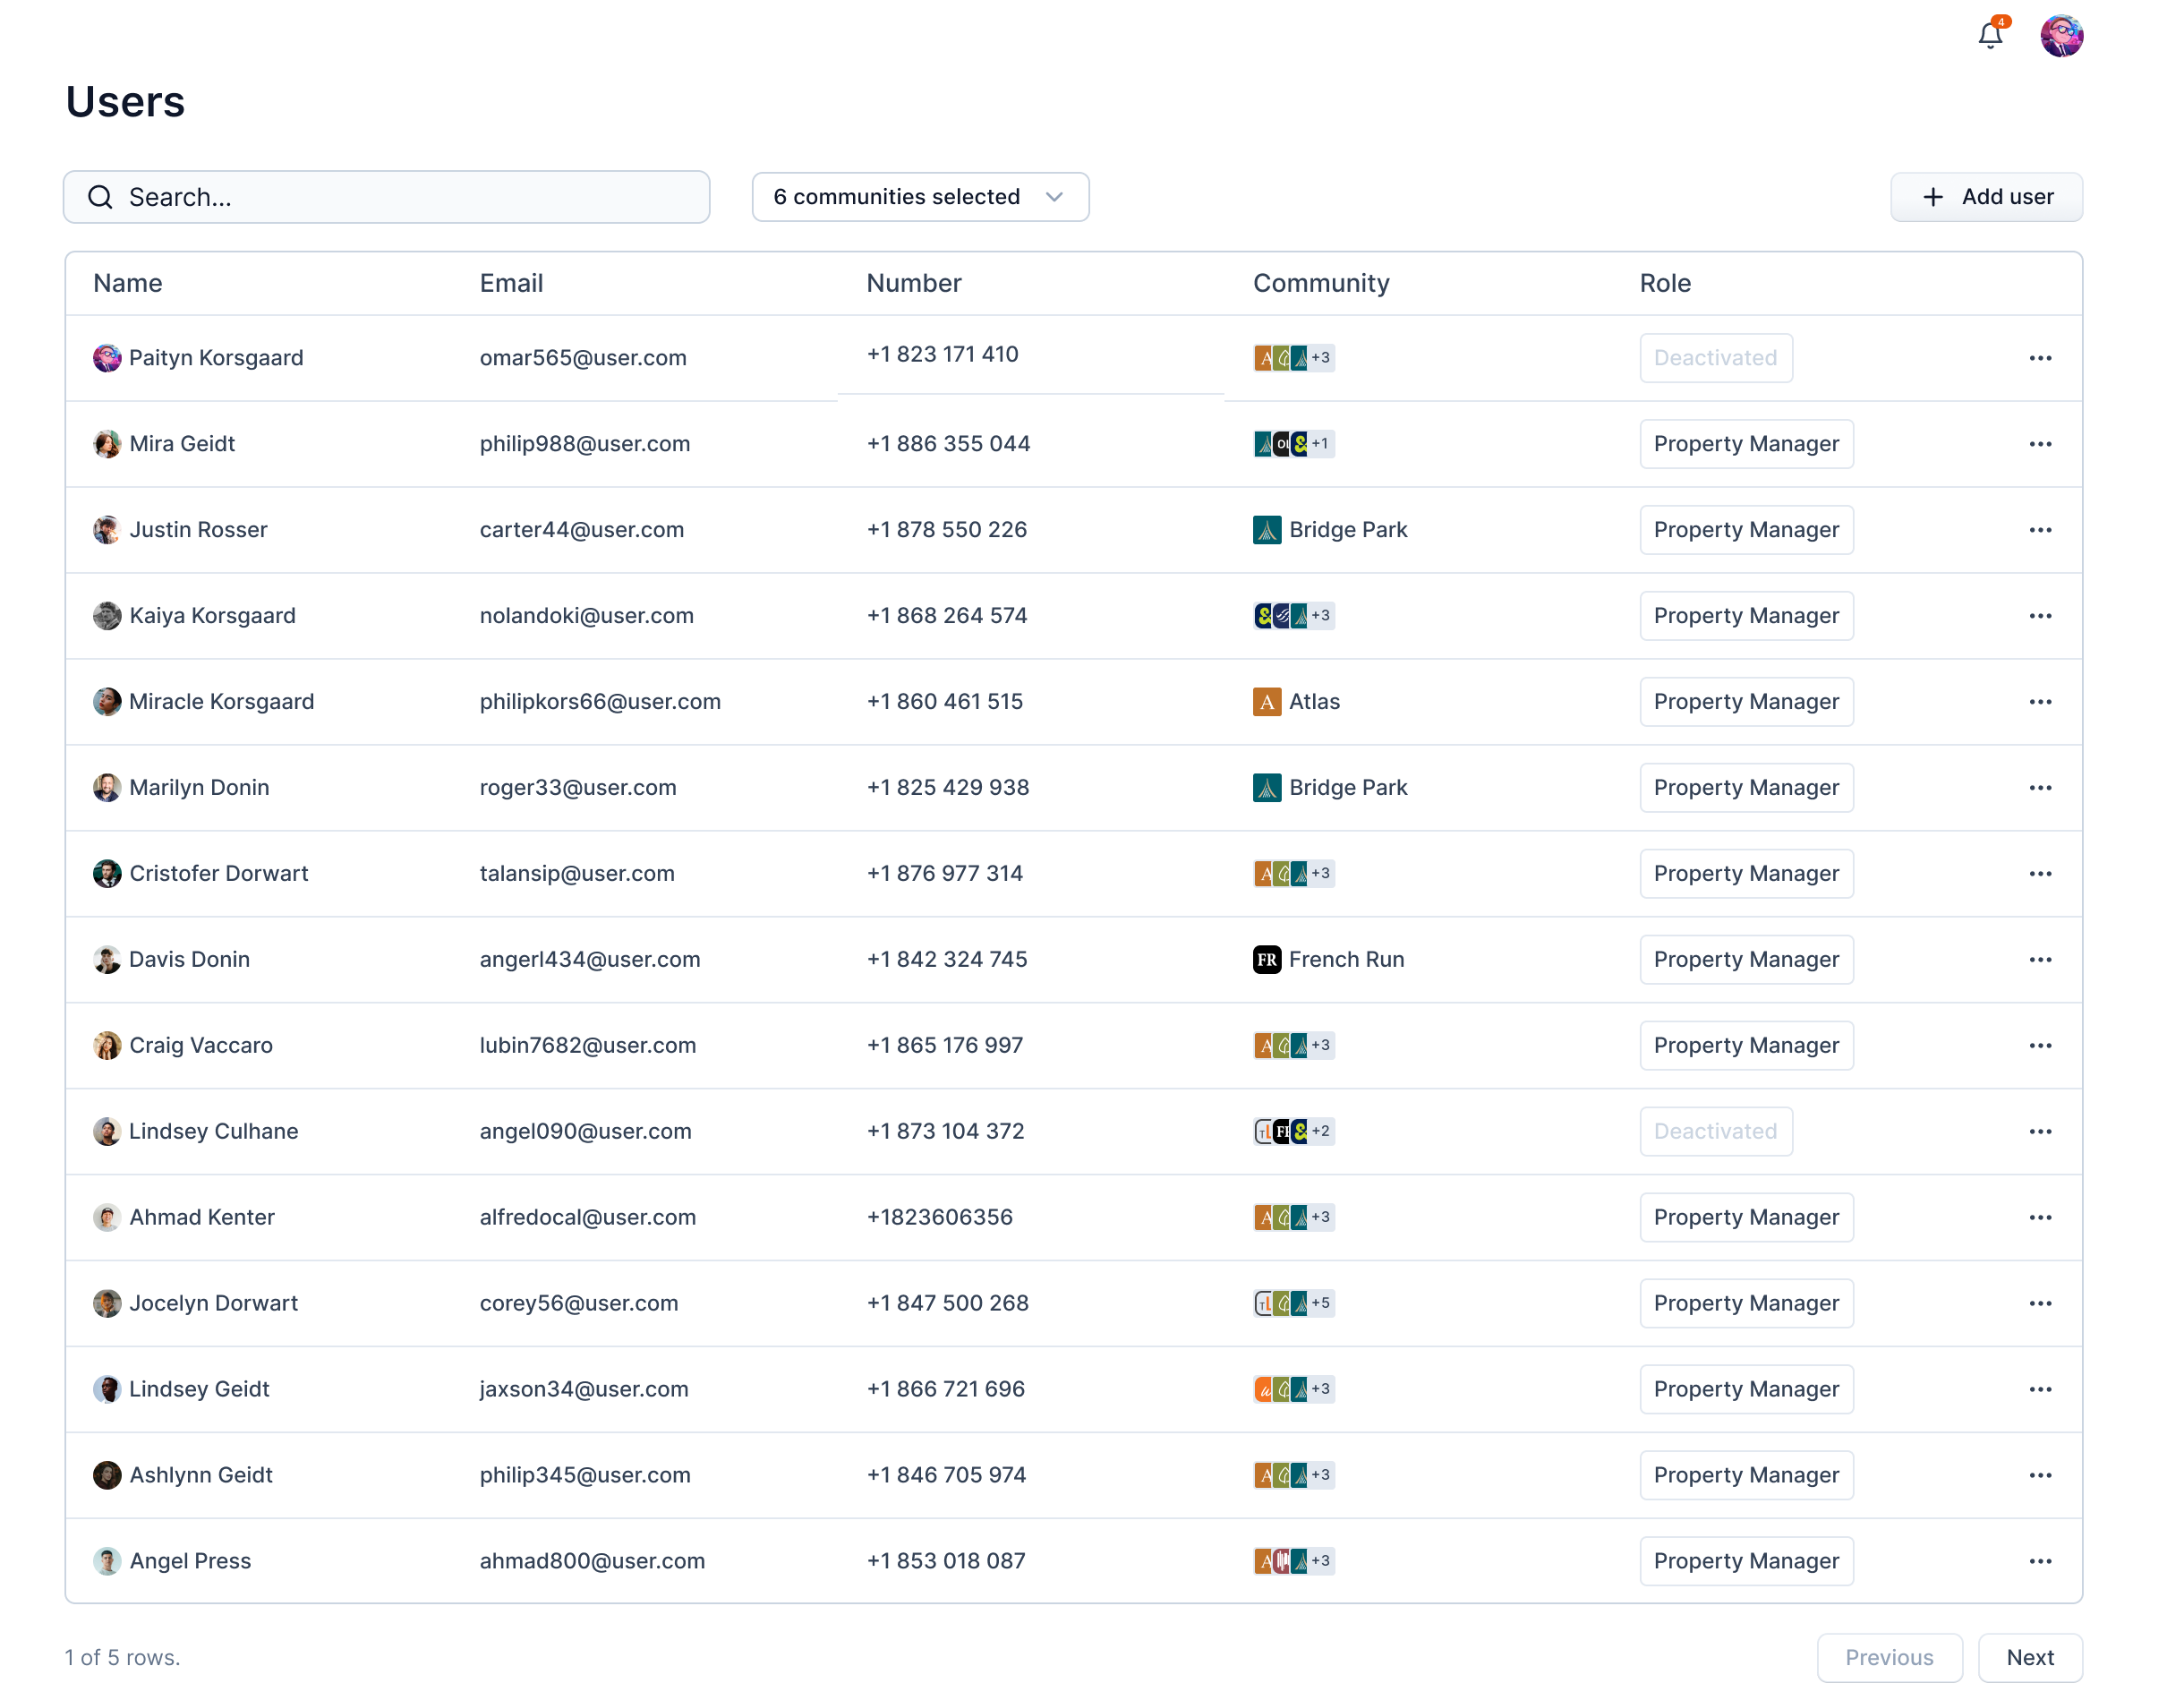
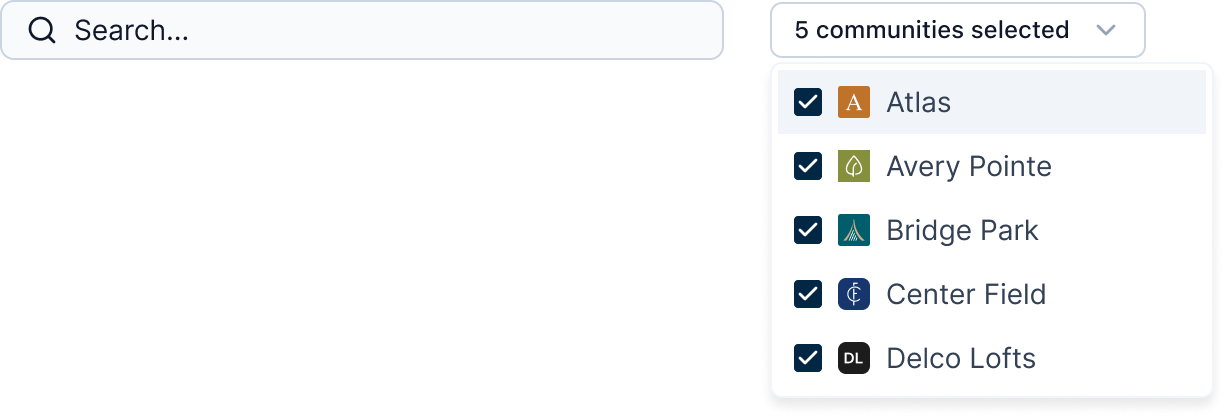
Search User
To search for a user, you can enter the user's name in the Search field, and select the communities from the community drop-down list next to the search bar.
Add User
Info
Not available to all users
To add a user, click the "Add user" button.

After clicking the button, a form will open in a pop-up. Here, you can enter the user's information.
Fields in the "Add User" Form
- Name: Enter the full name of the user.
- Email:Provide the user's email address.
- Number: Select the country code and enter the user's phone number.
- Role: Choose the appropriate role for the user. The available roles are:
- Property Manager
- Executive Property Manager
- Service Professional
- Community: Assign the community to the user from the drop-down list.
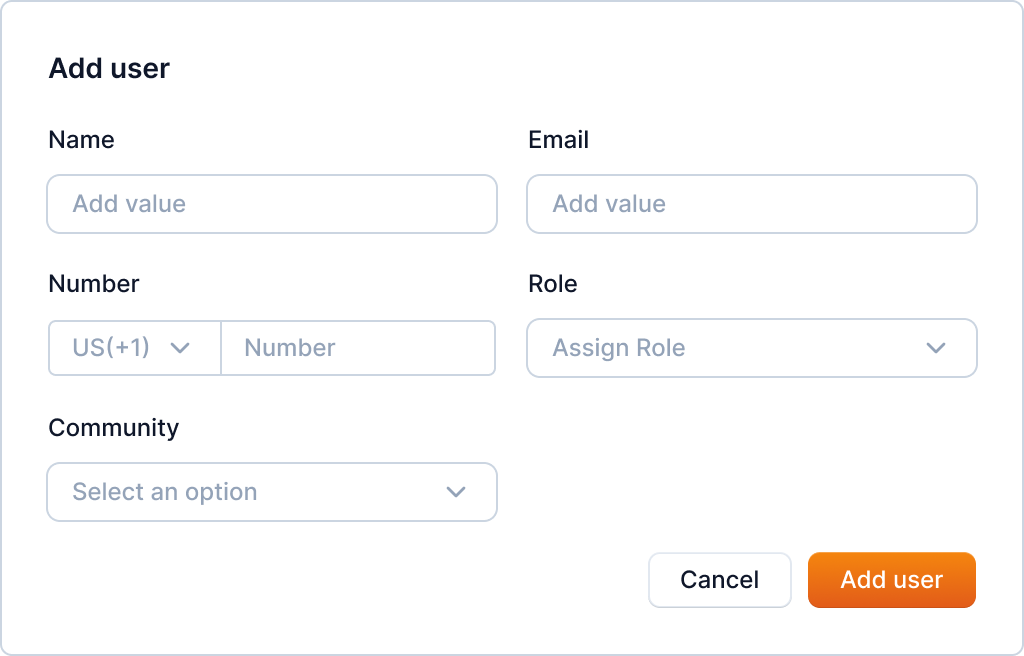
Enter the user's information and click the "Add user" button to add the user.
Note
The role can be Property Manager, Executive Property Manager, or Service Professional.
Edit and Delete User
Info
Not available to all users
You can update information of the user after you have created the user. To start editing, click the three-dots icon and select the "Edit" button.

After clicking the button, a form will open in a popup. Here, you can edit the user's information like Name, Email, Number, Role or Community.
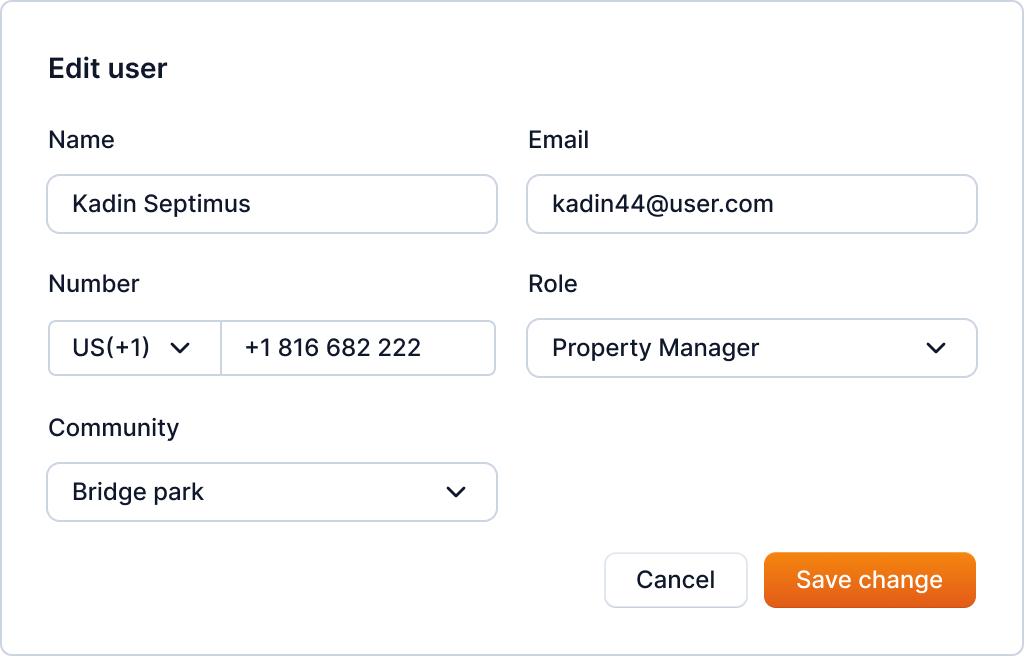
Enter the user's information and click the "Save change" button to update the user's information.
You can also delete the user using the delete option in the menu.
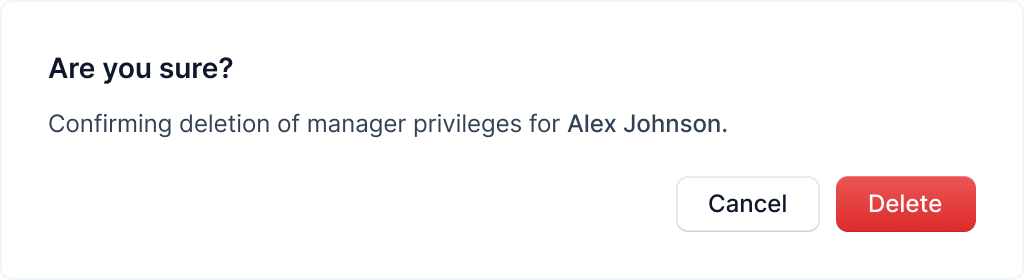
Click the "Delete" button to delete the user.
Warning
Deleting the user will delete all the data associated with the user. This action cannot be undone.
Ended: User Management
Vendor Management ↵
Introduction
Turnit offers vendor management through "Vendors" navigation.
You can view the vendors who have sent proposals to the community jobs. That's why not all vendors who have signed up in the system will show up in this page.
Furthermore, you can also search the vendors by their name, filter and sort the table by various fields. Similarly, it also offers you to make them your preferred using "Recommend" feature.
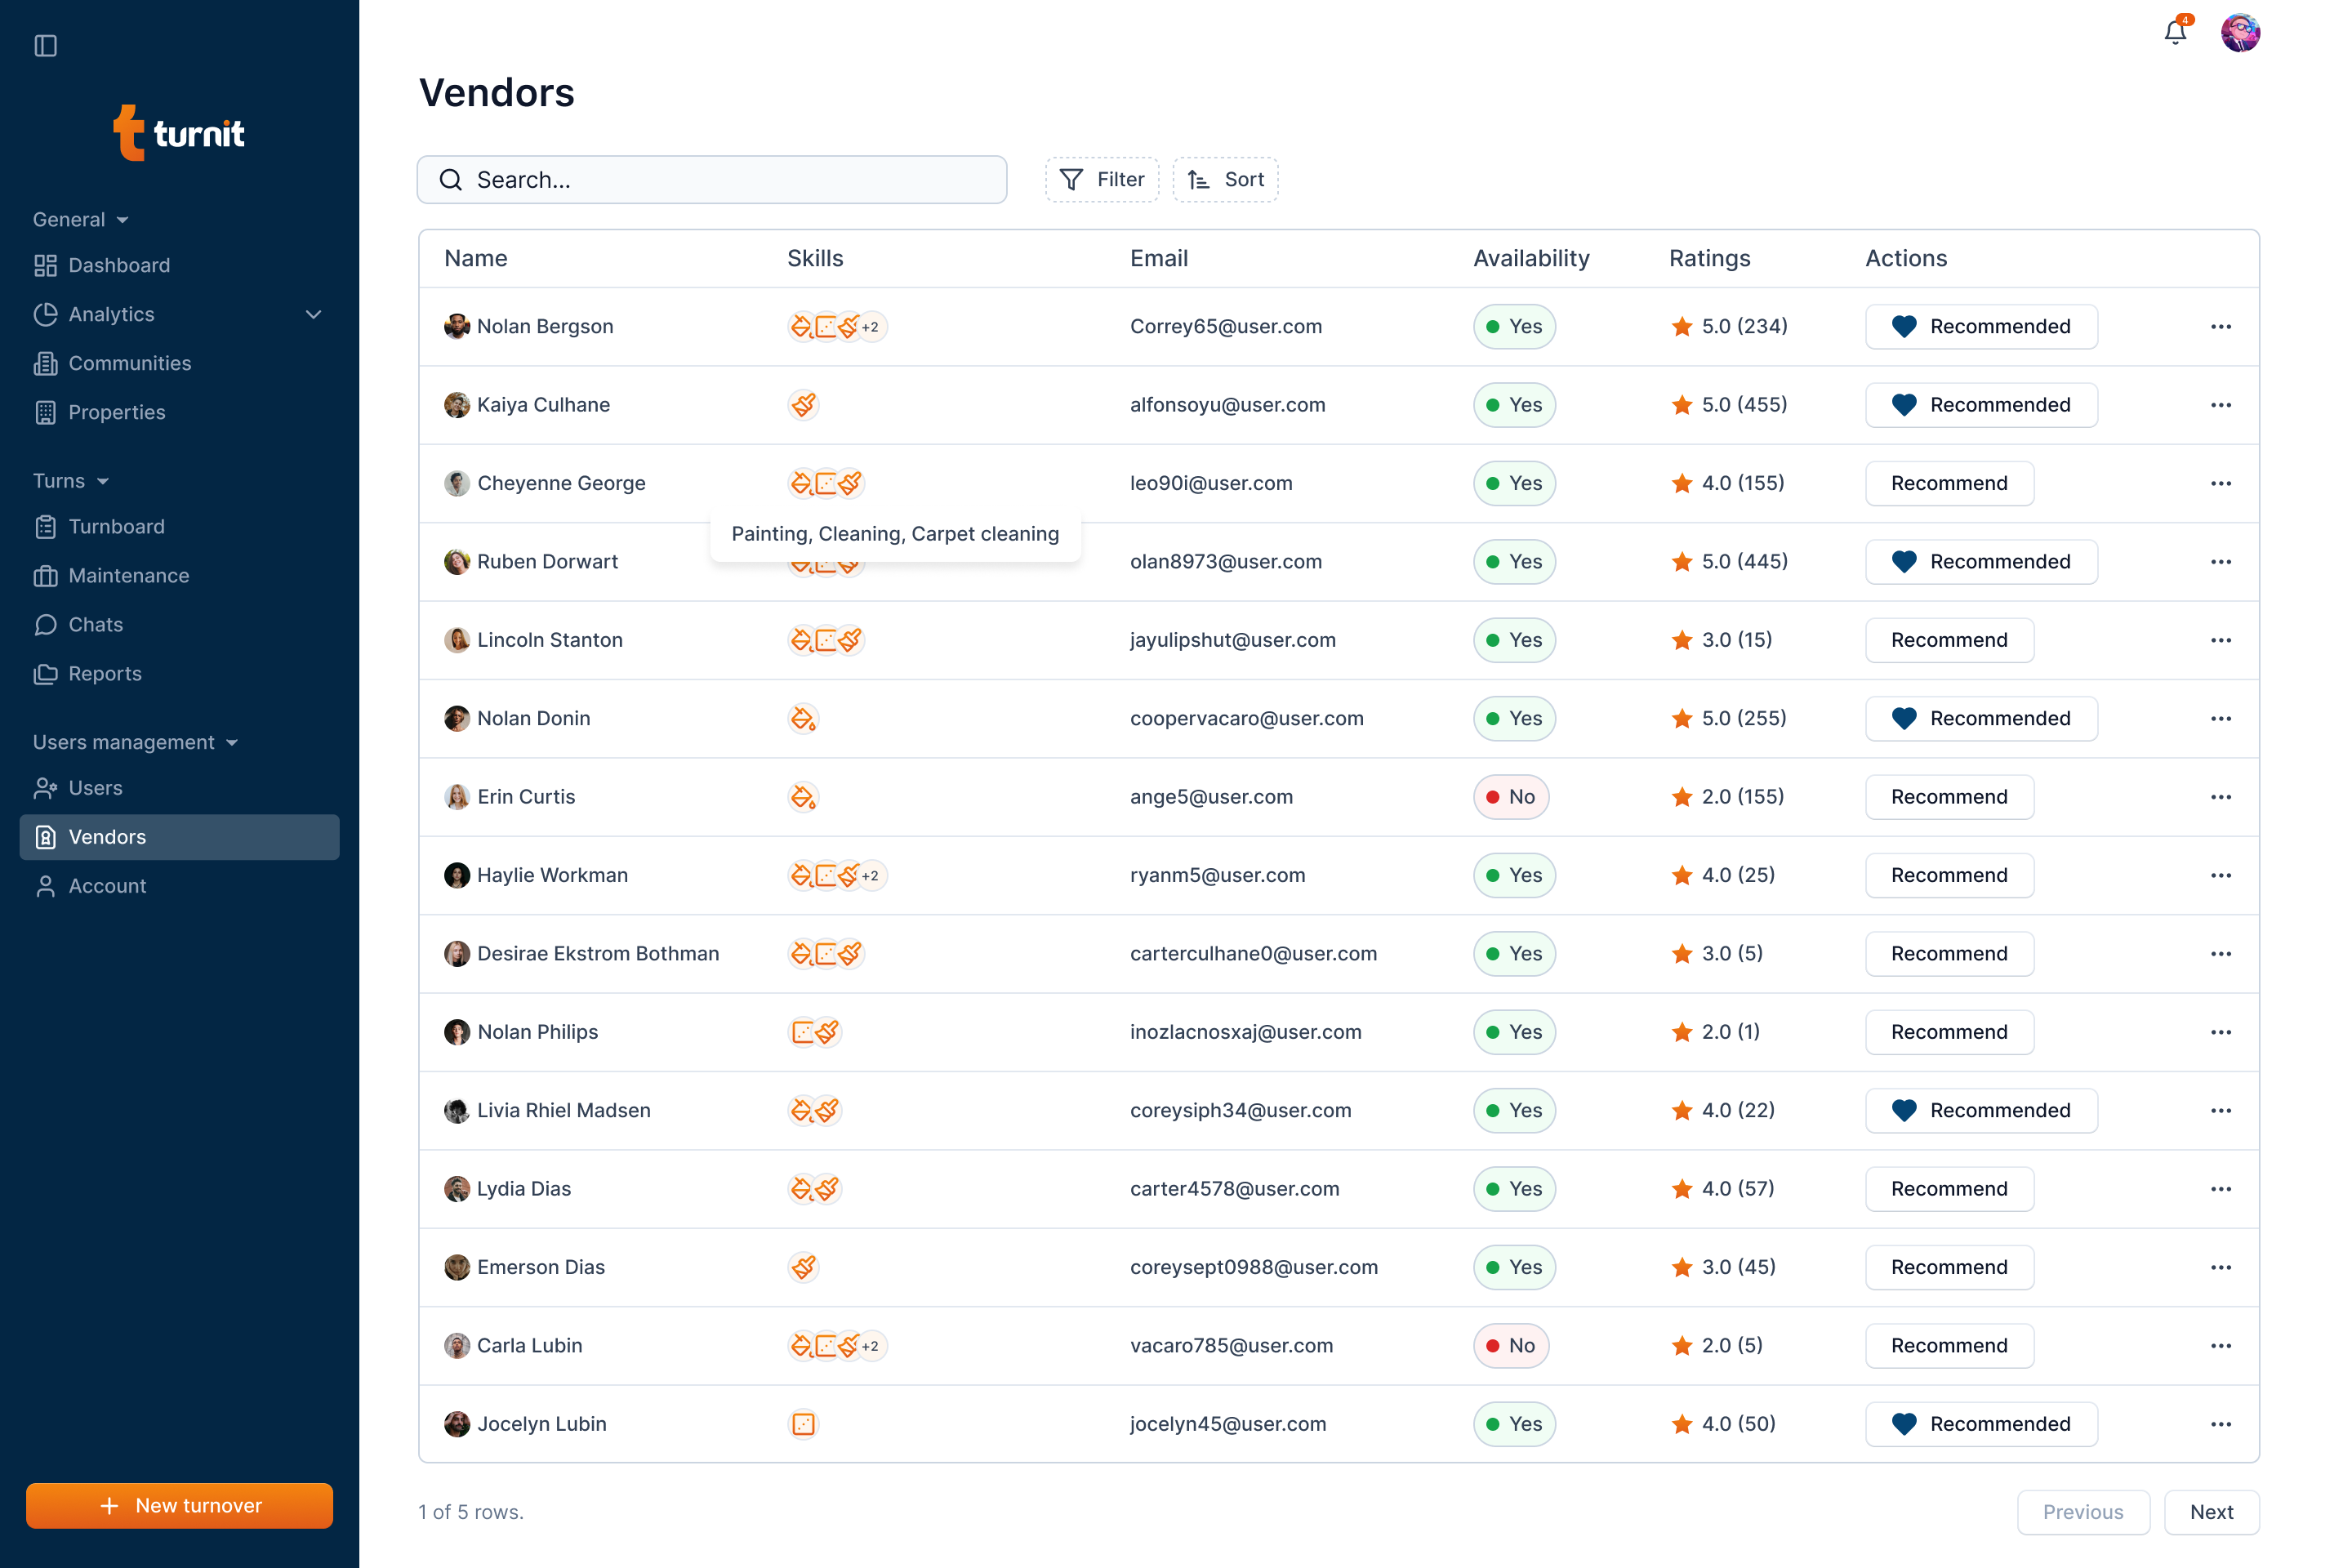
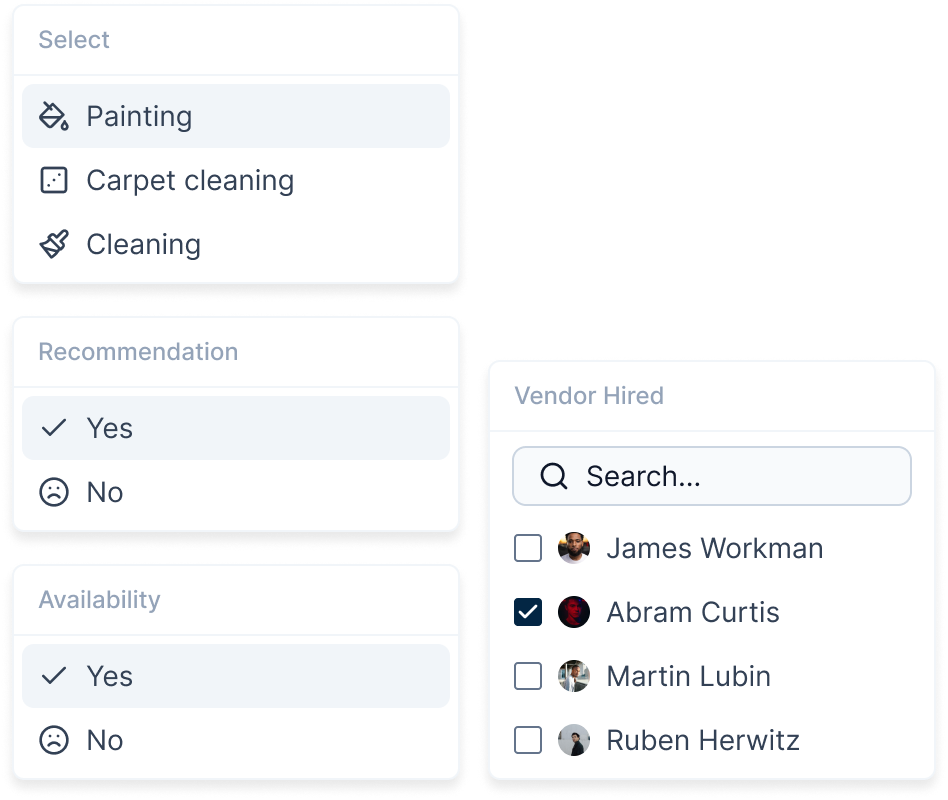
Search, Filter and Sort Vendors
You can search vendors using their first name and last name.

Furthermore, you can also filter the list and sort the list.
Recommend Vendors
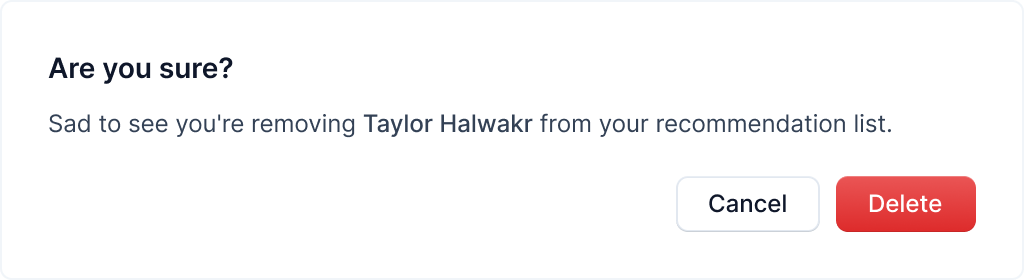
You can recommend the vendors for future jobs by clicking on the "Recommend" button on each row.
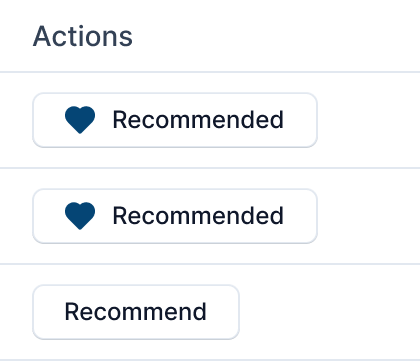
The recommended vendors will have a different style and clicking the same button will ask you to remove the vendor from the recommendation list.
Ended: Vendor Management
Analytics ↵
Overview
The Analytics module provides insights into turnover costs, job performance, vendor hiring times, and other key performance metrics. It supports both single and multi-community views:
- Single-Community Analytics: Displays data for an individual community.
- Multi-Community Analytics: Allows comparisons across multiple communities.
Single-Community Analytics
Overview
The Single-Community Analytics dashboard provides detailed insights into turnover metrics, job performance, and time-based analytics for a single selected community.
Key Sections and Visualizations
1. Key Performance Indicators
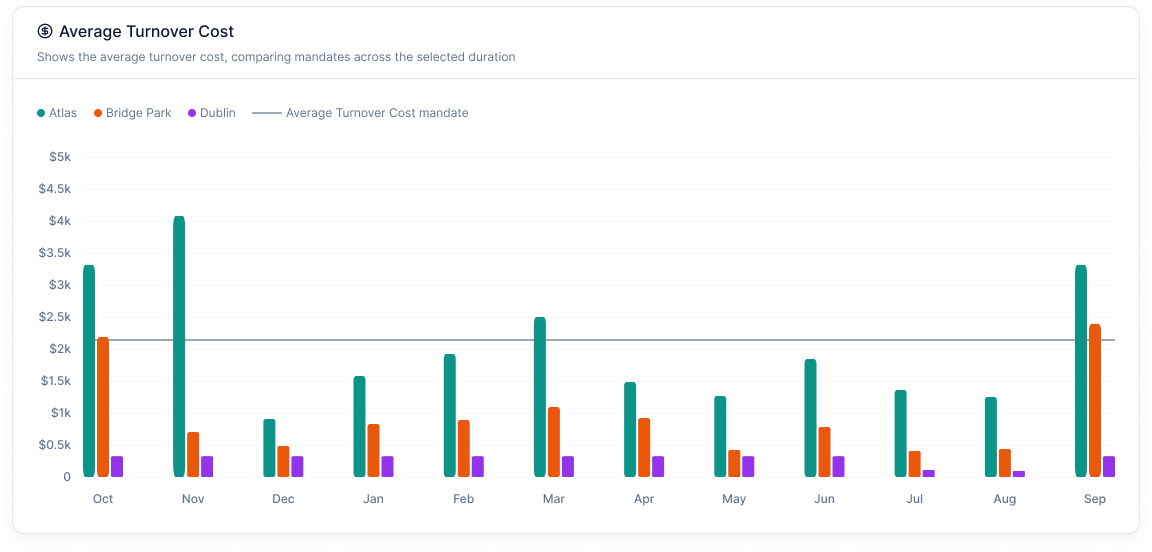
- Average Turnover Cost: Displays the cost associated with turnovers for the selected duration, with a comparison to the previous month.
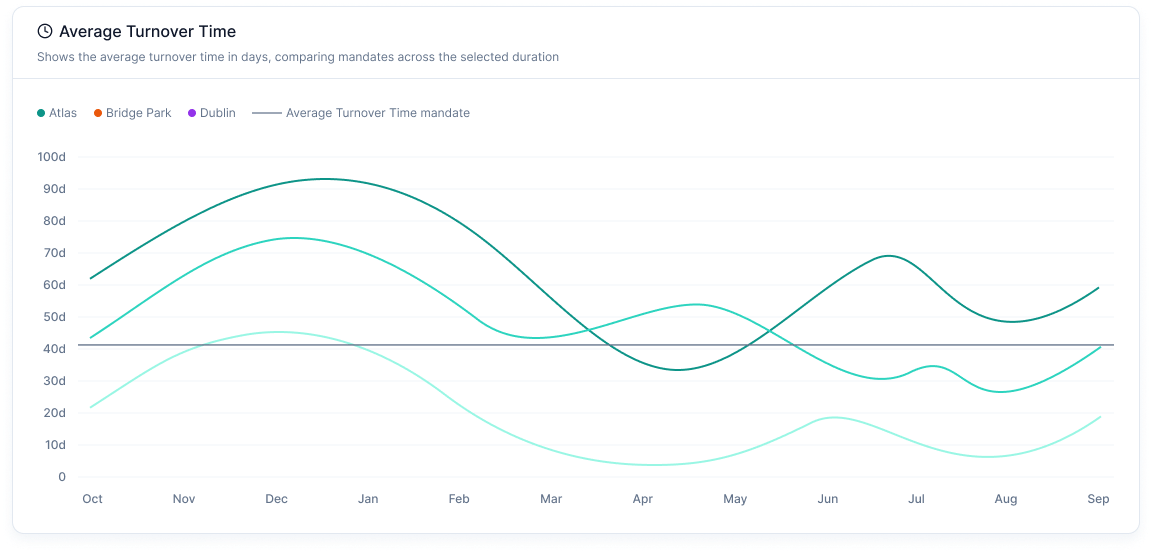
- Average Turnover Time: Shows the average duration taken for turnovers, highlighting changes from the previous month.
- Average Vendor Hiring Time: Indicates the average time taken to hire vendors, with percentage change from last month.

2. Turnover Metrics
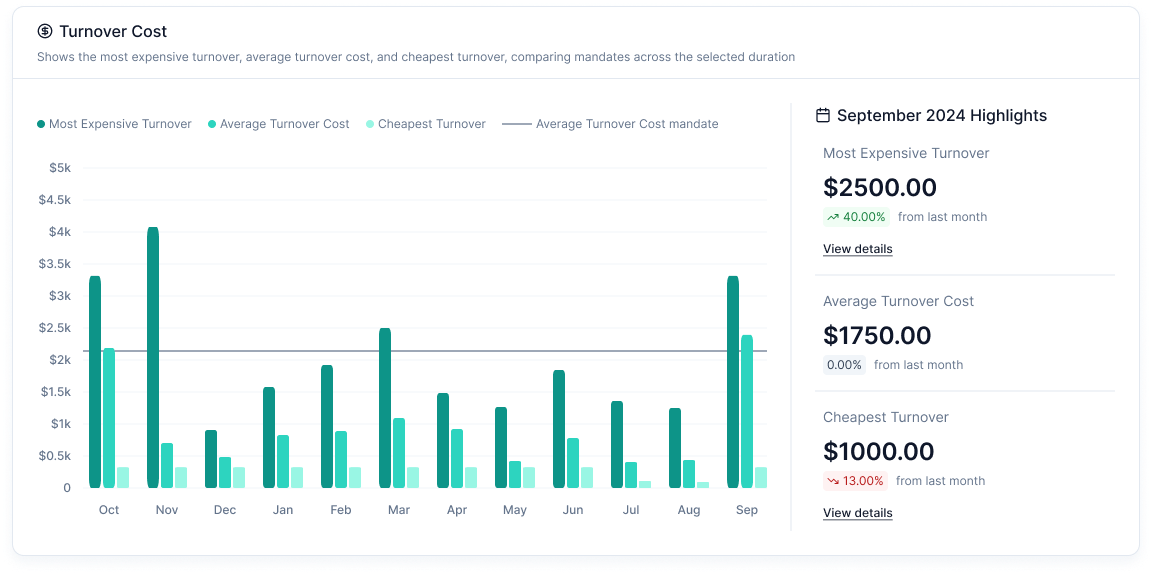
-
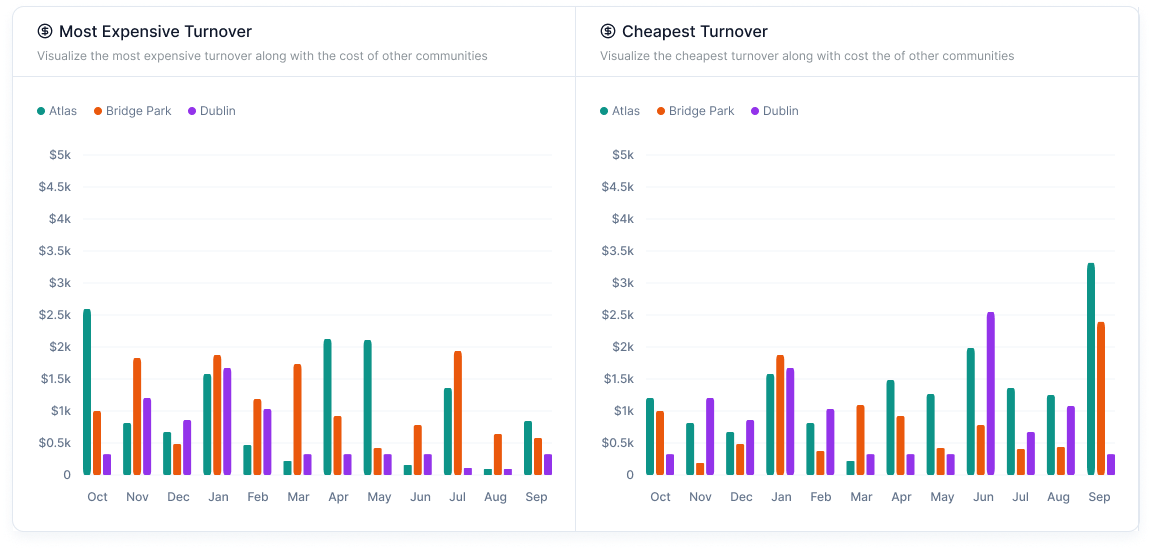
Turnover Cost Breakdown: Bar charts comparing the most expensive, average, and cheapest turnovers.
-
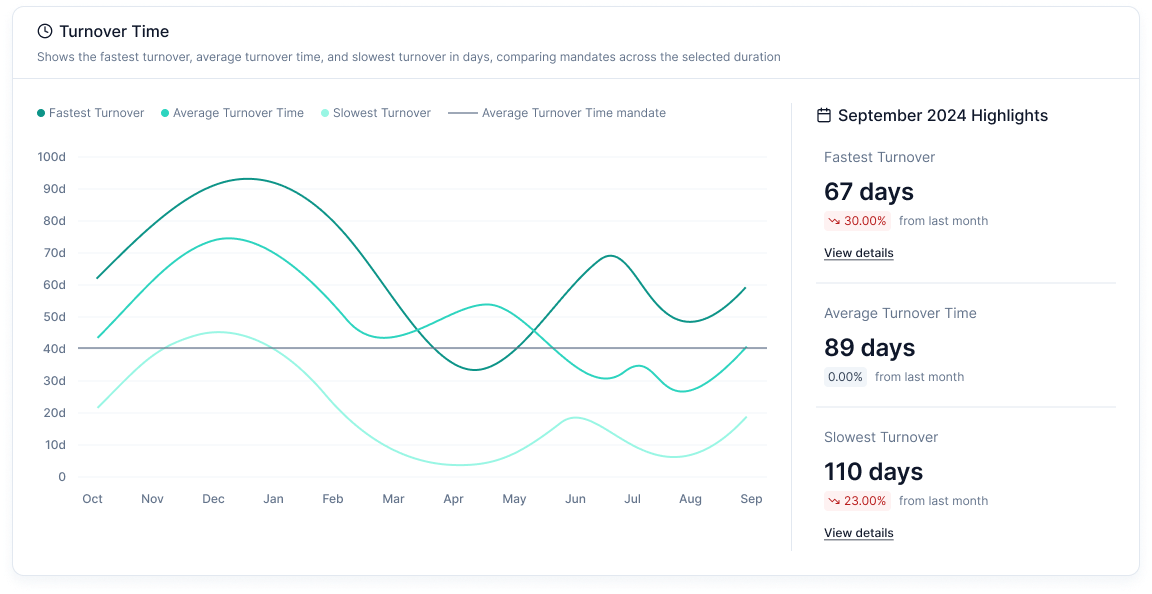
Turnover Time: This shows the duration taken for turnovers.
-
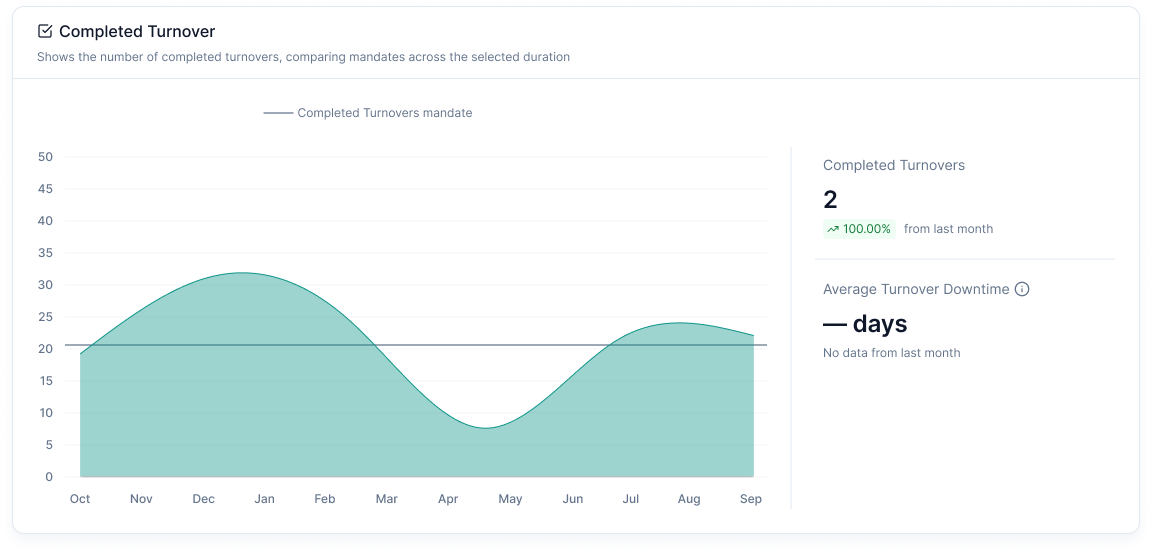
Completed Turnovers Chart: A line graph showing the number of completed turnovers over time.
3. Job Metrics
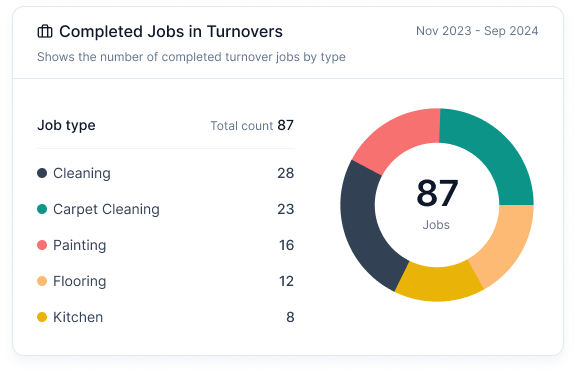
-
Completed Jobs in Turnovers: Pie chart showing completed jobs by type (e.g., Cleaning, Carpet Cleaning, Painting, Flooring, etc.).
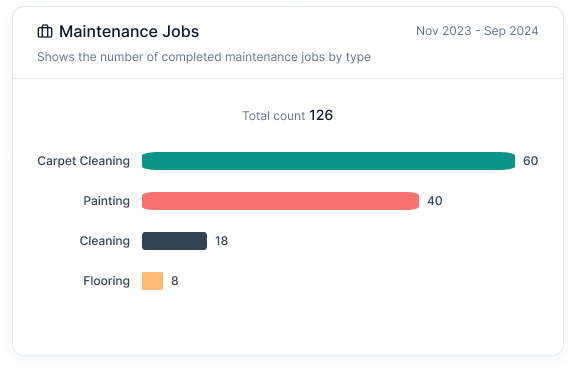
-
Maintenance Jobs Chart: A bar chart displaying the number of completed maintenance jobs by type.
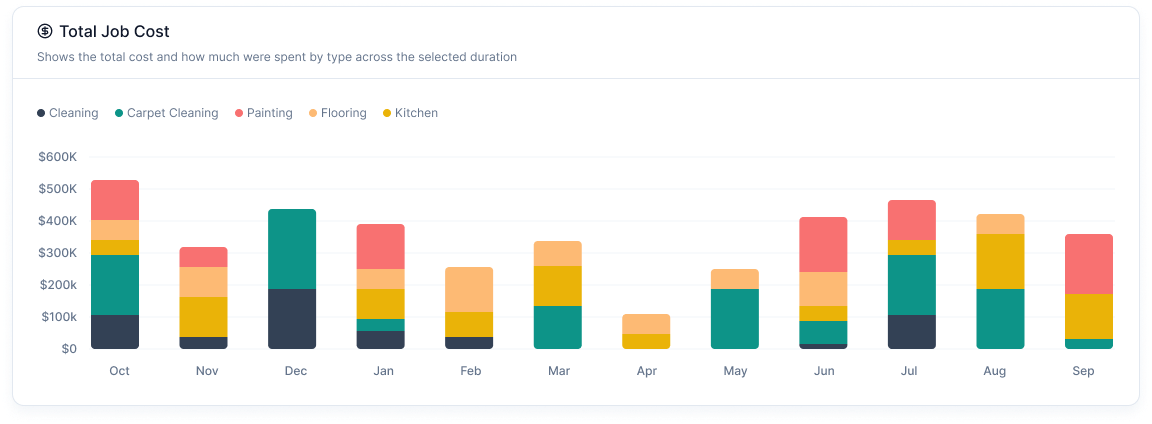
-
Total Job Cost Chart: A stacked bar chart visualizing the total cost spent per job type over time.
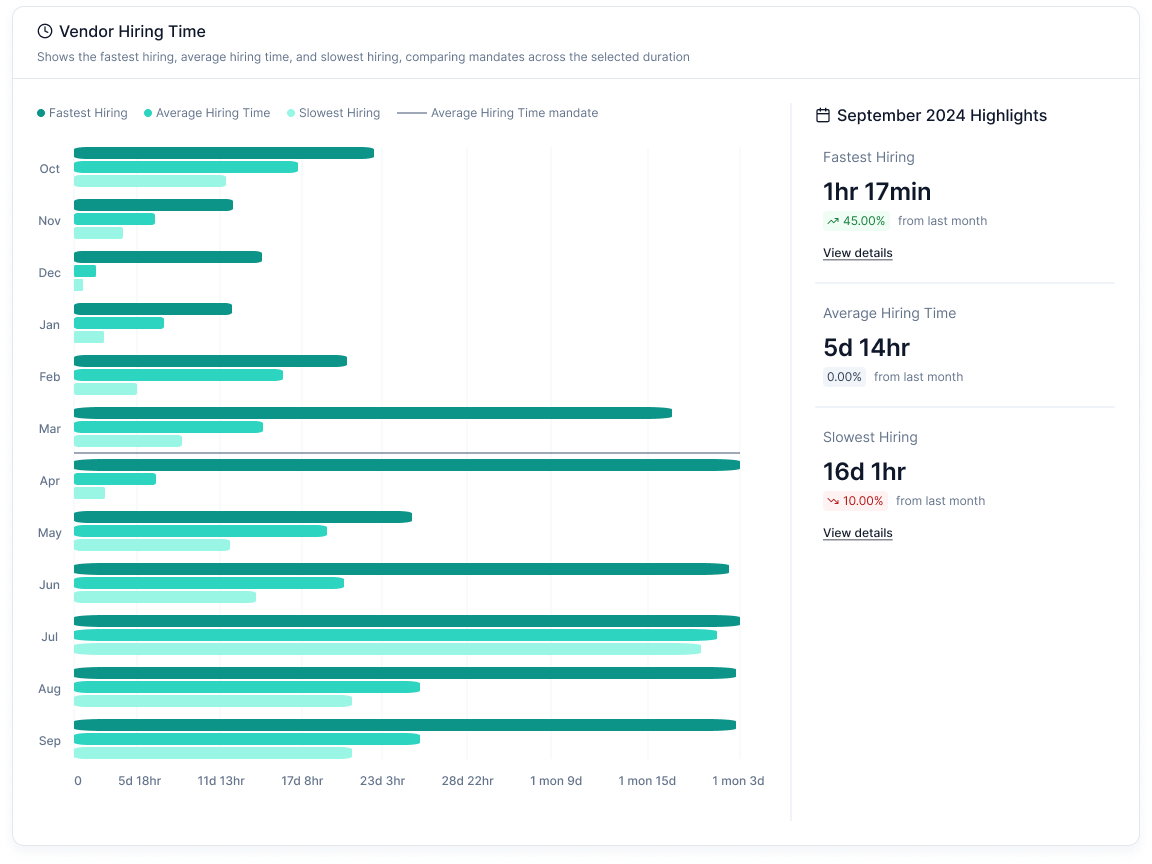
-
Vendor Hiring Time: A bar chart tracking the fastest, average, and slowest hiring times.
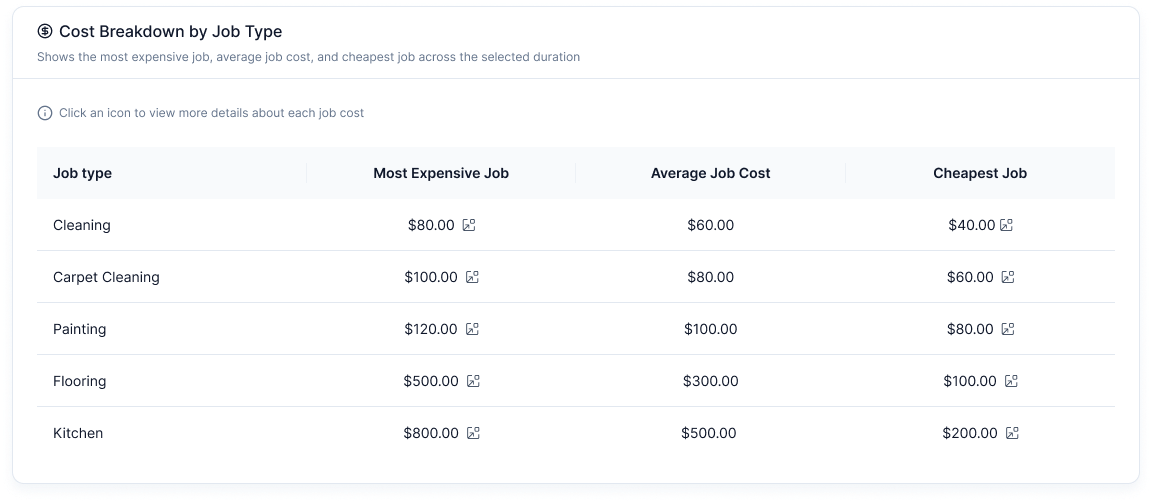
-
Cost Breakdown by Job Type Table: A tabular breakdown of the most expensive, average, and cheapest job costs.
4. Highlights
- Last Month Highlights: Displays the corresponding data from the previous months from the selected date.
- Visual Indicators: Color-coded markers indicate improvements or declines in key metrics.
- Clickable Details: Users can click the view details button in highlighted metrics to access a detailed breakdown.
Features
- Date Range Selection: Allows users to filter data within specific timeframes.
- Community Selection: Users can switch between different communities.
- Export Options: Enables downloading of insights for external reporting.
- Interactive Charts: Hover-based insights for deeper understanding.
How to Use
- Select a Community to analyze specific data.
- Set a Date Range for the period of interest.
- Review Turnover & Job Cost and Time through charts and tables.
- Export Data if required for further analysis.
Multi-Community Analytics
Overview
The Multi-Community Analytics dashboard provides detailed insights into turnover metrics, job performance, and time-based analytics and comparison for a multiple selected community.
Key Sections and Visualizations
1. Turnover Metrics
-
Turnover Cost: Displays the Average, Cheapest, and Expensive cost associated with turnovers for the selected duration.
-
Turnover Time: This shows the Average, Slowest, and Fastest duration taken for turnovers.
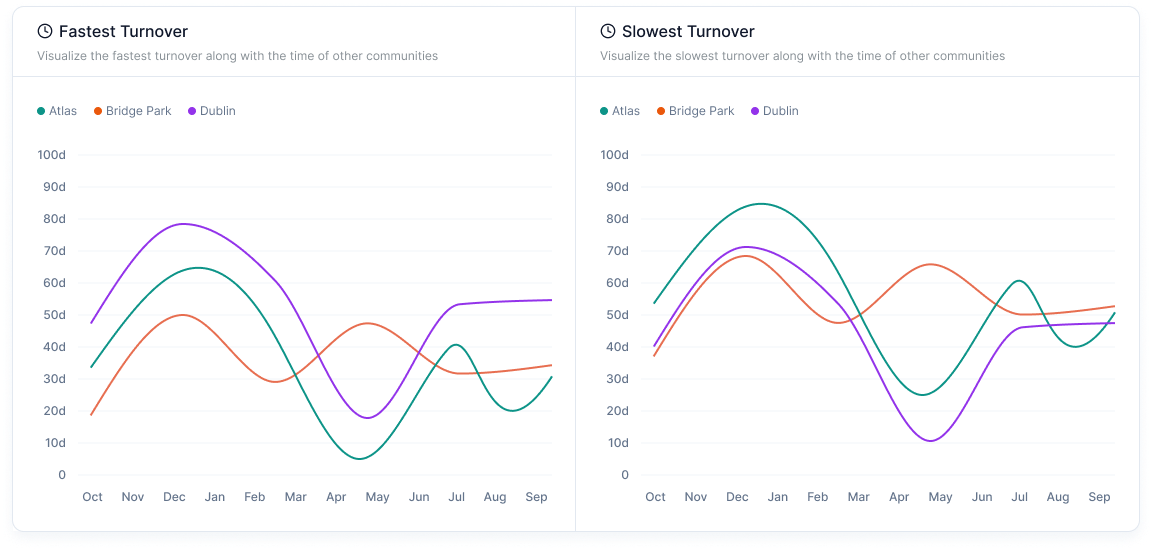
-
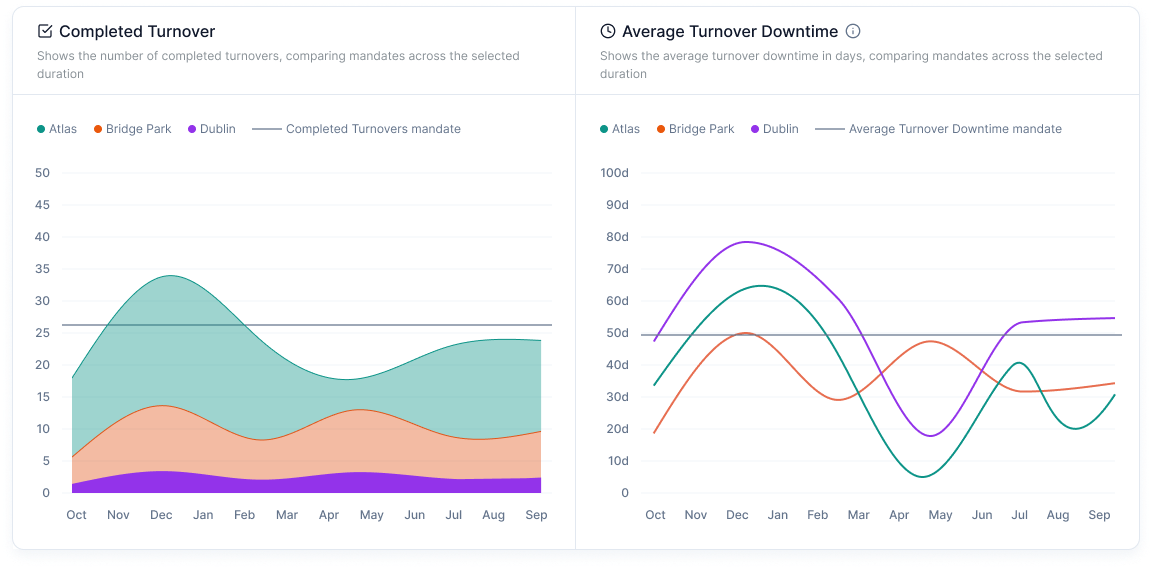
Completed Turnovers Chart: A line graph showing the number of completed turnovers over time.
- Turnover Downtime Chart: This shows the average turnover downtime in days.
2. Job Metrics
-
Total Job Cost Chart: A stacked bar chart visualizing the total cost spent per job type over time.
-
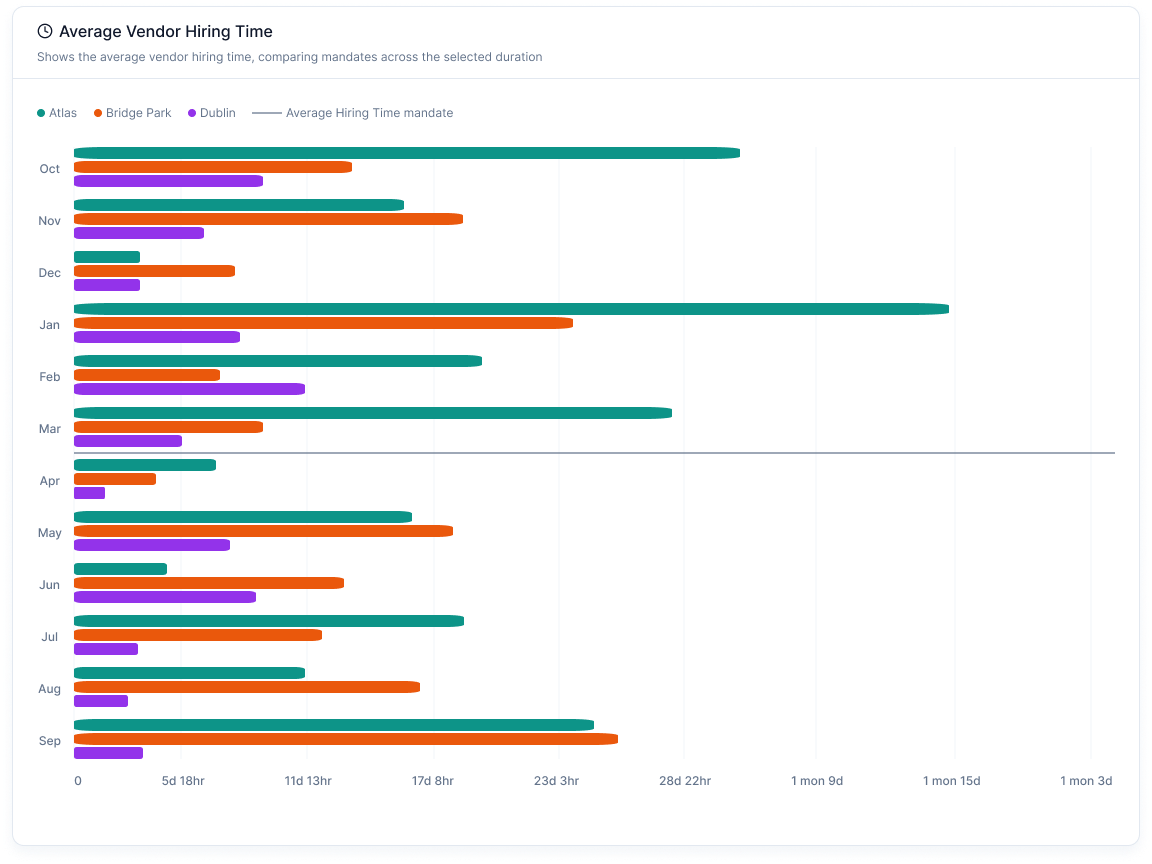
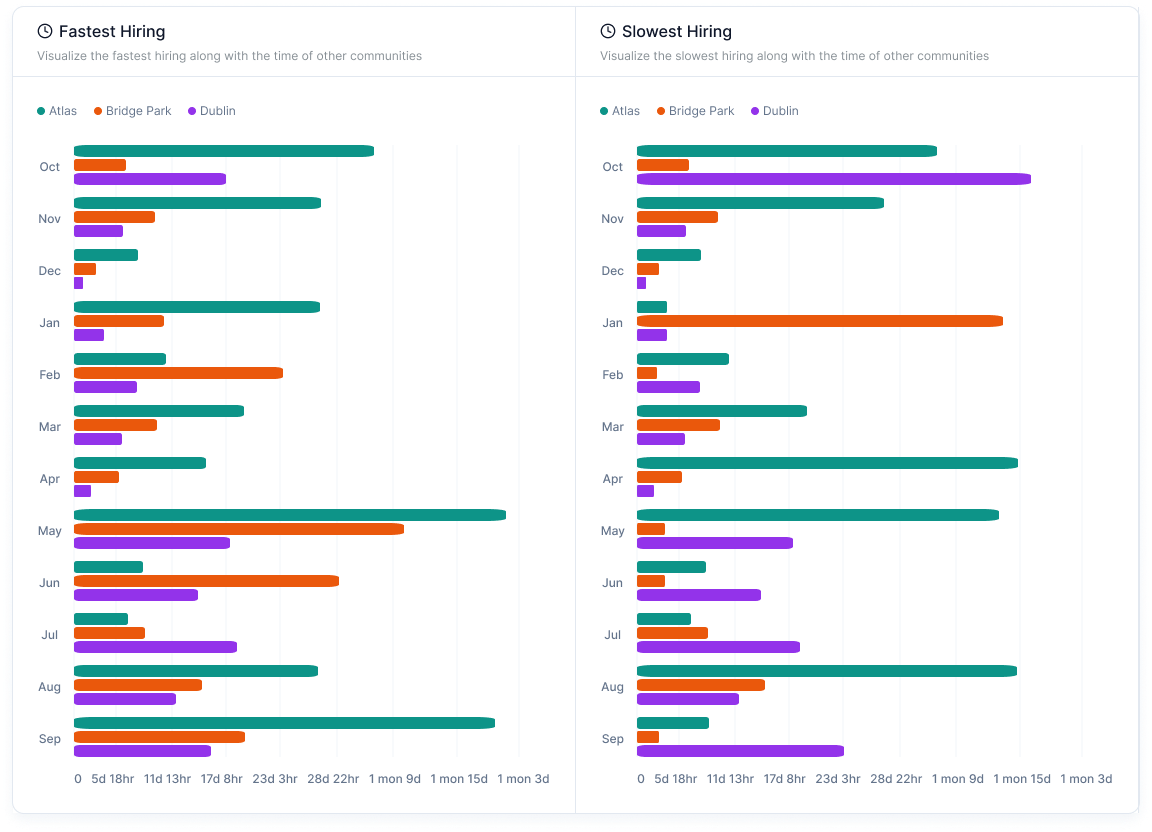
Vendor Hiring Time: A bar chart tracking the Average, Slowest, and Fastest hiring times.
-
Cost Breakdown by Job Type Table: A tabular breakdown of the most Average, Cheapest, and Expensive job costs.
Features
- Date Range Selection: Allows users to filter data within specific timeframes.
- Community Selection: Users can switch between different communities.
- Export Options: Enables downloading of insights for external reporting.
- Interactive Charts: Hover-based insights for deeper understanding.
How to Use
- Select a Community to analyze specific data.
- Set a Date Range for the period of interest.
- Review Turnover & Job Cost and Time through charts and tables.
- Export Data if required for further analysis.
Ended: Analytics
Introduction
Info
Not available to all users.
You can chat with vendors on the platform through the chat feature.
A new chat is created when a vendor for a particular job is hired. The "chats" page shows conversations with vendor on the basis of jobs.
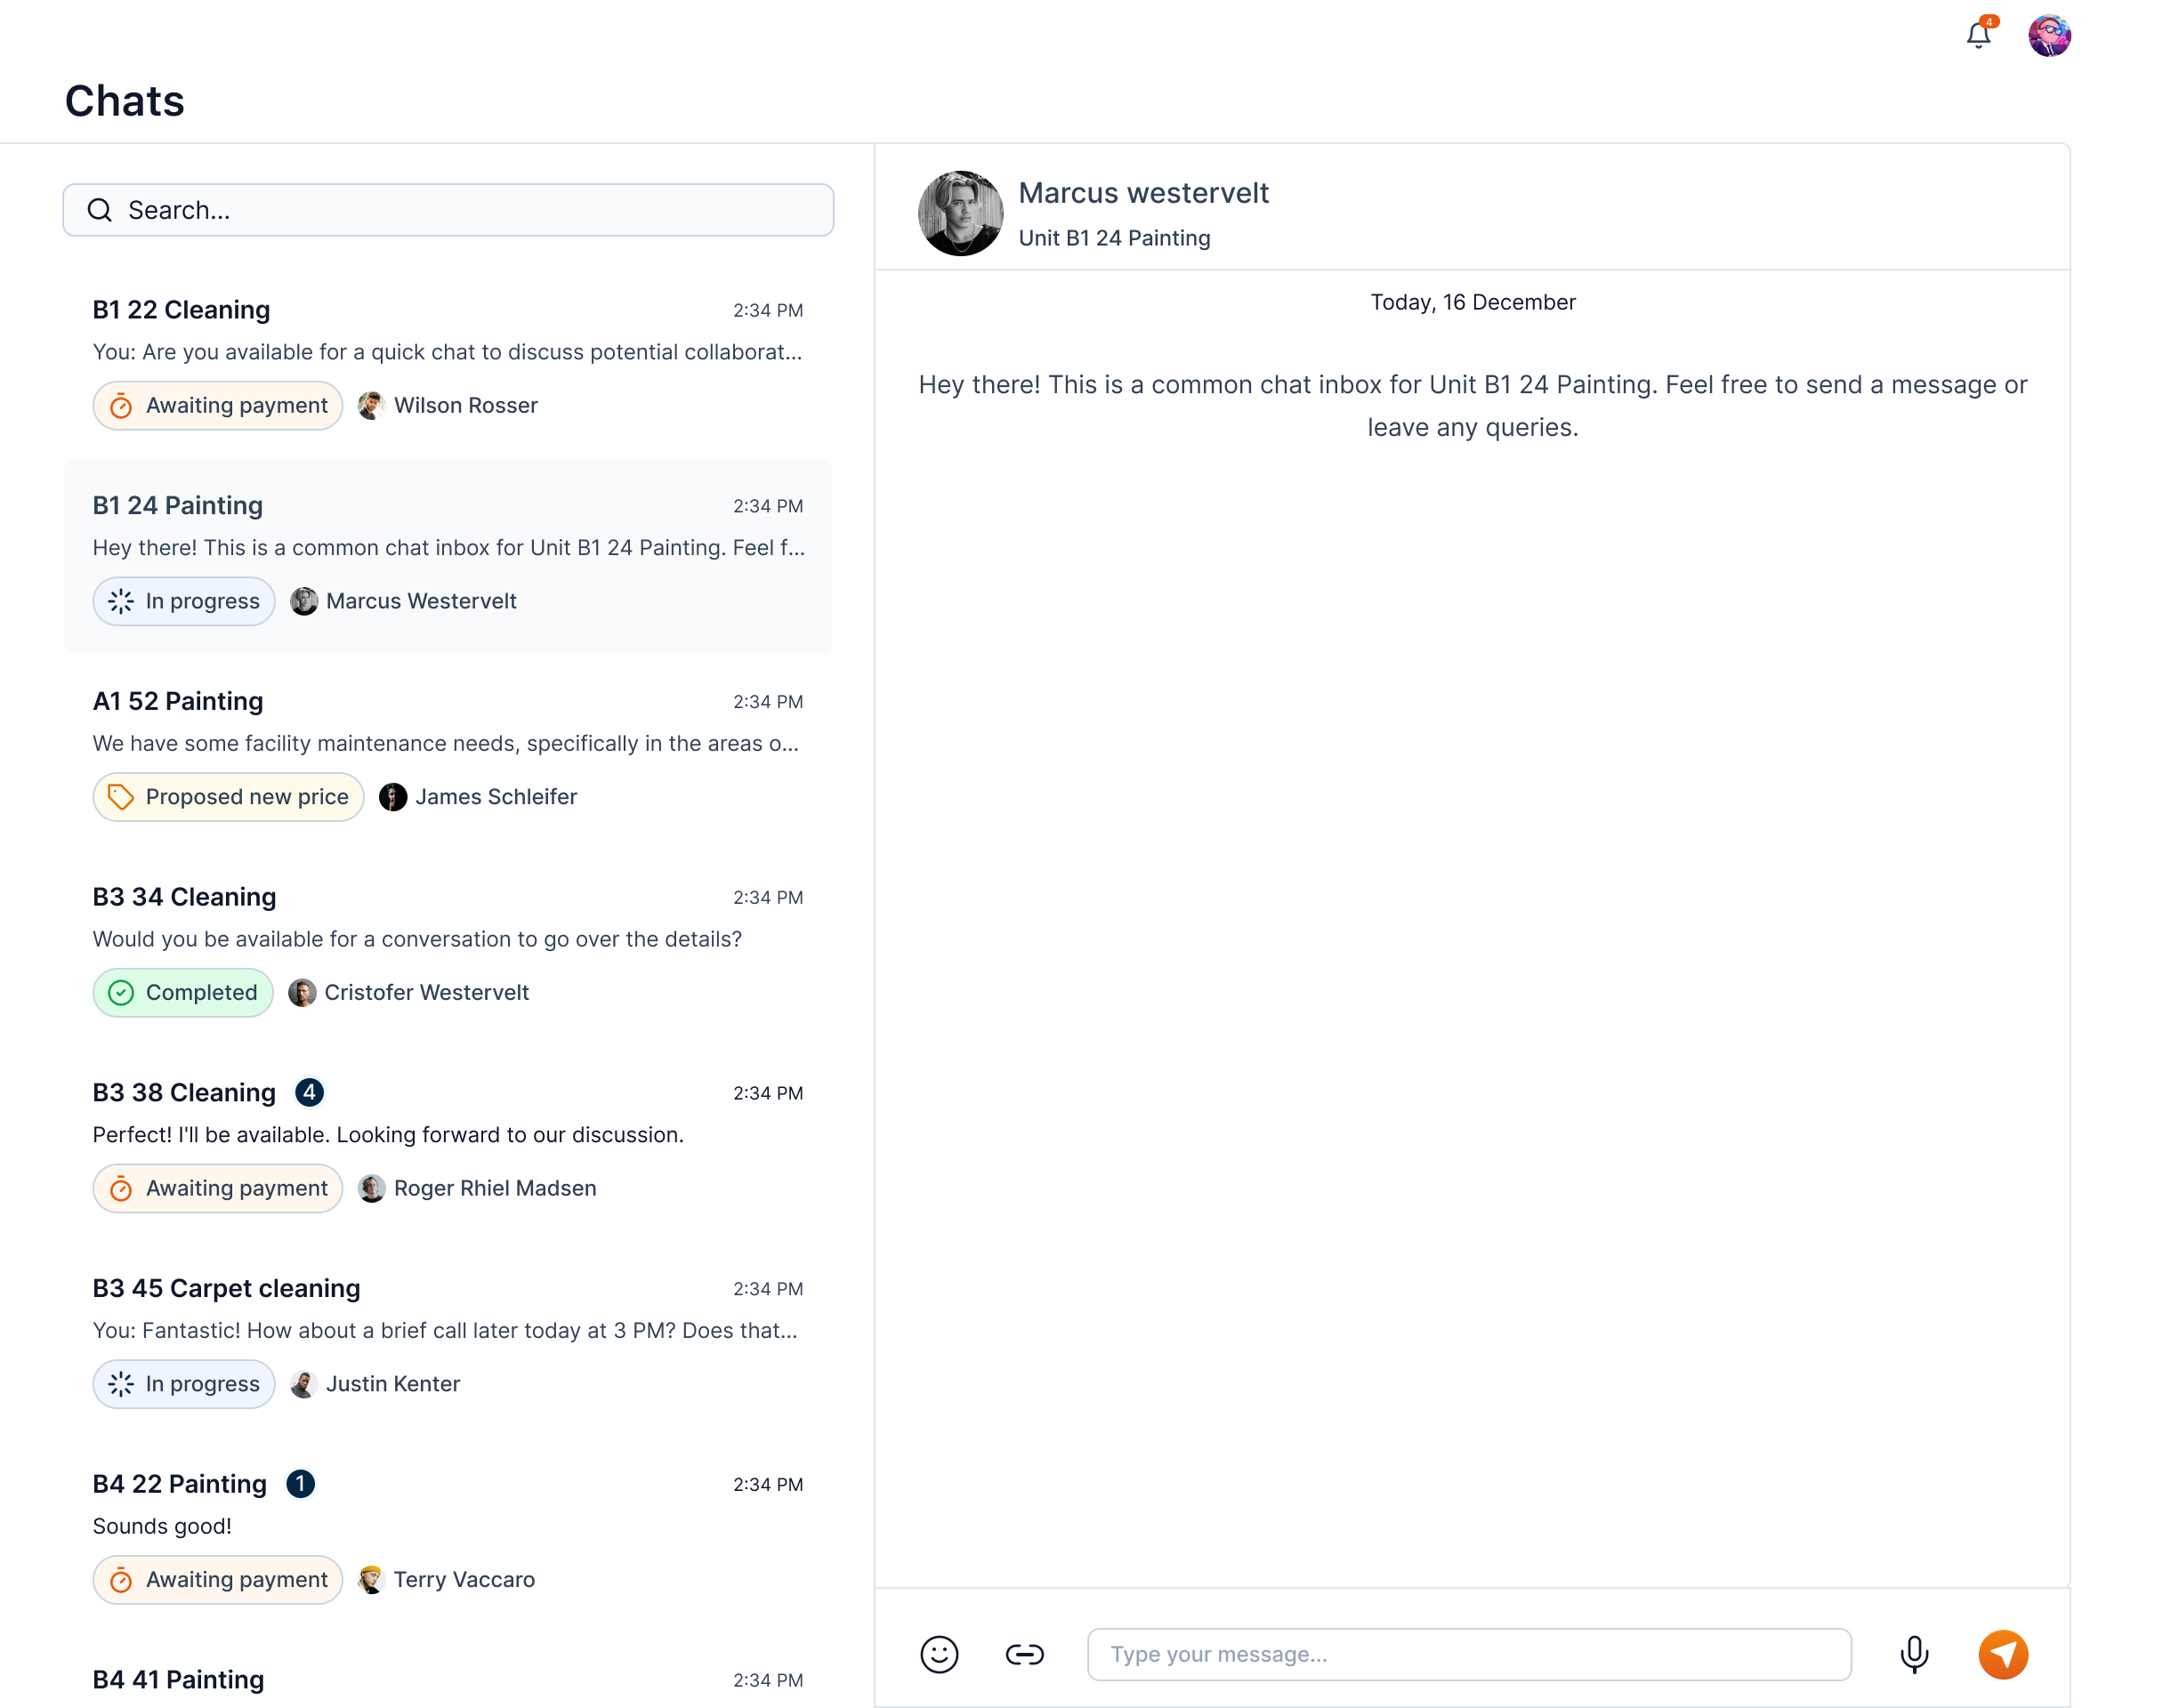
The chat page is divided into two sections:
-
Chat Listing: This section shows all the chats with vendors on the basis of jobs. You can search for a particular chat using the search feature.
-
Messages: This section shows the messages in the selected chat. You can send a message to the vendor by typing in the message box and clicking on the send button.
In the chat listing section, we can find chats with vendors on the basis of jobs.
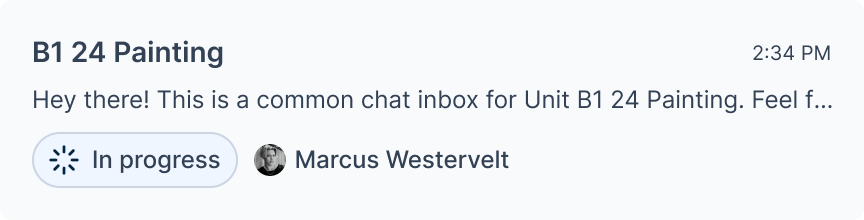
The chat card has the title of the associated job. It also has other information like the vendor's name, and the last message sent in the chat. It also includes the status of the job in the form of a chip.
Send a Message
To send a message, click on the chat card from the chats list. This will open the chat window to the right for the selected job.
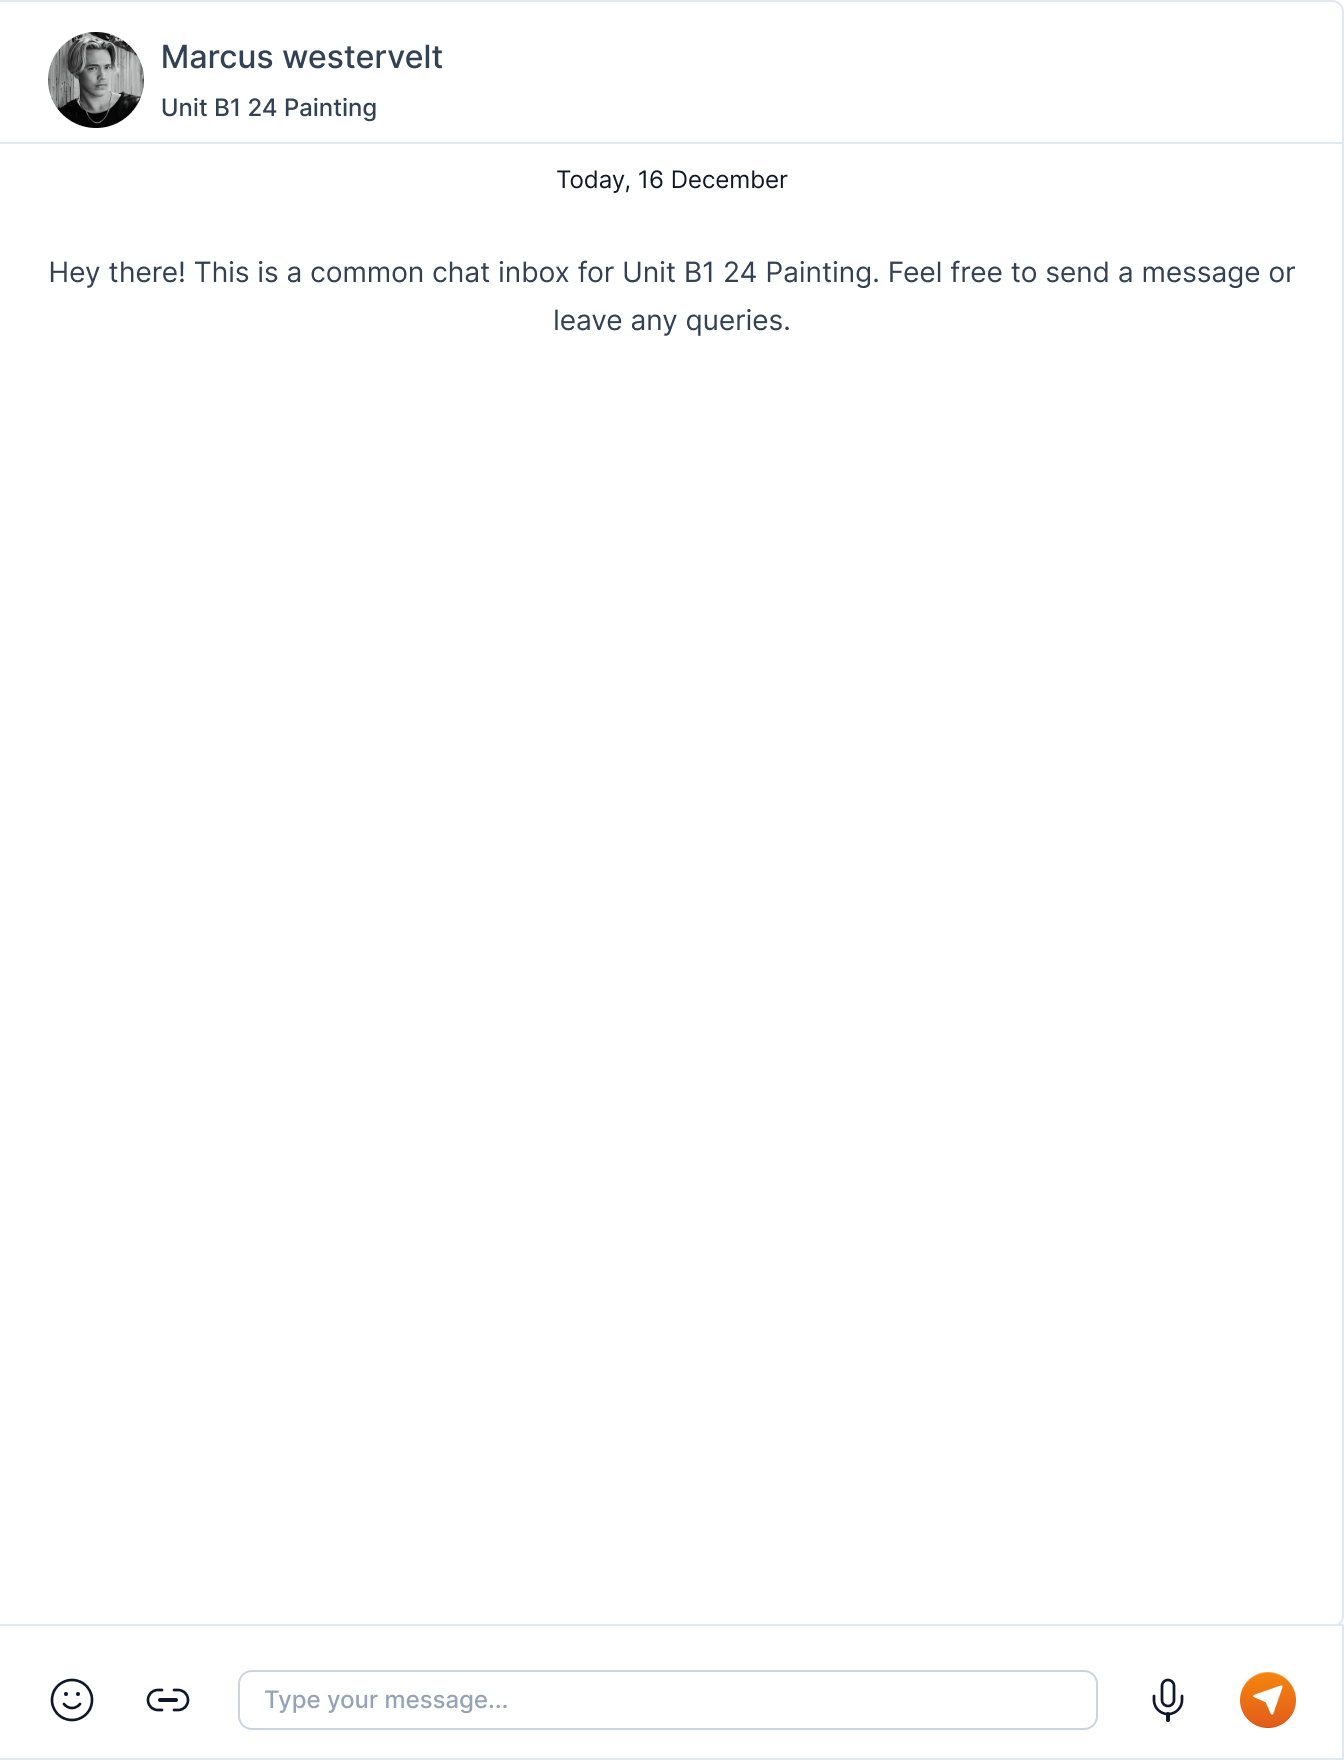
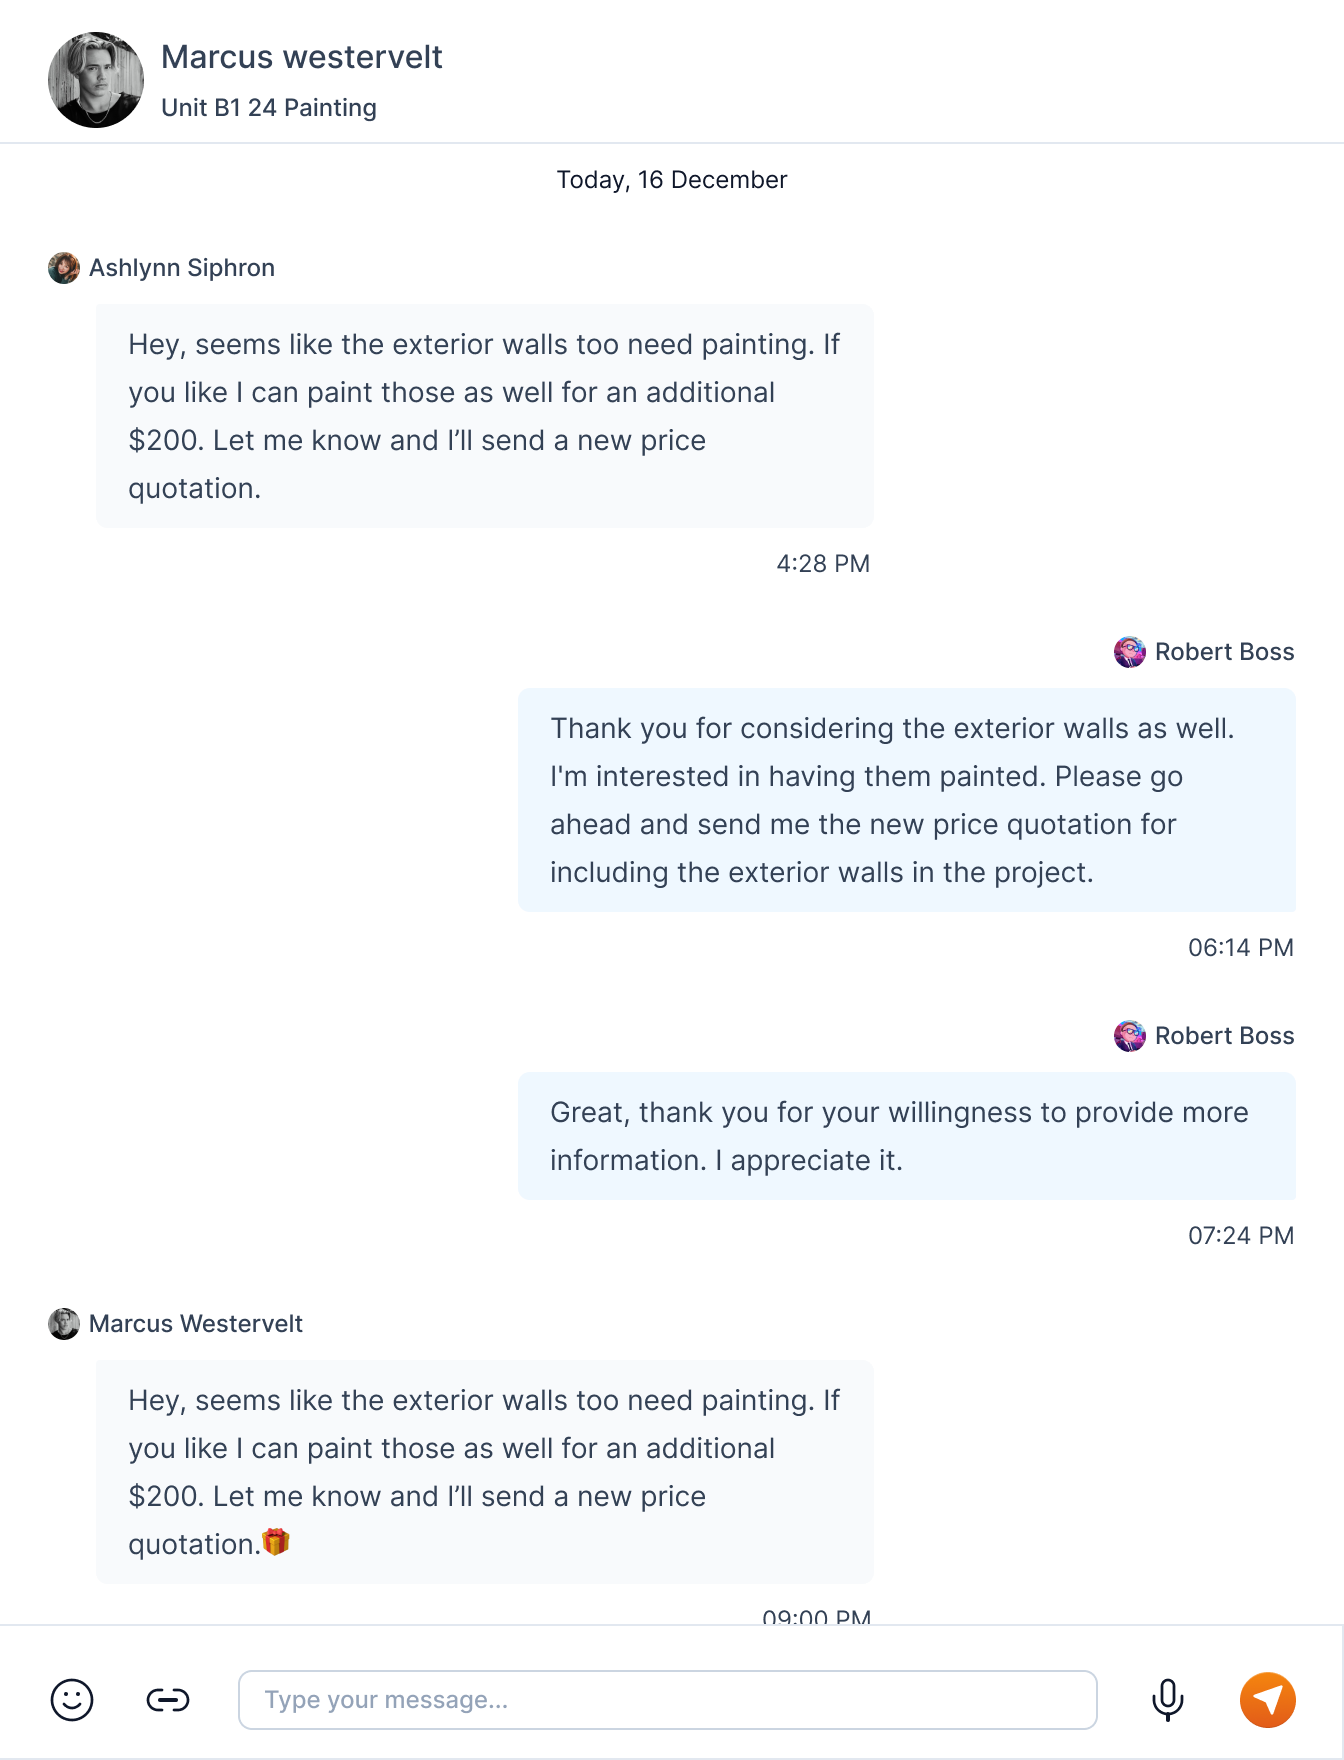
Type your message in the message box and click on the send button or the Enter key.
Tip
You can also send attachments by clicking on the attachment icon, emojis by clicking the emoji icon, and voice messages by clicking the mic icon.
The sent messages are shown on the right side of the chat window and the received messages are shown on the left side of the chat window.
Login
You can login to the Turnit platform using your email and password from the login page.
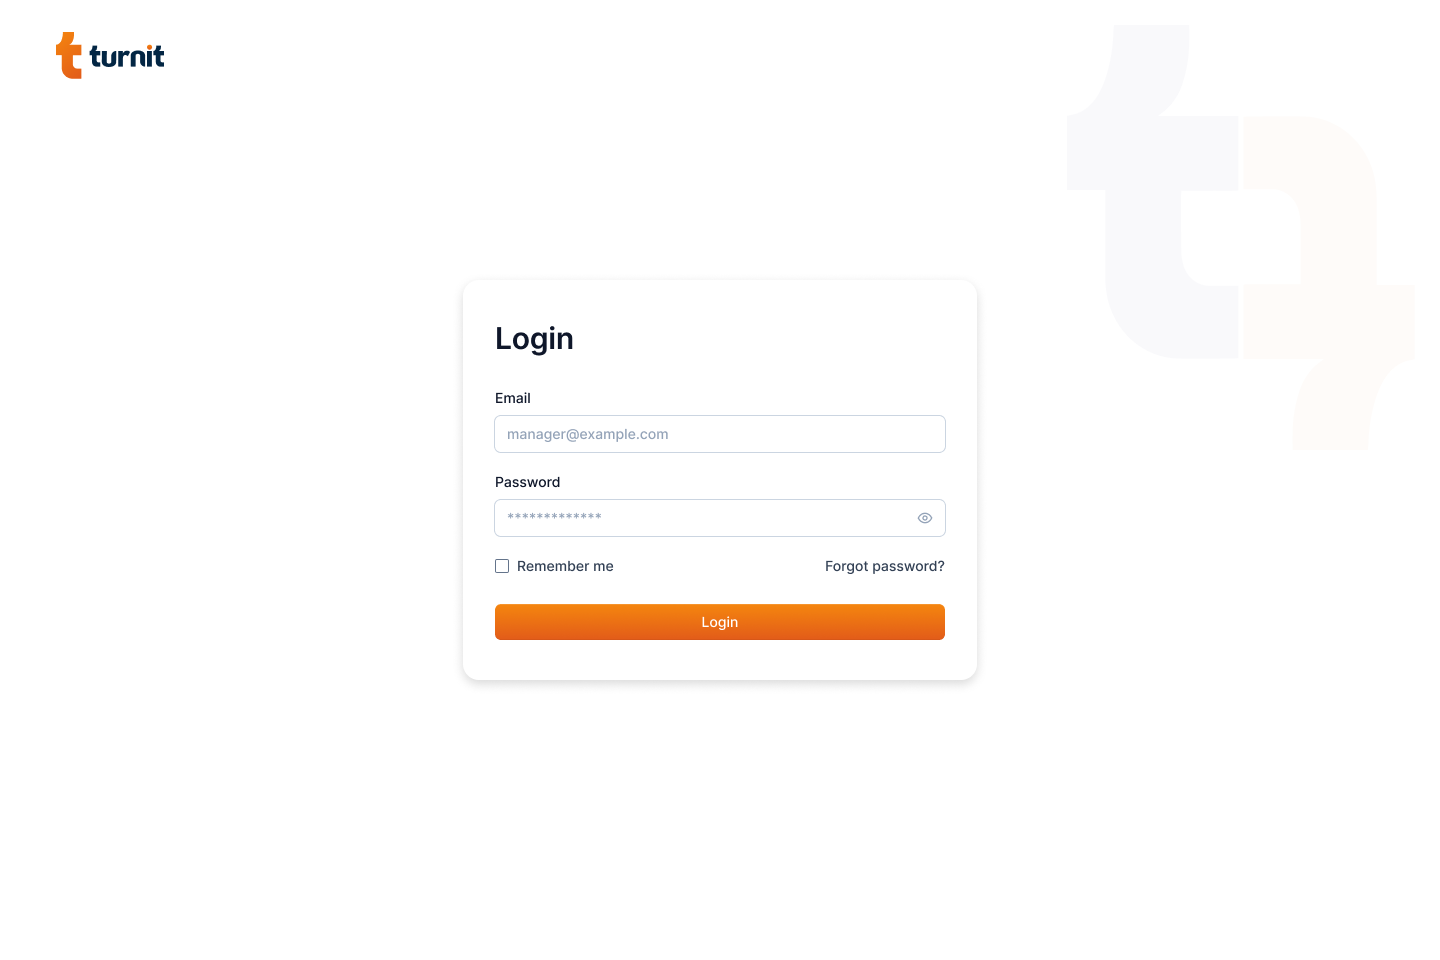
Enter your email and password in the respective fields and click on the login button.
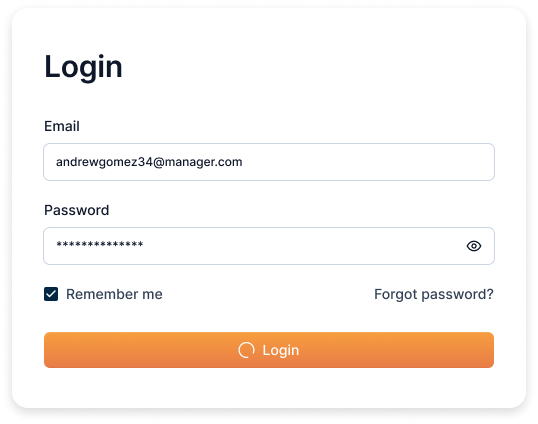
Tip
You can select the "Remember me" checkbox to remember your login credentials.
The eye icon next to the password field allows you to view the password.
After successful login, you will be redirected to the dashboard page.
Forgot Password
If you have forgotten your password, you can reset it from the login page. To do so, click on the "Forgot Password?" link.
It will redirect you to the forgot password page.
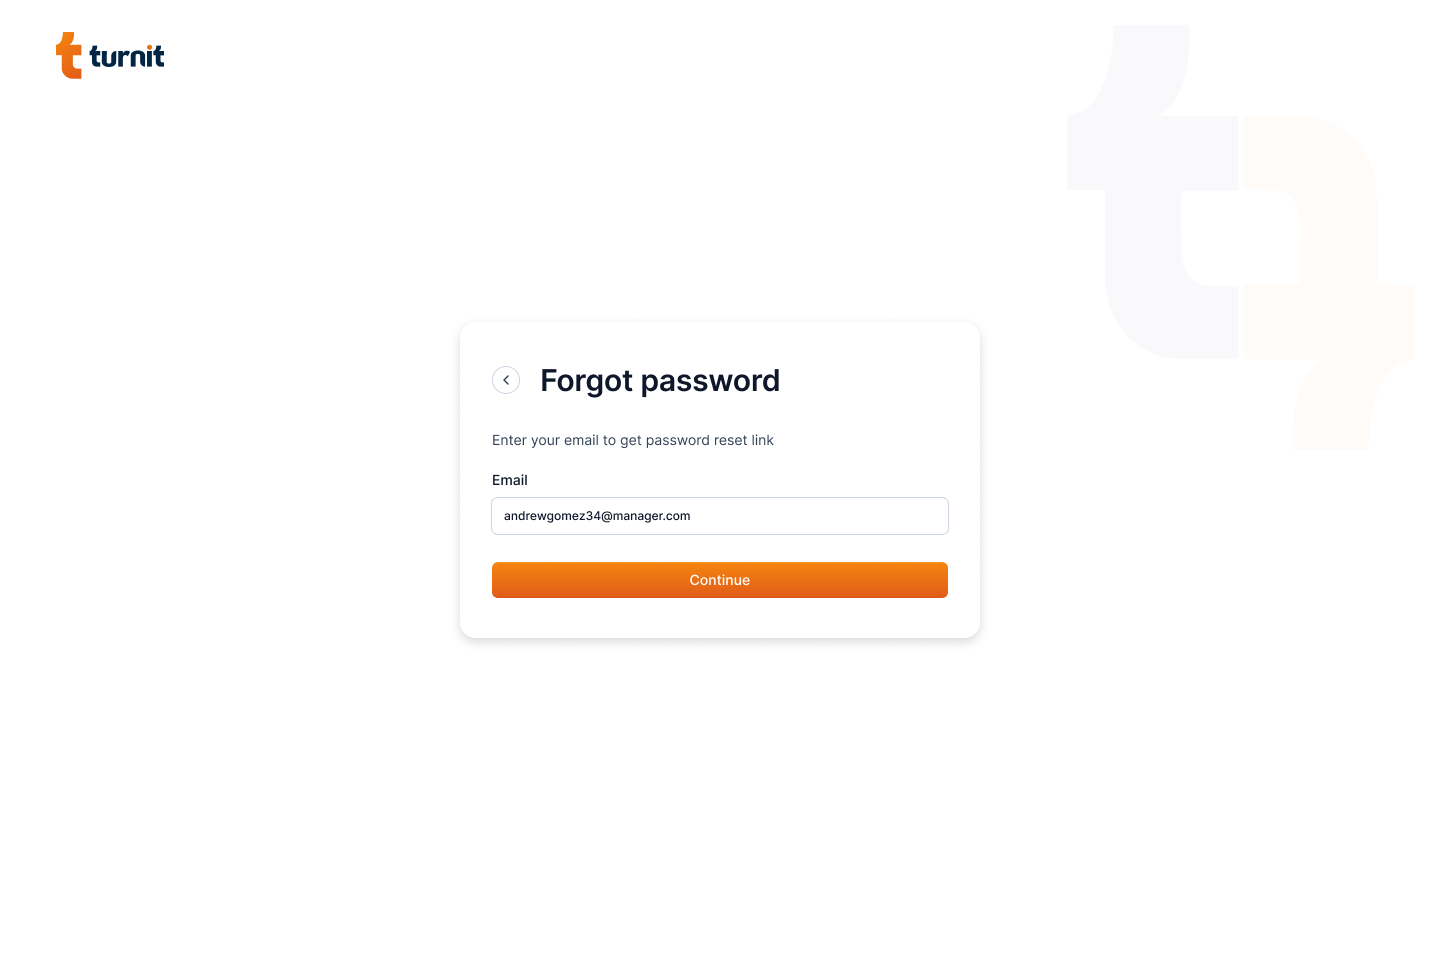
Enter your email and click on the "Continue" button. You will receive an email with a link to reset your password.
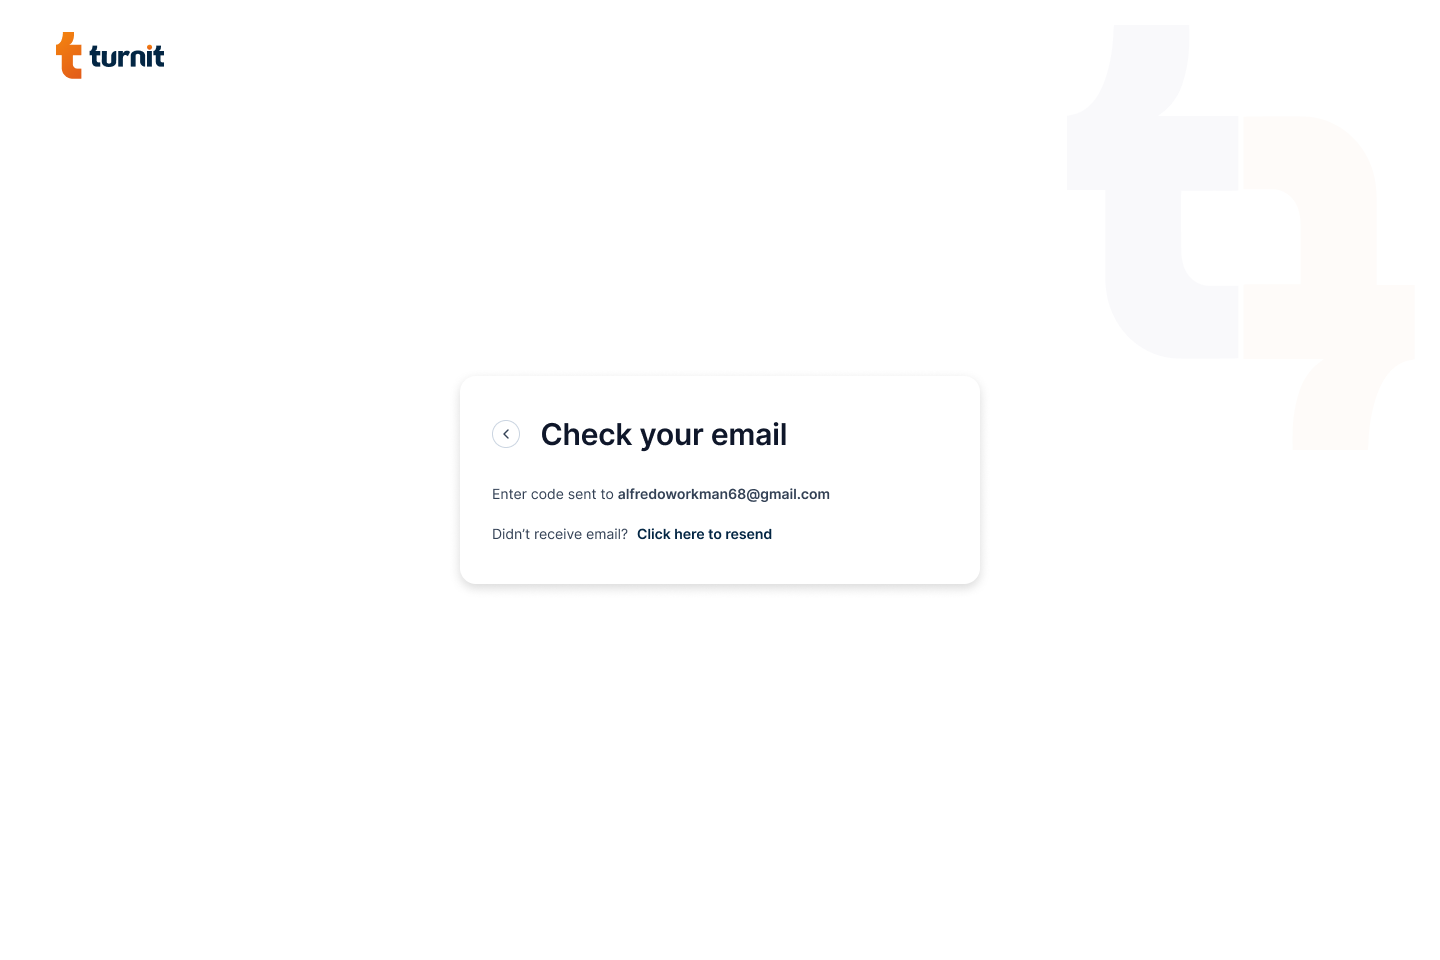
Tip
If you do not receive the email, check your spam folder. If you still do not receive the email, click on the "Click here to resend" link.
On clicking the link in the email, you will be redirected to the reset password page.
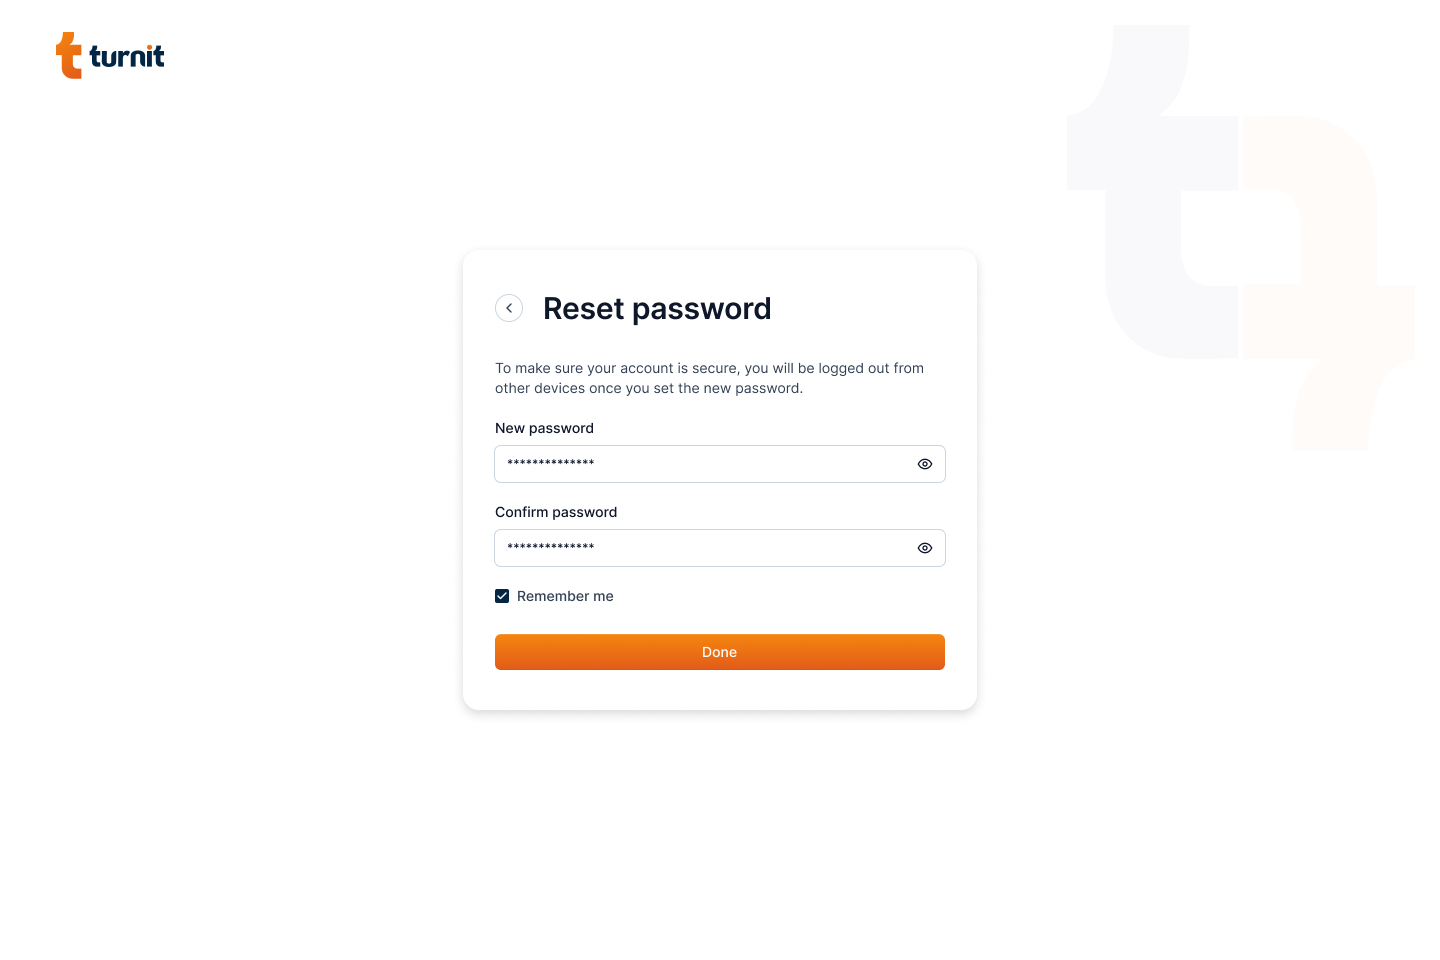
Enter your new password and click on the "Done" button. You will be redirected to the login page.
Account
A logged in user can view and edit their account details from the account page. To access the account page, click on the user icon in the top right corner of the page and select "Account" from the dropdown menu.

It will redirect you to the account page.
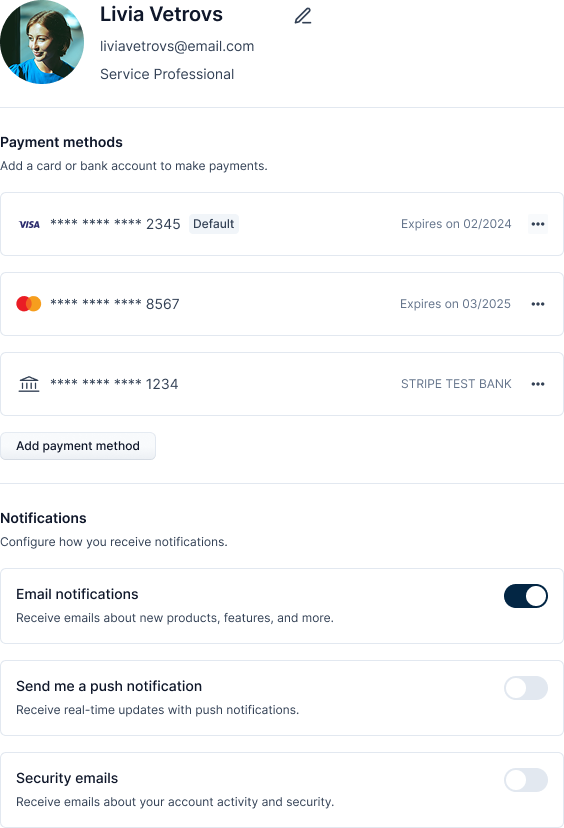
The account page displays the following information:
| Information | Description |
|---|---|
| User info | It displays the profile picture, name, and the email of the user with the option to edit them. |
| Payment methods | It shows the list of payment methods associated with the user. |
| Notification preference | It shows the notification preference set by the user with an option to toggle notifications on or off. |
Edit Profile
To edit the profile, click on the "Edit" icon in the user info section.

It will open the edit profile page where you can update your profile picture, name, email, and user role.
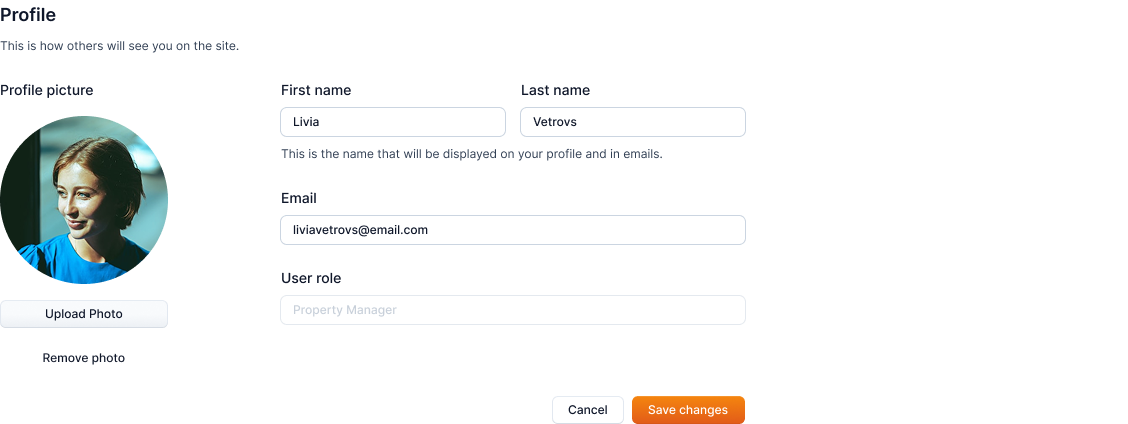
After updating the information, click on the "Update" button to save changes.
Payment Methods
Info
Not available to all users.
This section shows the list of payment methods associated with the user.
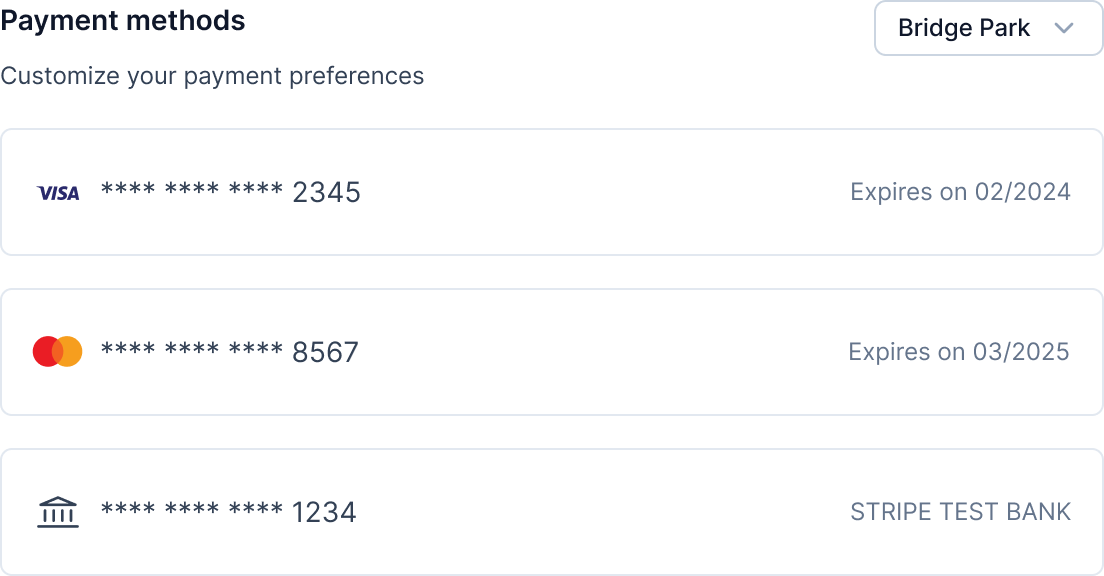
You can view the payment methods of a particular community by selecting the community from the dropdown menu.
Notifications
You can view and toggle the notification preferences from this section.
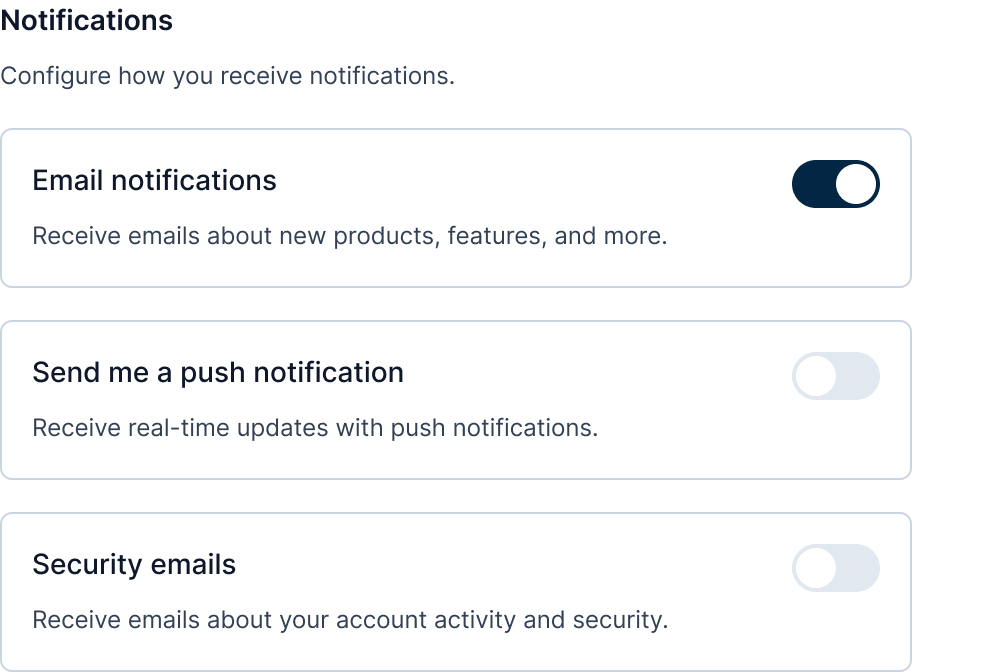
You have the option to toggle the notifications for the following:
| Notification | Purpose |
|---|---|
| Email notifications | To receive emails about new products, features, and more. |
| Push notifications | To receive real-time updates. |
| Security emails | To receive emails about your account activity and security. |
Notifications
You can view the notifications that you have received by clicking on the bell icon in the top right corner of the page.

The notification bell also has a count of the number of unread notifications that you have received.
After clicking on the bell icon, a popup will appear with a list of your notifications.
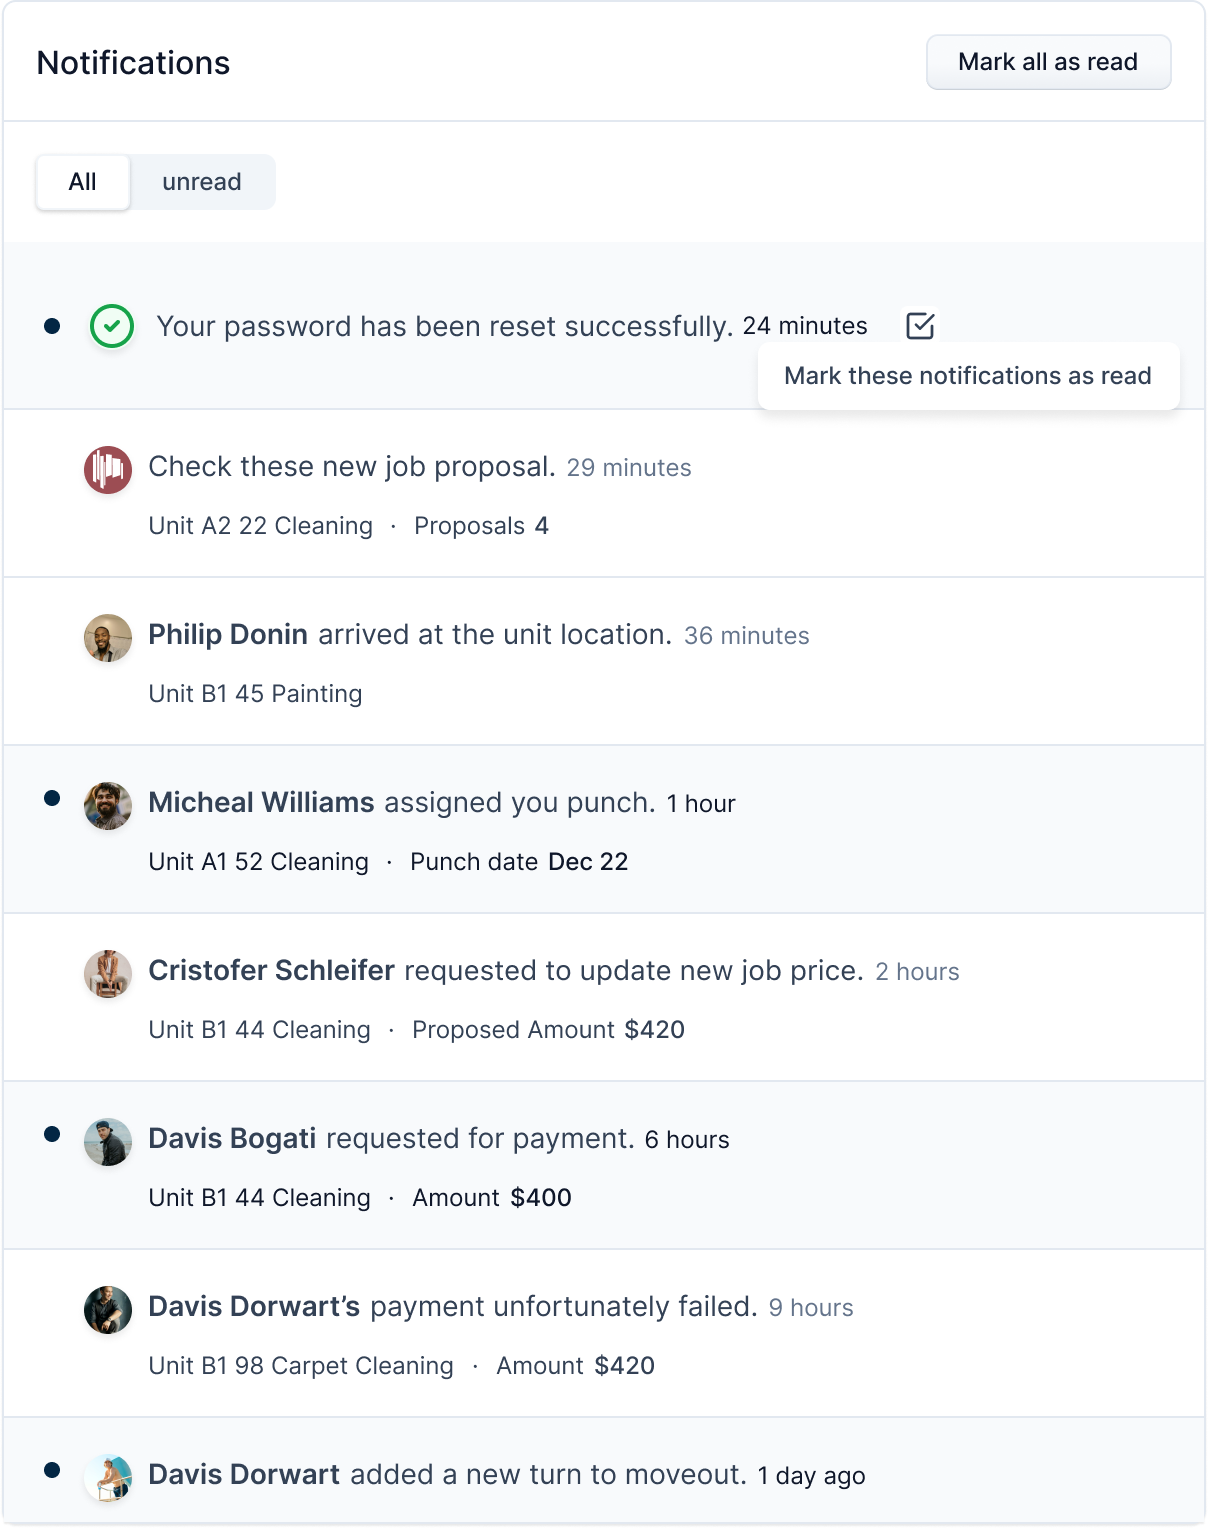
You can use the switch tab to toggle between all notifications and unread notifications.

Note
Unread notifications are marked with a black dot to the left of the notification. Read notifications do not have this dot.
To mark all the notifications as read, click on the Mark all as read button.

After clicking the button, all the notifications will be marked as read.
You can also mark individual notifications as read by clicking on the checkbox next to the notifications and clicking the Mark these notifications as read button.

Note
On clicking the notification, you are redirected to respective page/modal of the notification. For example, if a notification is job related, you are redirected to the job detail modal, and if it is turn related, you are redirected to the turnboard.